After logging in, you will be taken to the UnitTrak homepage. Here is a short summary of the features on this page with links to more information:
Navigation Bar
The top menu bar is visible throughout the UnitTrak application and allows for quick navigation between the modules of UnitTrak:
- Projects – Manage all of your construction projects from site selection to final inspections.
- Units – Manage your portfolio of open units here. You can also access data on units that were sold or closed.
- Franchise – Manage all of your franchise details here including agreement details and renewal dates.
- Lease – Navigate through your current and former leases in this module.
- Contacts – Maintain your database of internal and external contacts to be assigned to units.
- Administration – Manage various UnitTrak settings including custom categories, user permissions and more.
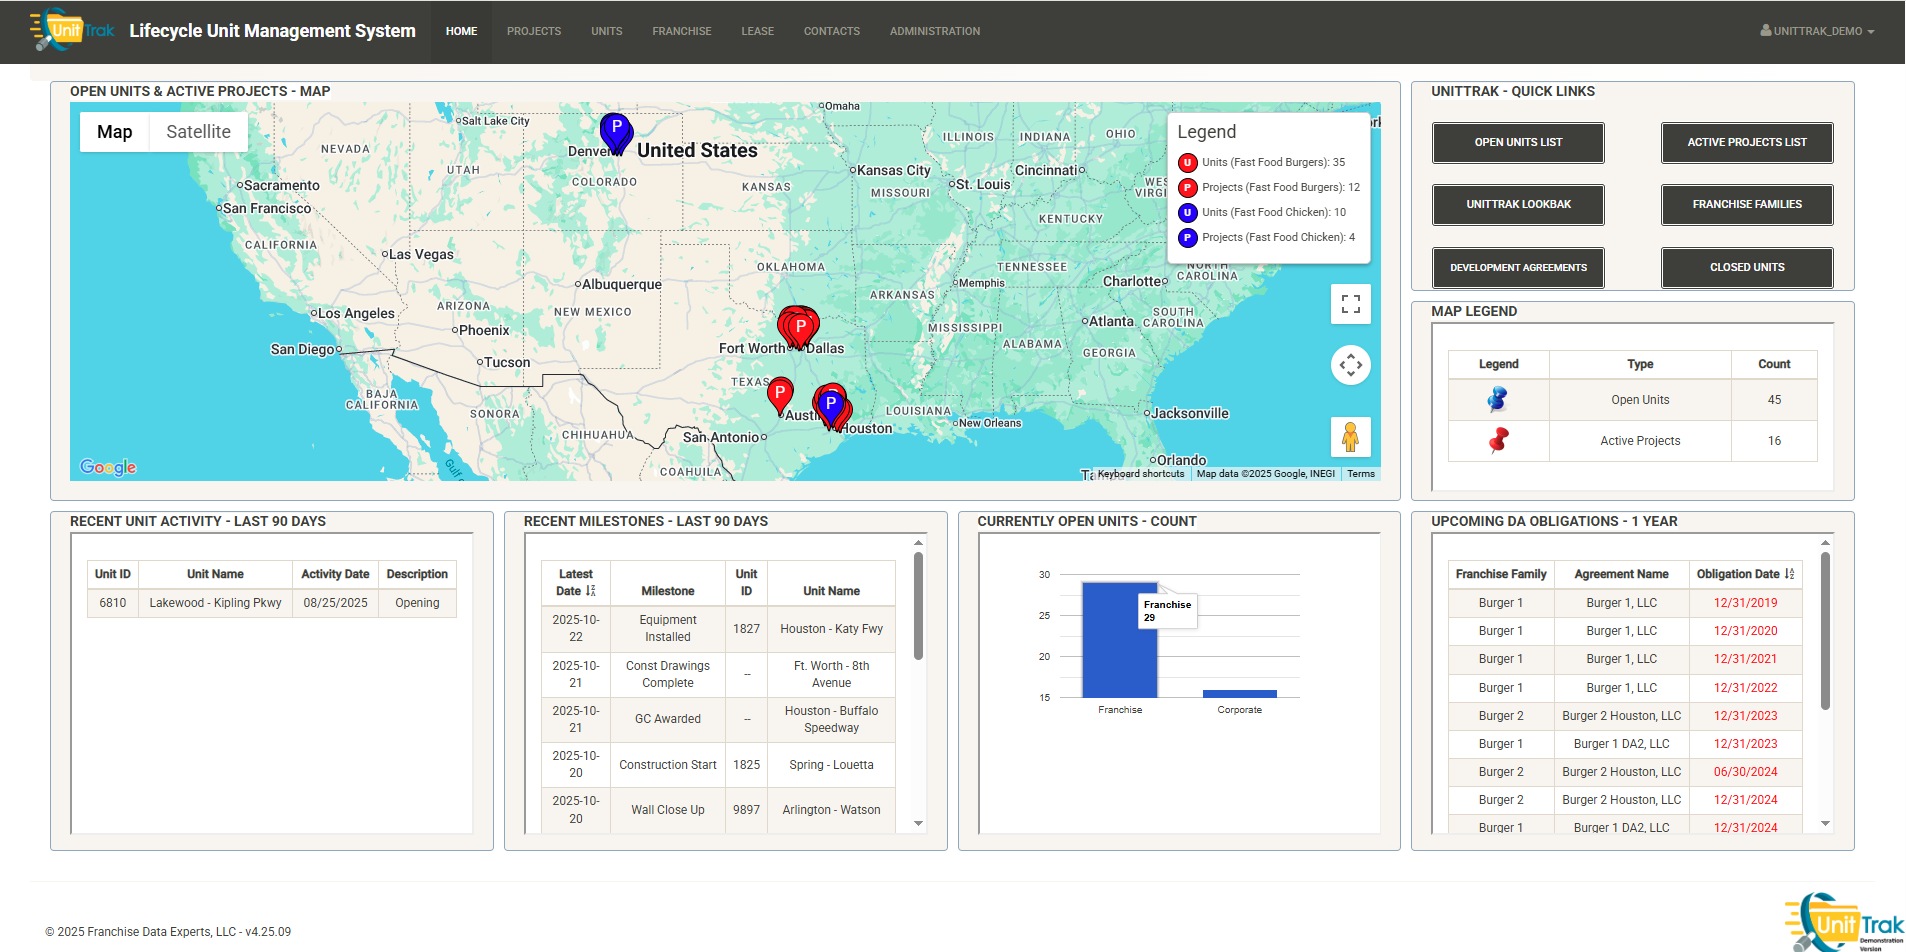
Unit Map
The map is a fully featured Google map displaying Open Units and Active Projects by brand. You can use the various controls to change the map type, zoom in or out, pan the view, make the map full-screen or enter Streetview mode.
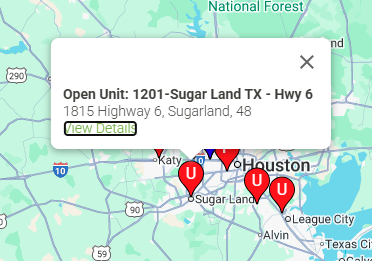
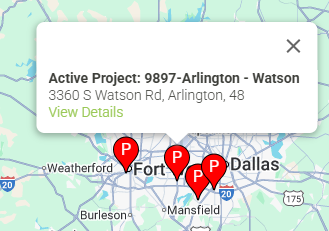
Hovering over any project or unit will display a popup with information about the item and a link to generate a unit or project overview report:
Quick Links
The Quick Links box includes shortcuts to take you directly to commonly used areas including (note-these links can be customized by client):
- Open Unit List
- Active Projects List
- UnitTrak LookBak
- Franchise Families
- Development Agreements
- Closed Units
Recent Activity Widgets
Across the bottom half of the homepage dashboard are a group of widgets to provide quick updates about recent system activity (note-these widgets can but customized by client). Examples here include a log of recent unit activity, a list of recent project milestones, a total unit count by corporate/franchise units, and upcoming Development Agreement obligations. The widgets will quickly alert you to upcoming deadlines, renewals and recent activity.
Main Dashboard
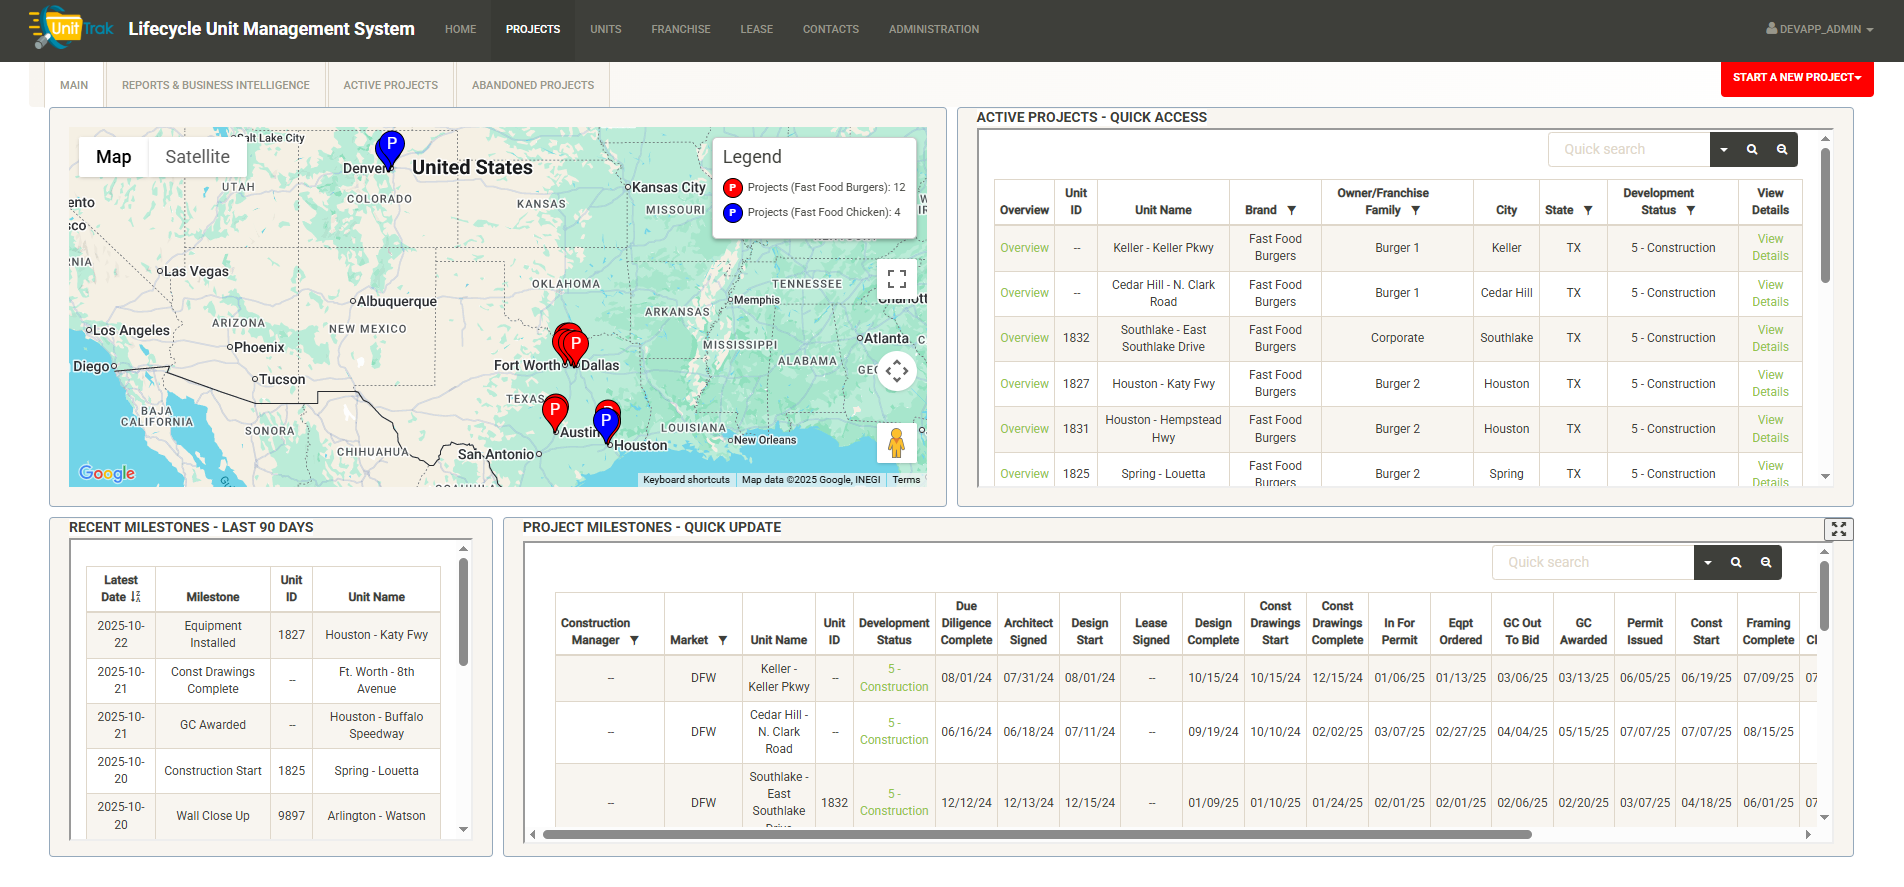
Projects Map
The map is a fully featured Google map displaying Active Projects by brand. You can use the various controls to change the map type, zoom in or out, pan the view, make the map full-screen or enter Streetview mode.
Hovering over any project will display a popup with information about the item and a link to generate a project overview report:
Active Projects – Quick Access
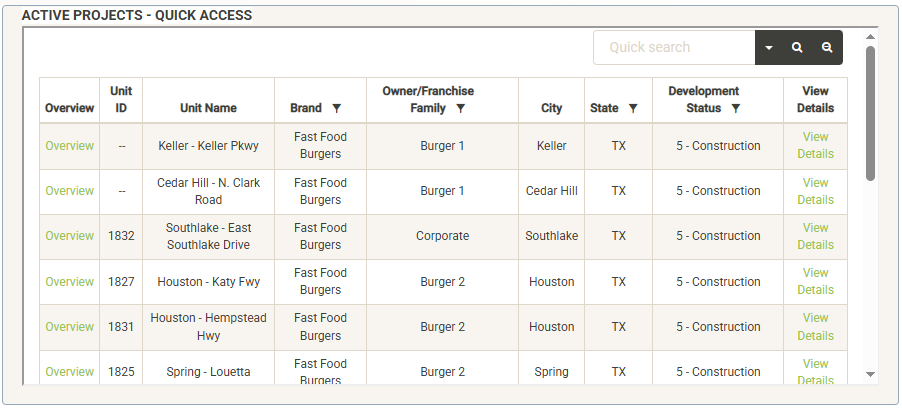
The Active Projects Widget allows you access to your active project list directly from the main page. You can easily locate your targeted project using the search and sort tools in this widget. You can click on any of the content headers to re-sort the list by that column. The columns that contain a filter symbol can be filtered by clicking on the filter. You can also use the search box to search for attributes such as Unit ID or Unit Name.
Once you’ve located your project, you can quickly access the project’s overview report by clicking on the “Overview” link next to the Unit ID. To access or edit the project details, click on the “View Details” link to the far right of the project information.
Projects Widgets
Across the bottom half of the Projects dashboard are widgets to provide quick updates about recent system activity (note-these widgets can but customized by client). Widgets in our sample show recent project milestones logged as well as the Project Milestones Quick Update widget.
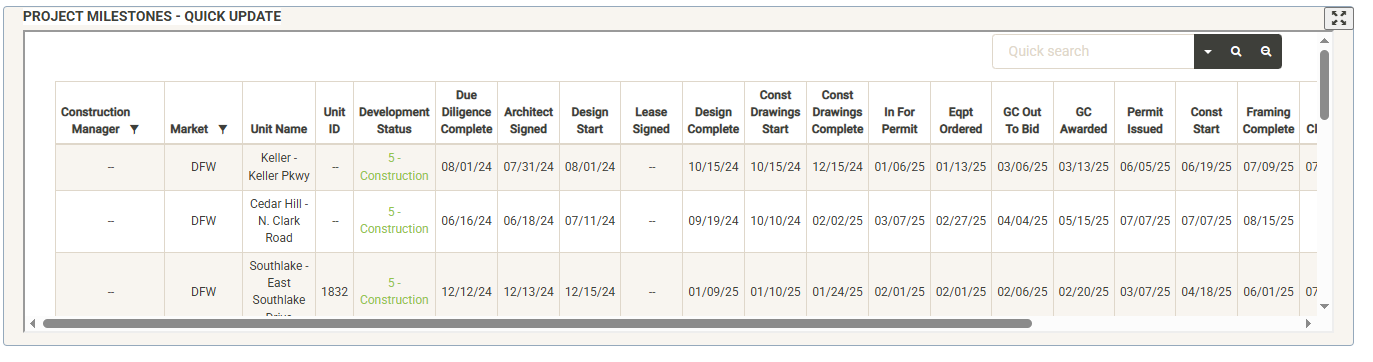
The Project Milestones Widget allows you to quickly update the status of your active projects from the main page. You can expand the widget using the expand button in the upper right corner of the widget. Click the button again to restore the widget to original size. Using the same sort and filter tools as the Active Projects widget you can sort and filter the list or use the search bar to search for your project. Once you’ve located your project, simply hover over the editable fields (development status, milestone dates). An edit pencil will appear in the editable fields (if you have proper permissions). Click on the pencil to edit the value of the field:
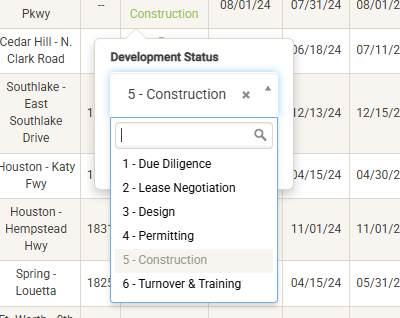
Your changes are saved automatically.
Add New Project
You can also add a new project here by clicking on the Start a New Project dropdown in the upper right corner of the screen. See the Adding a New Project section for more information about this.
Reports & Business Intelligence
The Projects module includes a dedicated reports tab to generate built-in and custom reports about your projects.
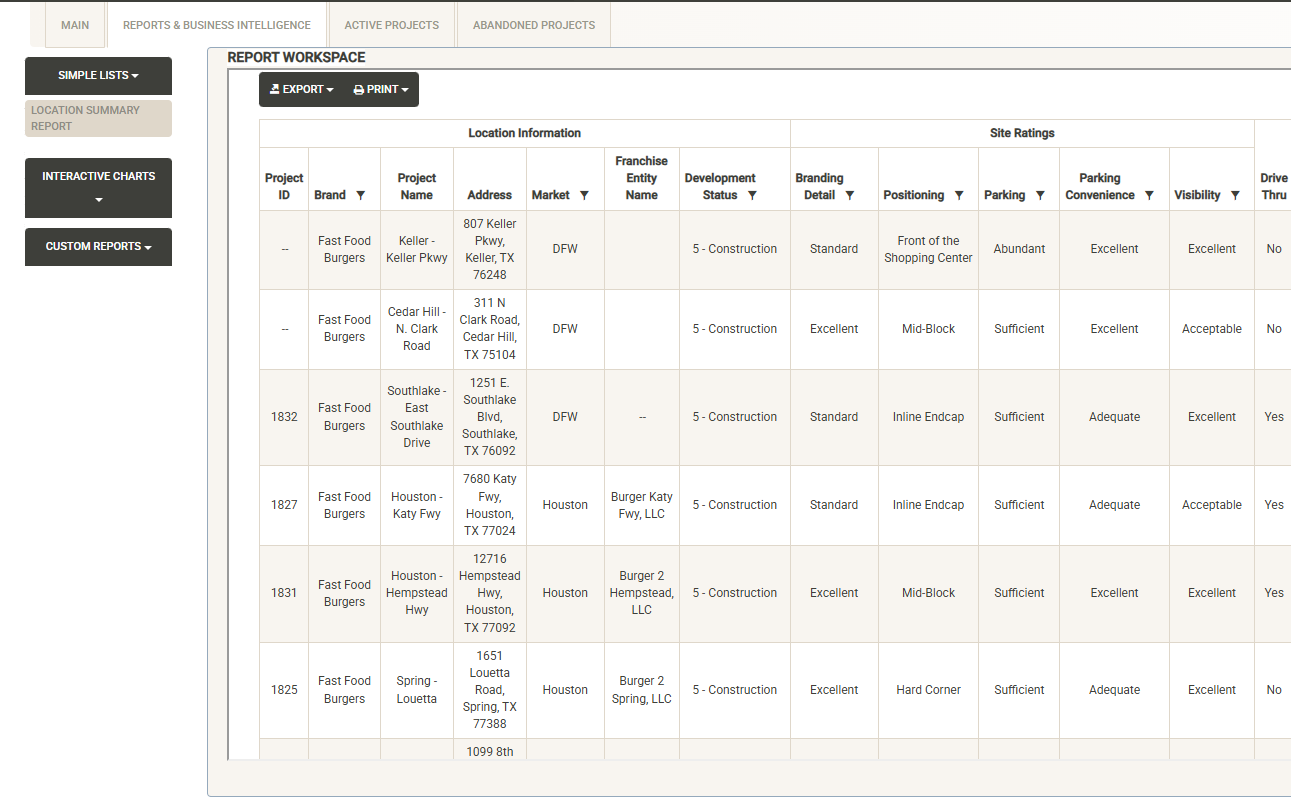
The left side of the page includes report categories including Simple Lists, Interactive Charts and Custom Reports (Note – Reports can be customized by client). Click on a category to open the report list, then select the report you wish to view. The Report Workspace window shows the selected report. Here you can again use the sorting and filtering options to customize your report output. You can export or print the report. Export options include PDF, Excel and CSV output of your report.
See the Reports section for more details about the reports included in the base system.
Active Projects
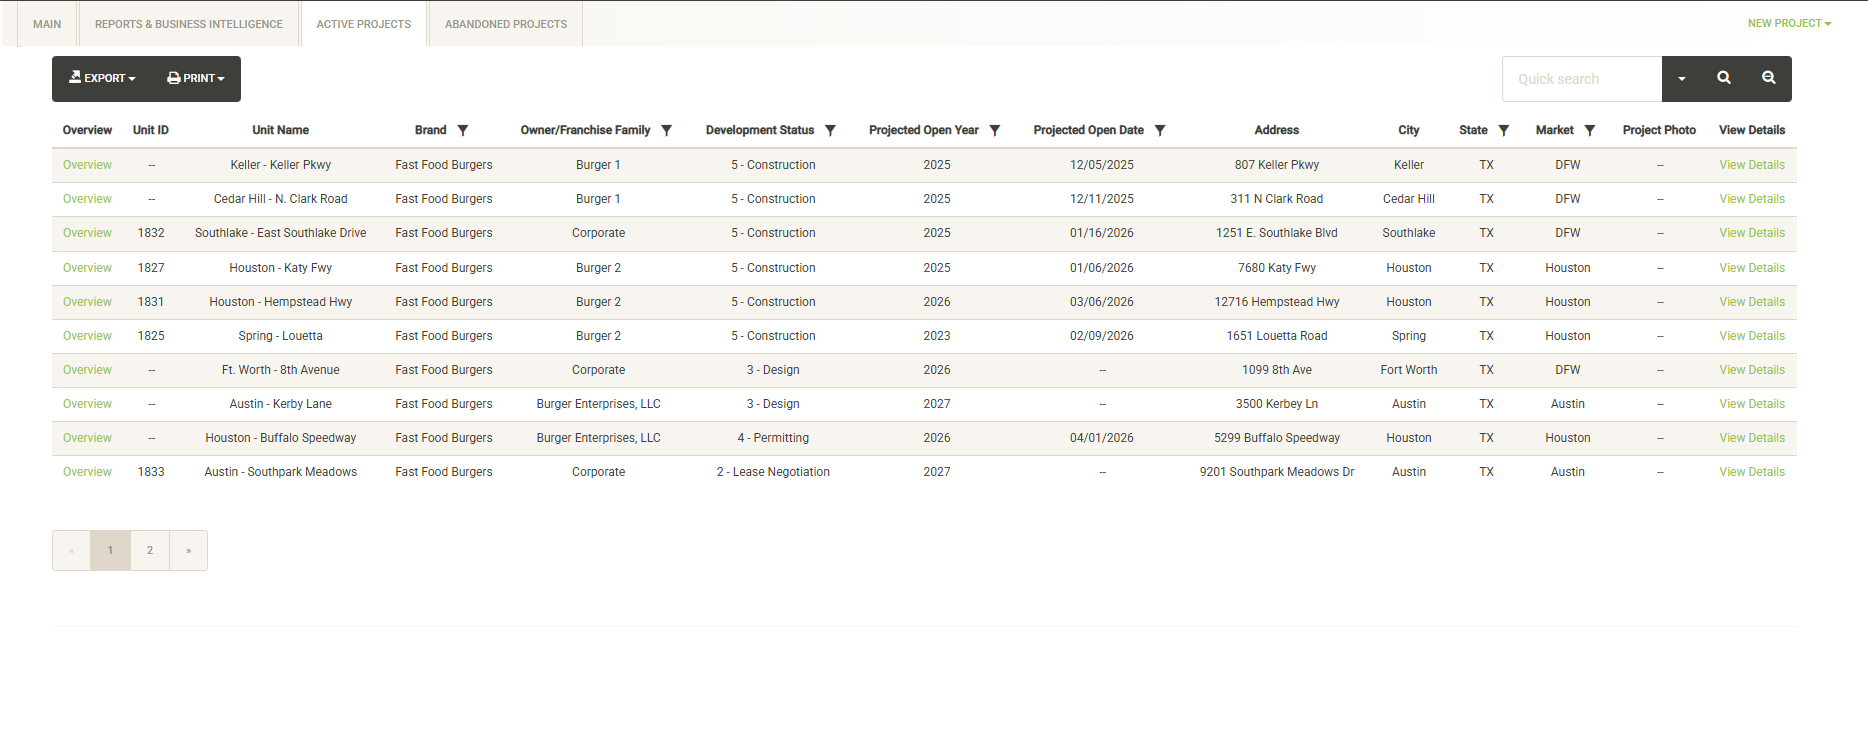
The active projects tab allows you to navigate your full list of active projects. You can use the sort and filter options in the column headers to customize the list. You can also print or export the project list from this screen. Once you’ve located your project, you can quickly access the project’s overview report by clicking on the “Overview” link next to the Unit ID. To access or edit the project details, click on the “View Details” link to the far right of the project information. See the Project Details section for more information about the various options within Project Details.
You can also add a new project here by clicking on the New Project dropdown in the upper right corner of the screen. See the Adding a New Project section for more information about this.
Abandoned Projects
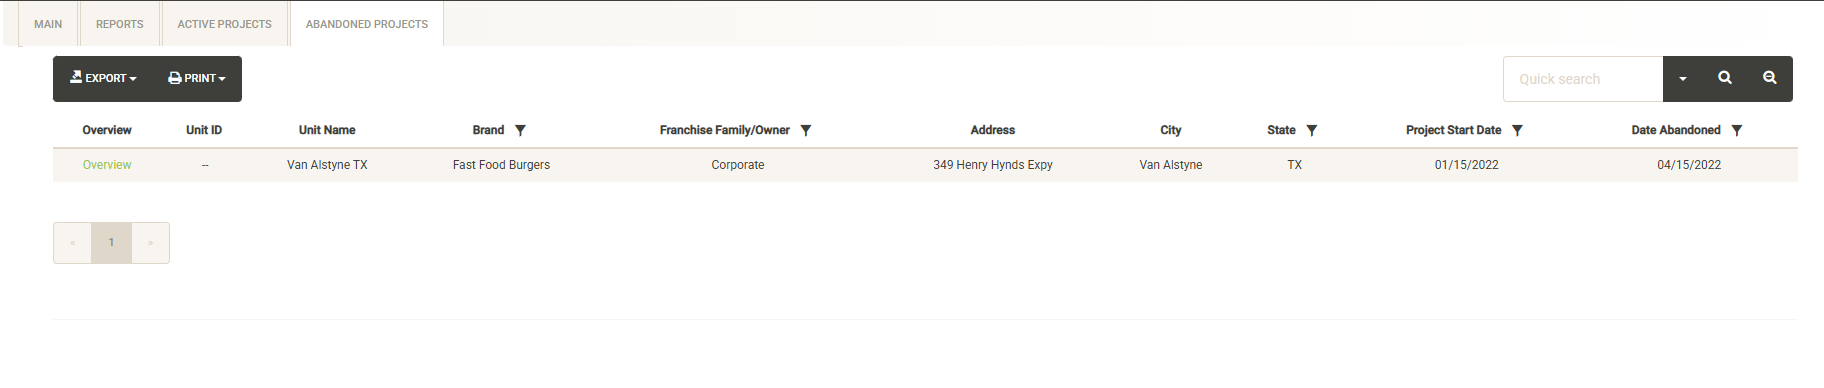
If a project was abandoned before completion, you can find information about it here. Note these abandoned projects are not editable. You can click on the Overview link to view the Overview Report for the abandoned project.
Project Details
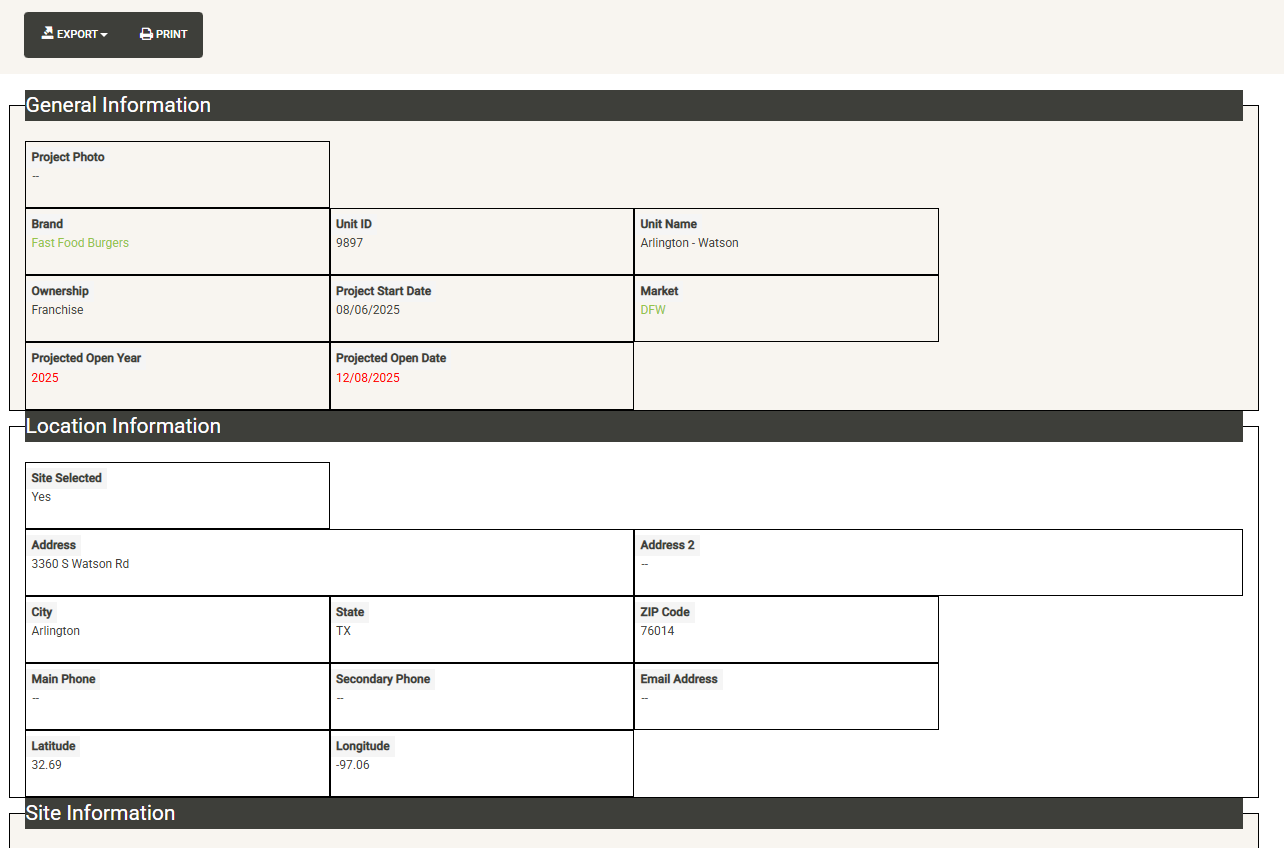
Once you’ve located your project and clicked on “View Details” from the various project lists, you will be taken to the Project Details page for your selected project.
Across the top of the page are key details about the project visible in each section. Below this are tabs covering various categories of data (note – the tabs visible in your version may vary).
Development Milestones

Displays your list of development milestones (created during setup) along with information and dates logged for the project. Click on “Modify Values” (only visible with proper permissions) to update the information on this page. Note that this page displays the same information as the Project Milestones widget from the main Projects page.
Site Information
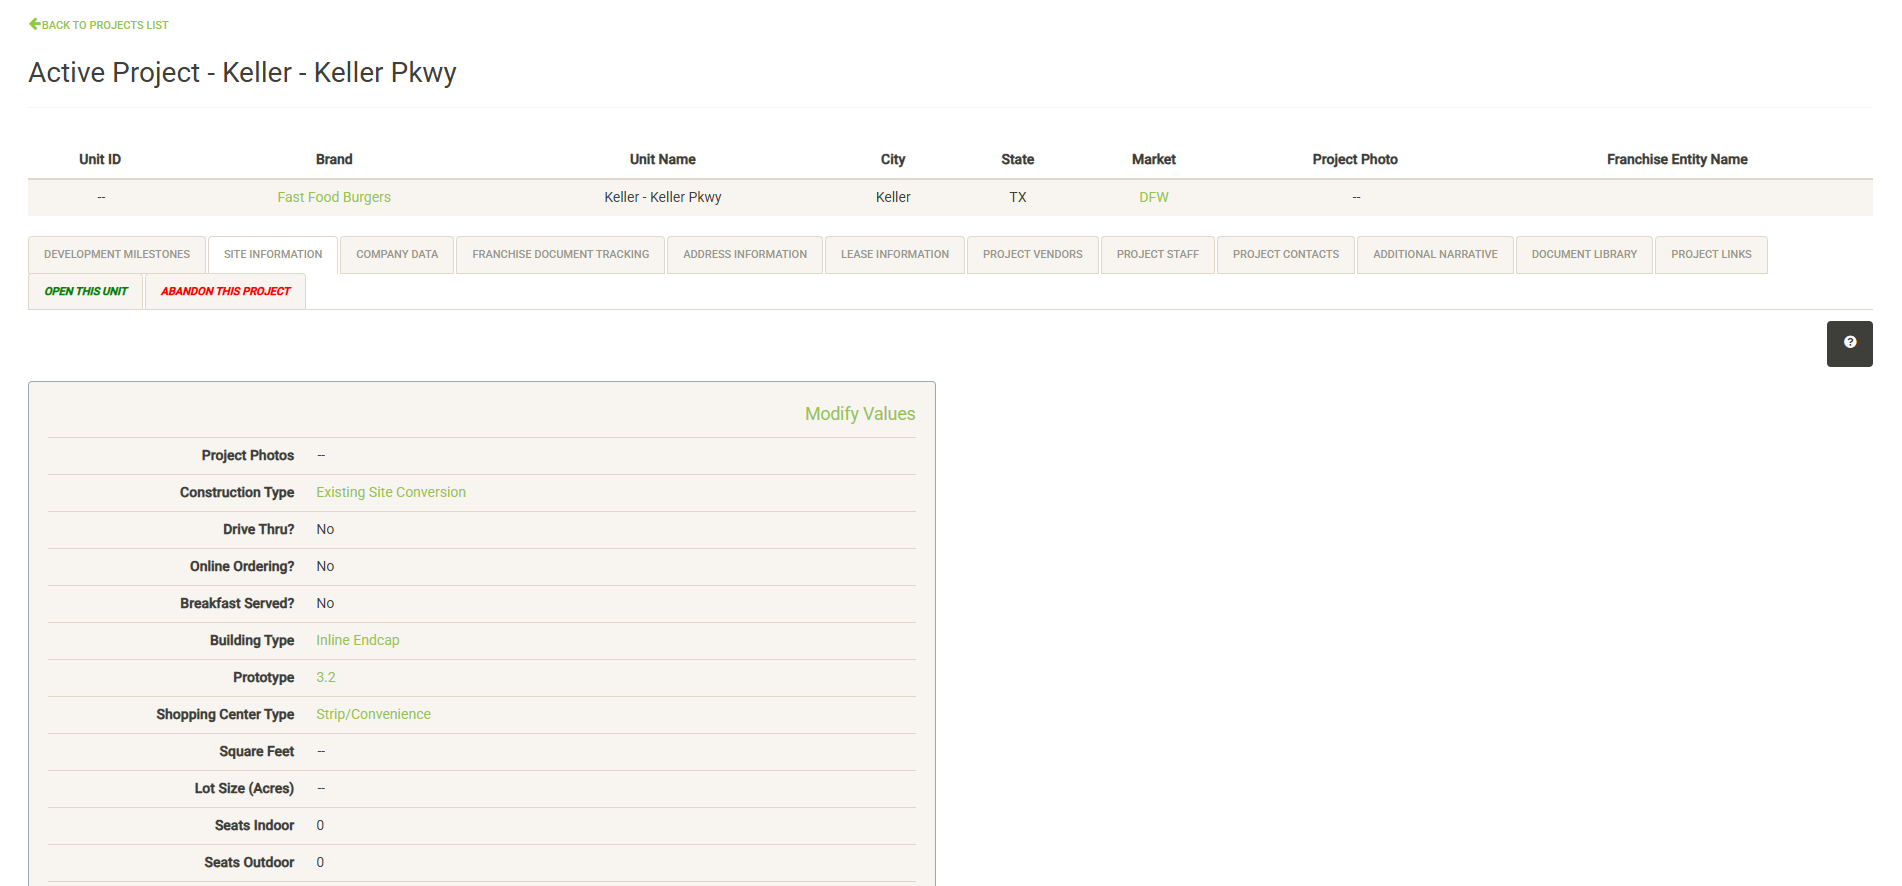
Displays attributes and information about the site of your project (Note – the available items may be different in your version). This includes building and lot information, project photos and site ratings. Click “Modify Values” (only visible with proper permissions) to update the information on this page. Many of the options available here can be modified in the Administration section.
Many of these attributes can be used in the Analog tool for measuring unit performance by attribute.
Company Data
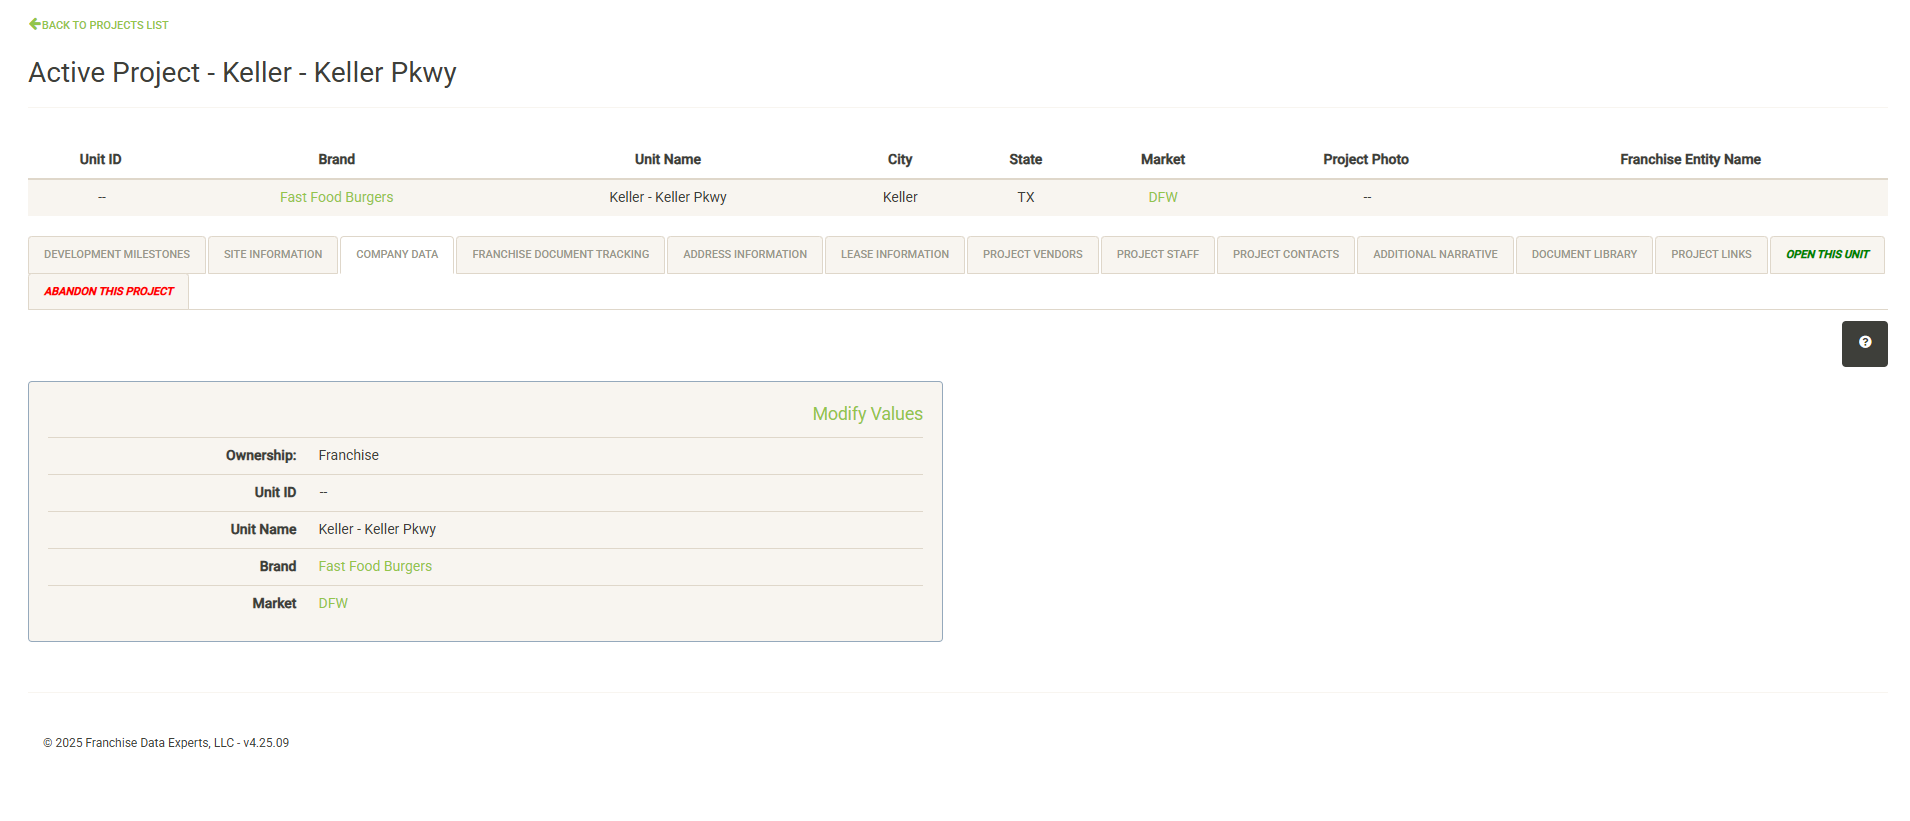
Displays internal classifications and attributes about your project including Ownership information, name and ID, Brand and Market. Selectable items such as Brand and Market are configured in the Administration section. Click “Modify Values” (only visible with proper permissions) to update the information on this page.
Franchise Document Tracking
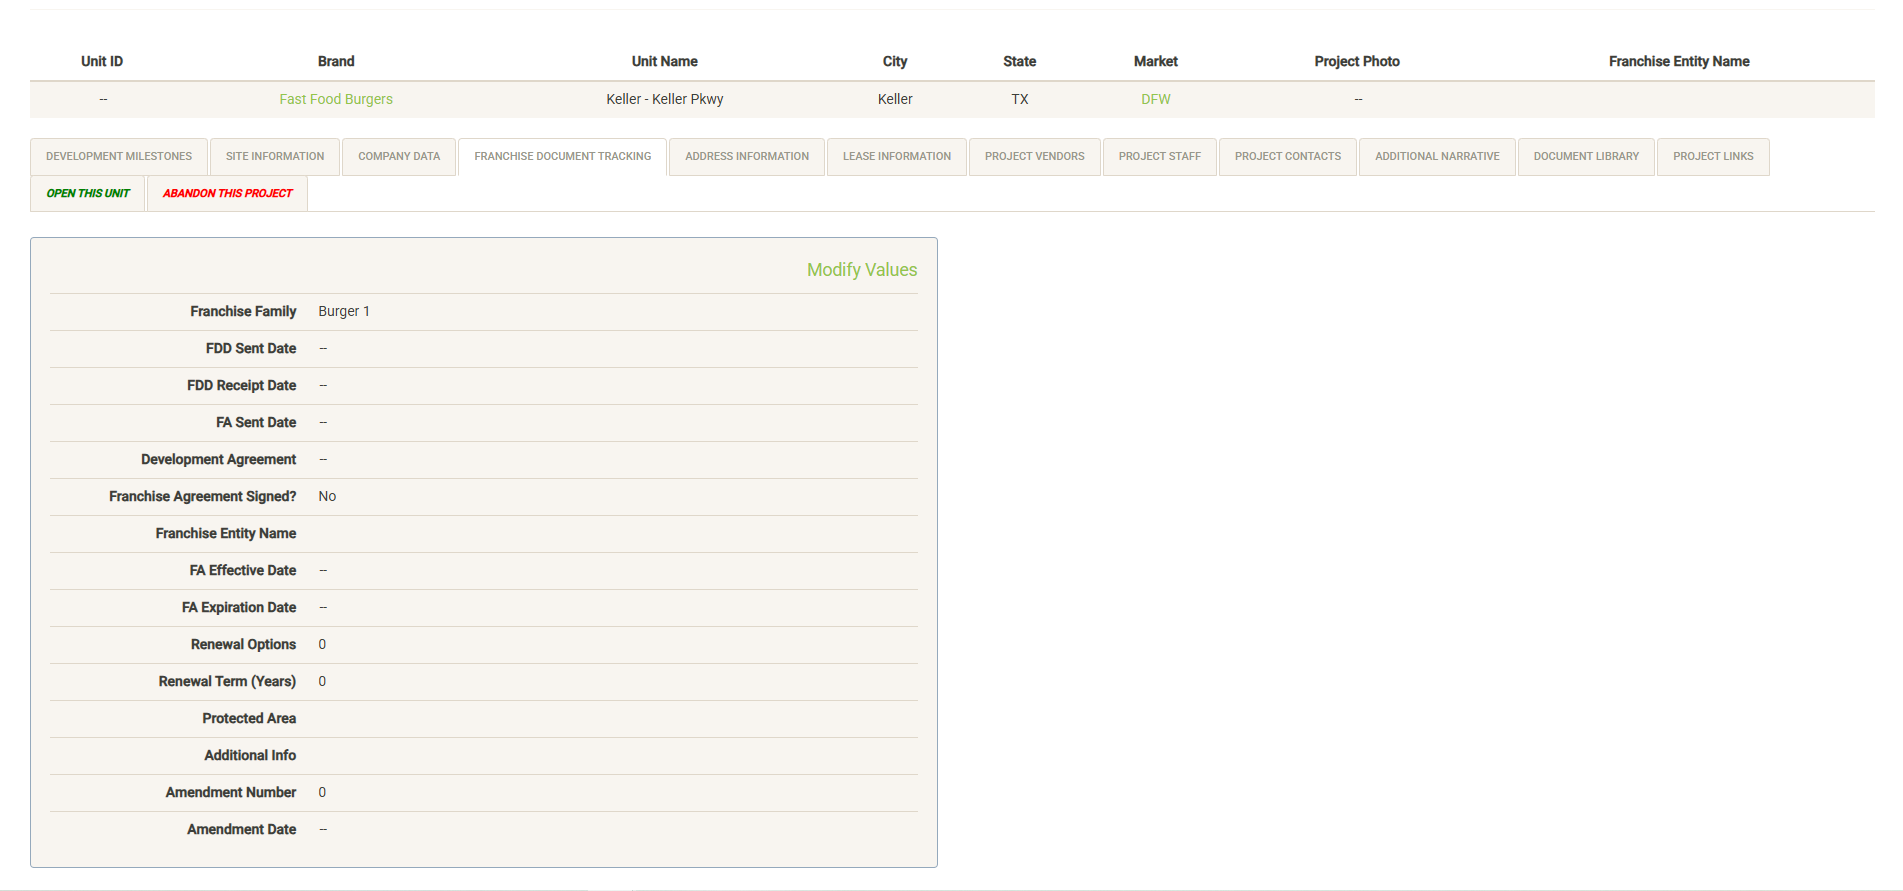
If your project was configured as a Franchise project during setup you will see this tab within the project details. This tab displays the status of your Franchise Agreement including the Franchise Family, milestone dates before signing as well as the details of the signed agreement. See the Franchise Agreements section for more details.
Click “Modify Values” (only visible with proper permissions) to update the information on this page.
Address Information
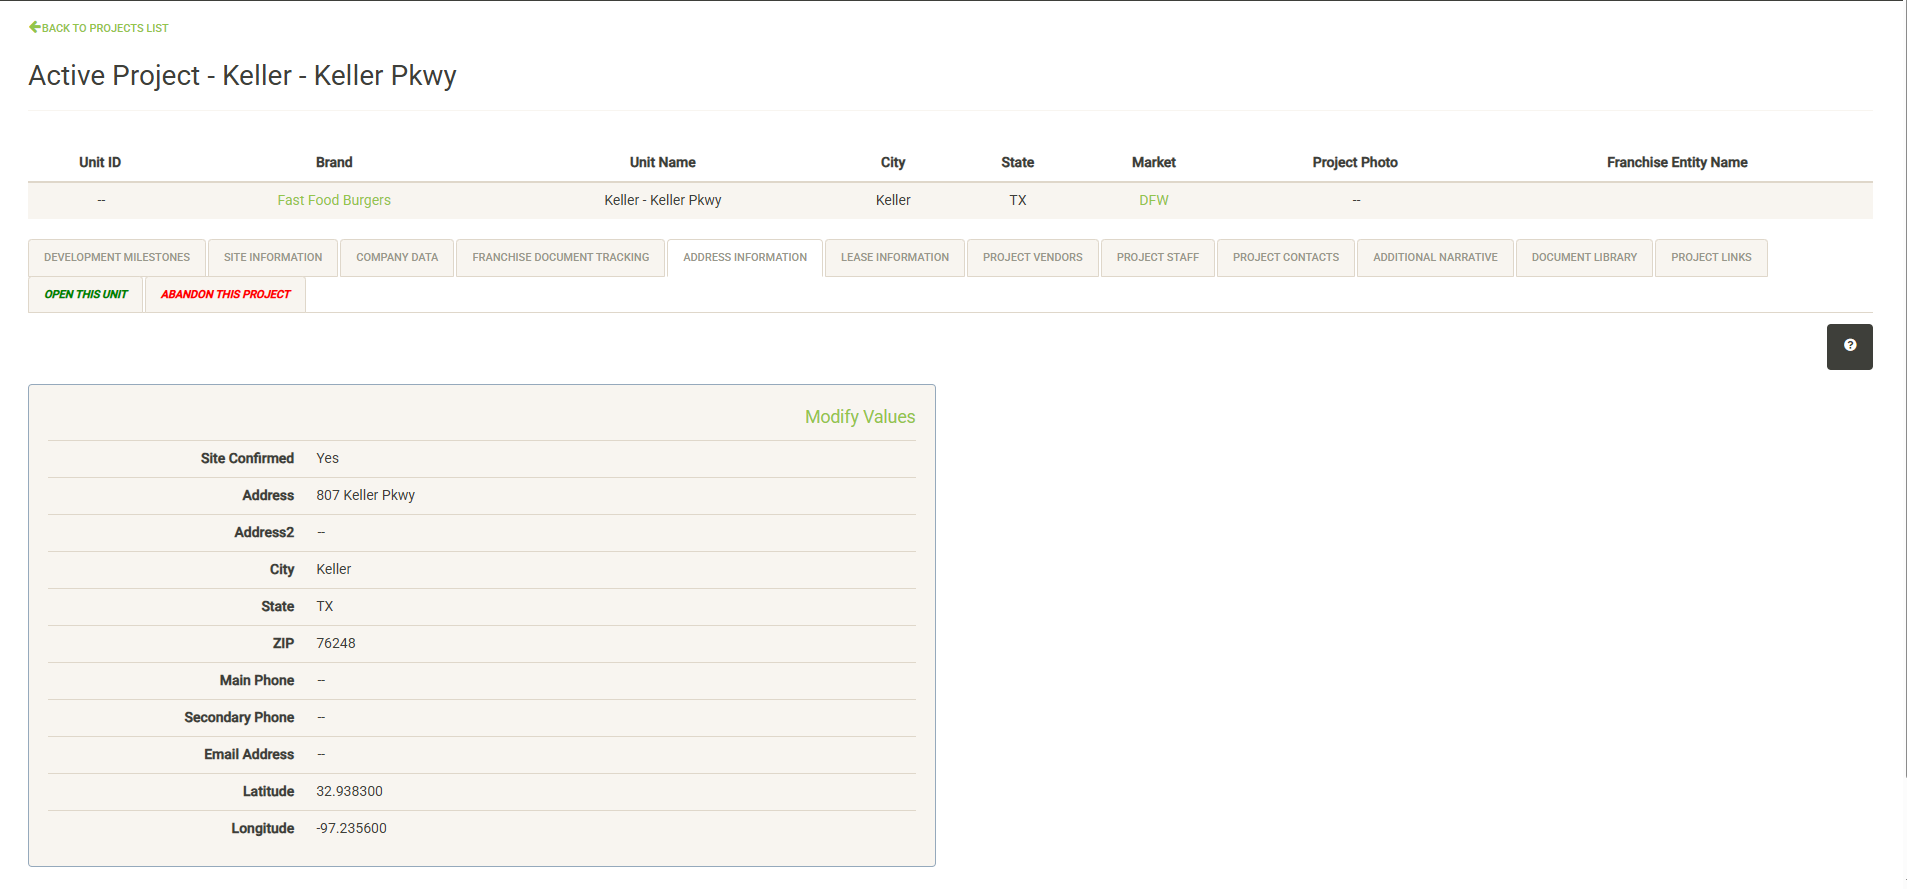
Displays Address information for the project. Address information is not required to start a new project and can be added after project start by clicking Modify Values. Address information can only be entered once the Site Confirmed status is set to “Yes.”
Note: Lat/Long data must be entered for the project to display on the maps. You can use Google maps to quickly obtain a lat/long for your site.
Lease Information
Displays information about the most current lease for the project. If no lease currently exists, you have the option to add a new landlord and new lease.

Existing Leases display the View/Edit Lease Details button. Clicking the button will take you to the full lease details page for the lease. The Summary link provides a quick lease overview report that can be printed or exported and shared.
Project Vendors
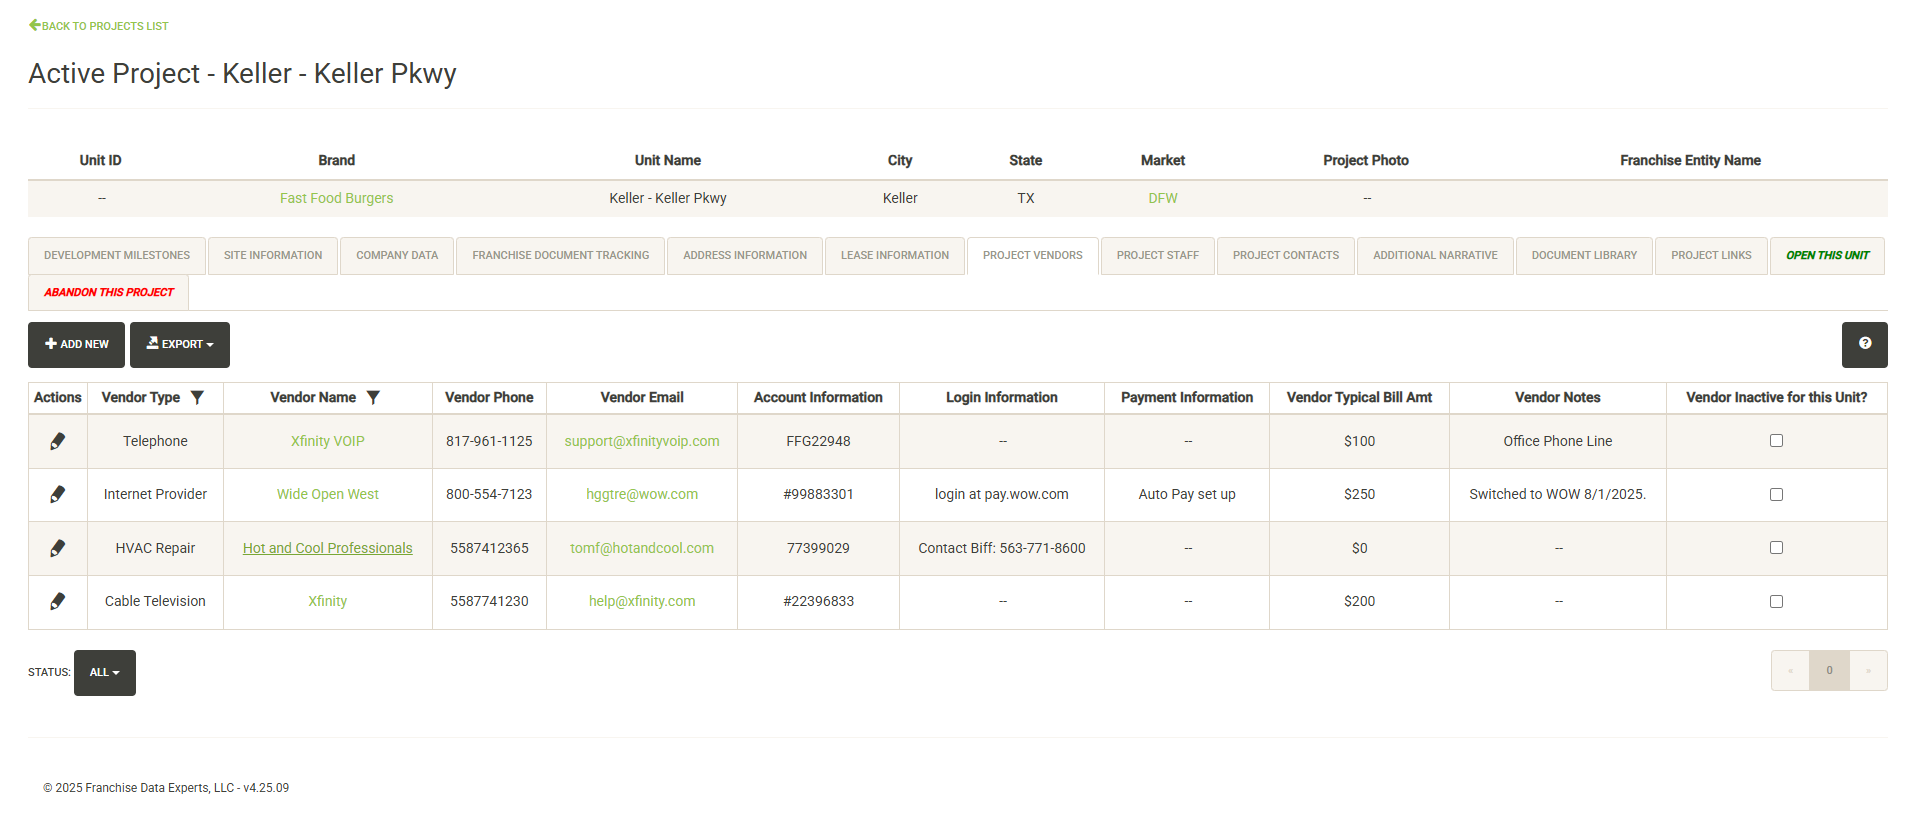
Displays the list of vendors assigned to the project. The vendor list includes details such as contact information, account information and notes about the account. You can quickly print or export a report with this data.
You can add new vendors to the project (with the proper permissions) by clicking on the “Add New” button.
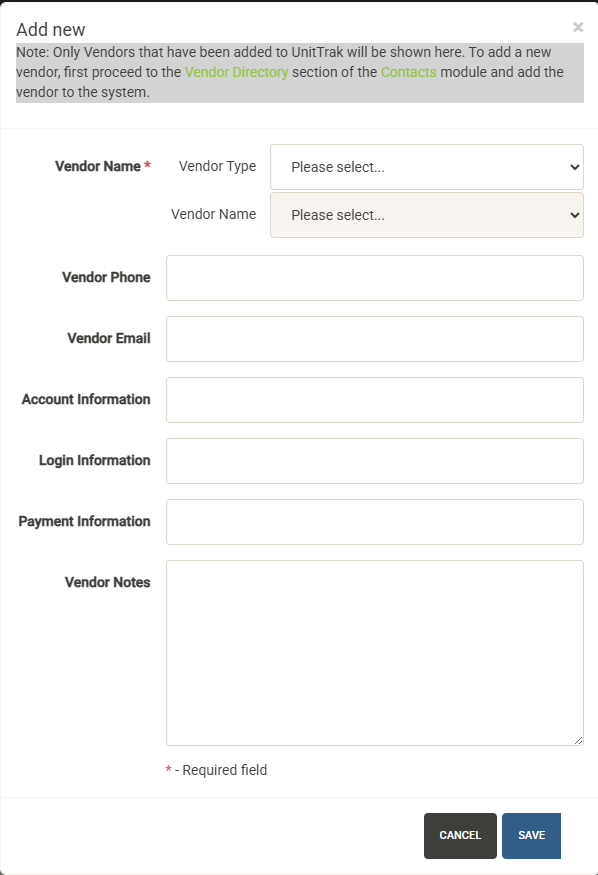
Note that the vendor must first be added to the vendor directory before it can be assigned to a unit or project. You can follow the link in the instructions to add the vendor to the directory if needed.
Select the Vendor Type from the dropdown, followed by the vendor name. You can then add unit/project-specific information for the vendor including phone number, email, account information, login information and payment information along with unit-specific notes.
Hit save to add the vendor to the project.
From the vendor list you can also filter the vendors to include those marked as inactive or just show active/inactive vendors:
You can edit existing vendor entries by hitting the edit pencil to the left of the vendor:
You can edit any of the unit/project specific data here or you can set the vendor to be inactive (with the proper permissions).
Project Staff
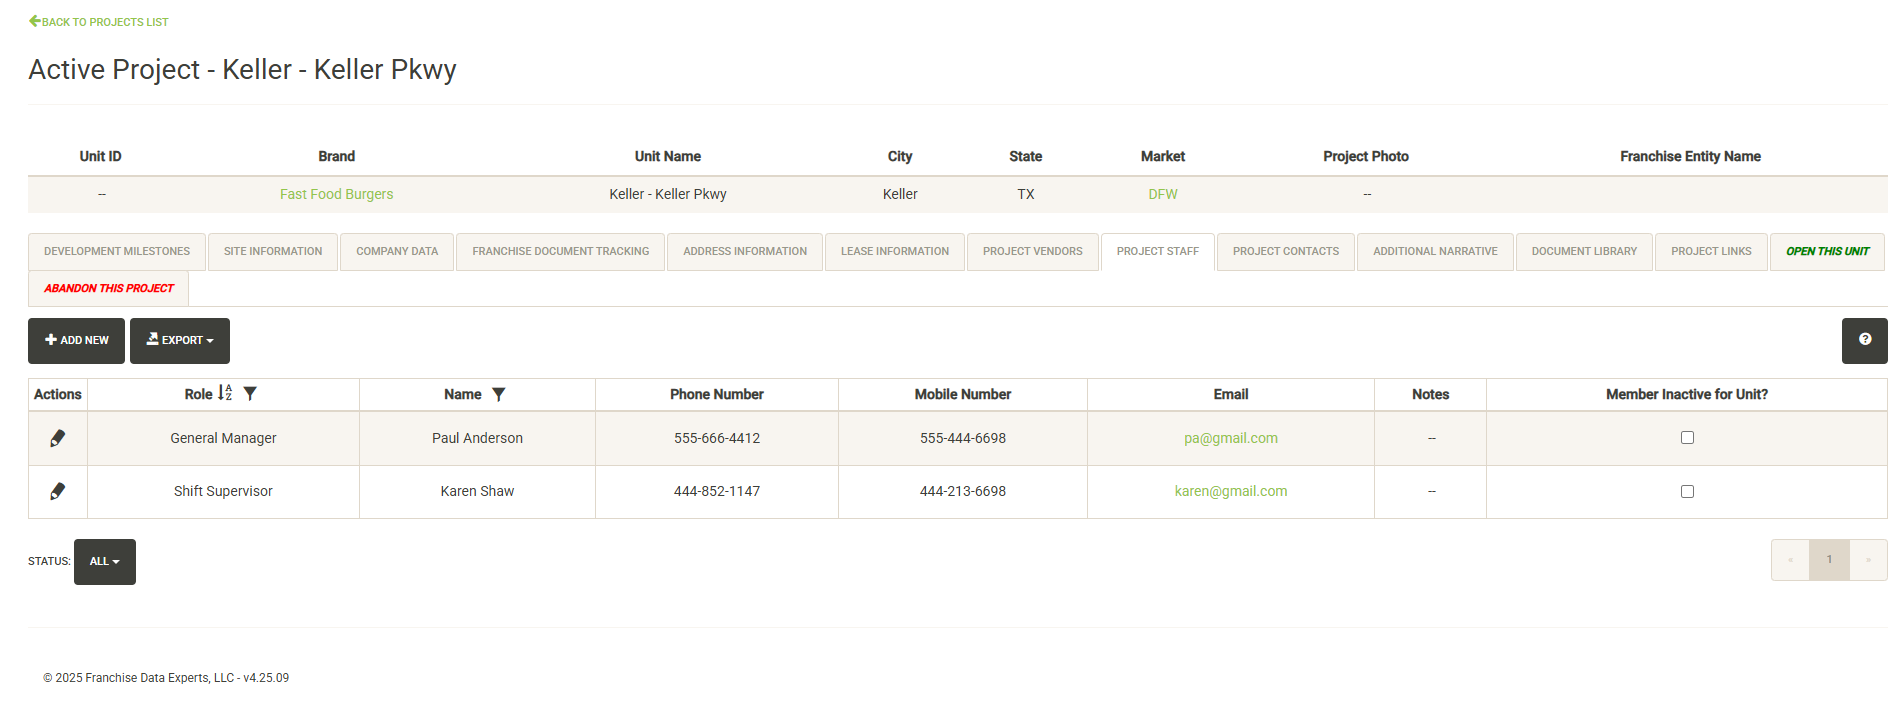
Displays members of the company staff assigned to the project. The staff list includes details such as contact information, role and notes about the staff member. You can quickly print or export a report with this data.
You can add new staff members to the project (with the proper permissions) by clicking on the “Add New” button.
Note that the staff member must first be added to the Company Staff page before they can be assigned to a unit or project. You can follow the link in the instructions to add the member to the Company Staff page if needed.
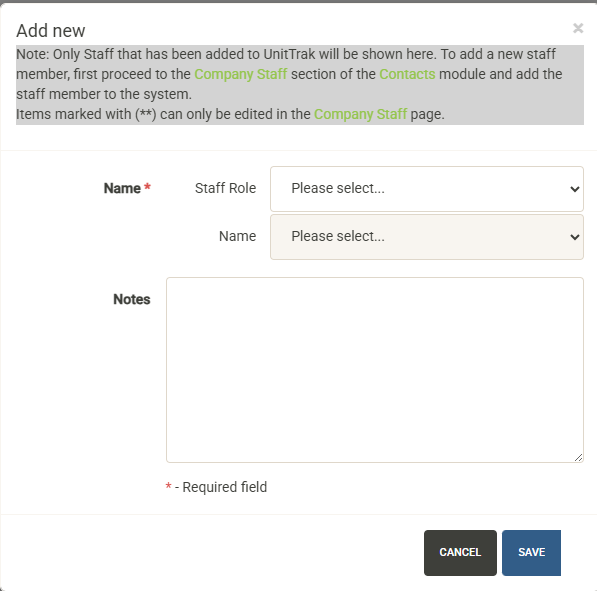
Select the Staff Role from the dropdown, followed by the member name. You can then add unit/project-specific notes for the member.
Hit save to add the vendor to the project.
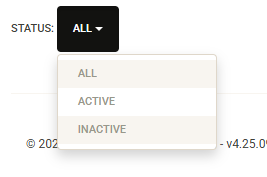
From the staff list you can also filter the vendors to include those marked as inactive or just show active/inactive vendors:
You can edit existing staff entries by hitting the edit pencil to the left of the vendor:
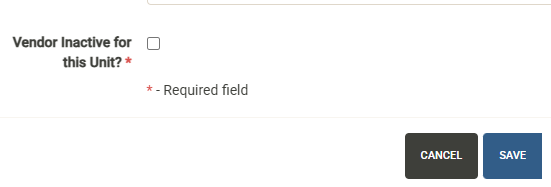
You can edit any of the unit/project specific data here or you can set the member to be inactive (with the proper permissions).
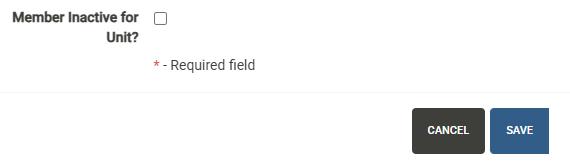
Note: If you need to change contact details about the member, these need to be edited in the Company Staff page.
Project Contacts
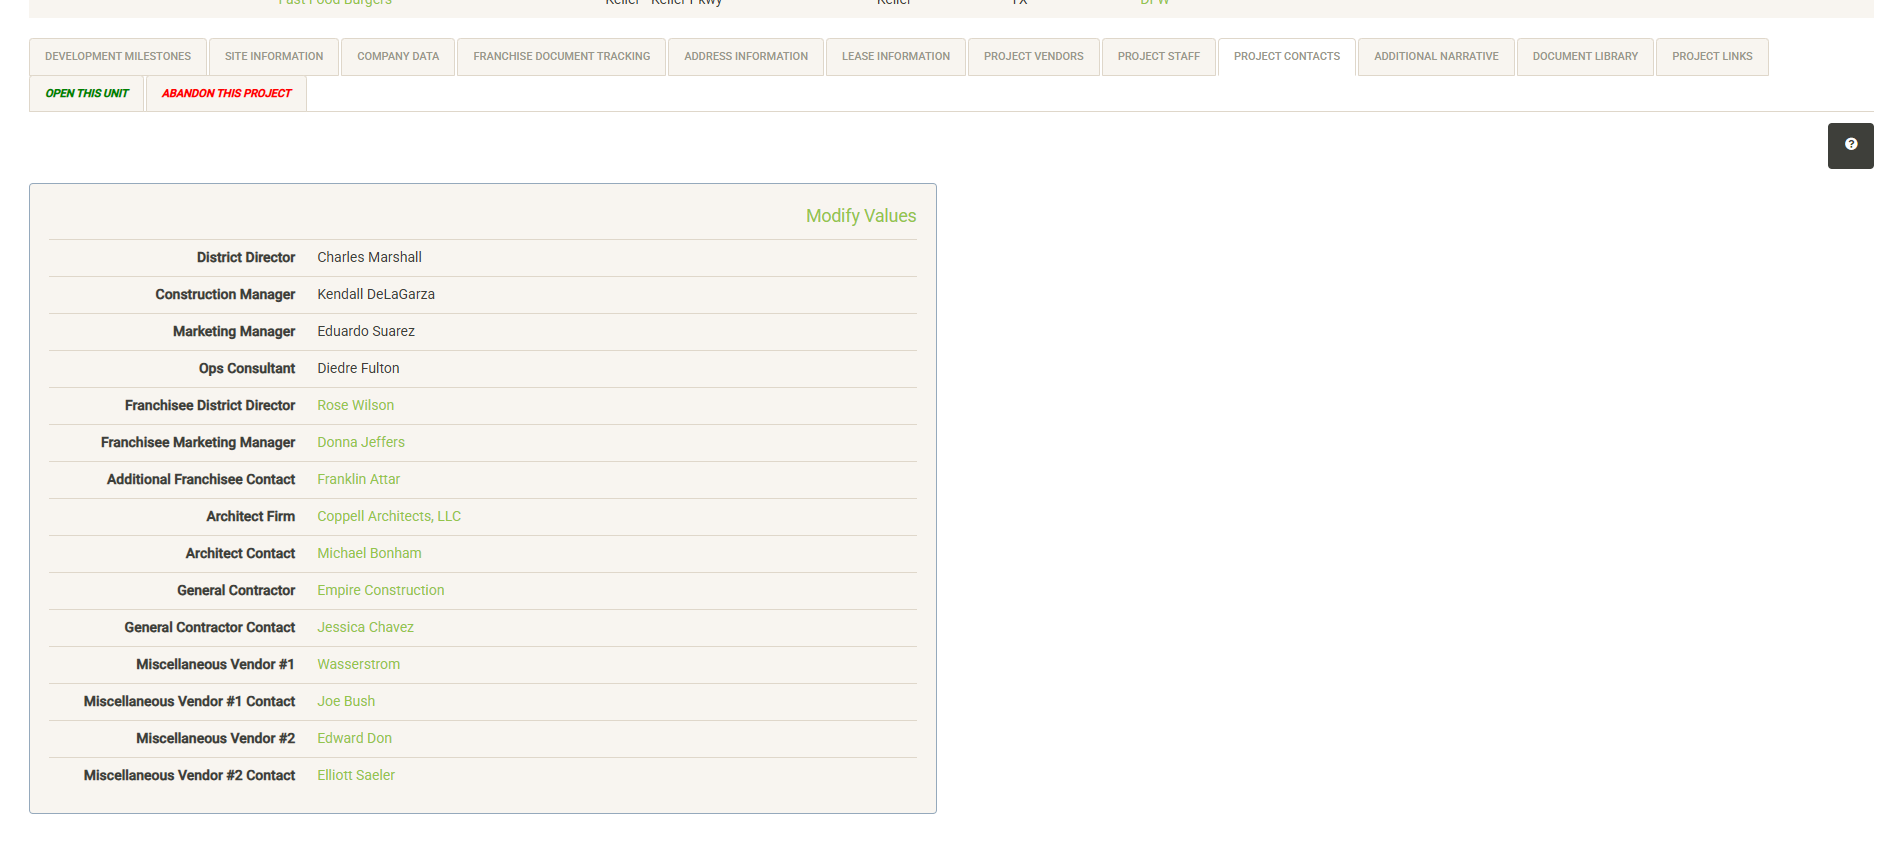
Displays contacts assigned to specific project roles in each project (these roles are customized during setup). Click on Modify Values to add or edit project contacts. Note that staff and outside contacts must first be added to the Contacts module in order to be available for selection here. When selecting internal staff, selections are filtered by role. Franchise Family Contacts are filtered by the assigned Franchise Family, while vendor contacts are filtered by the selected vendor.
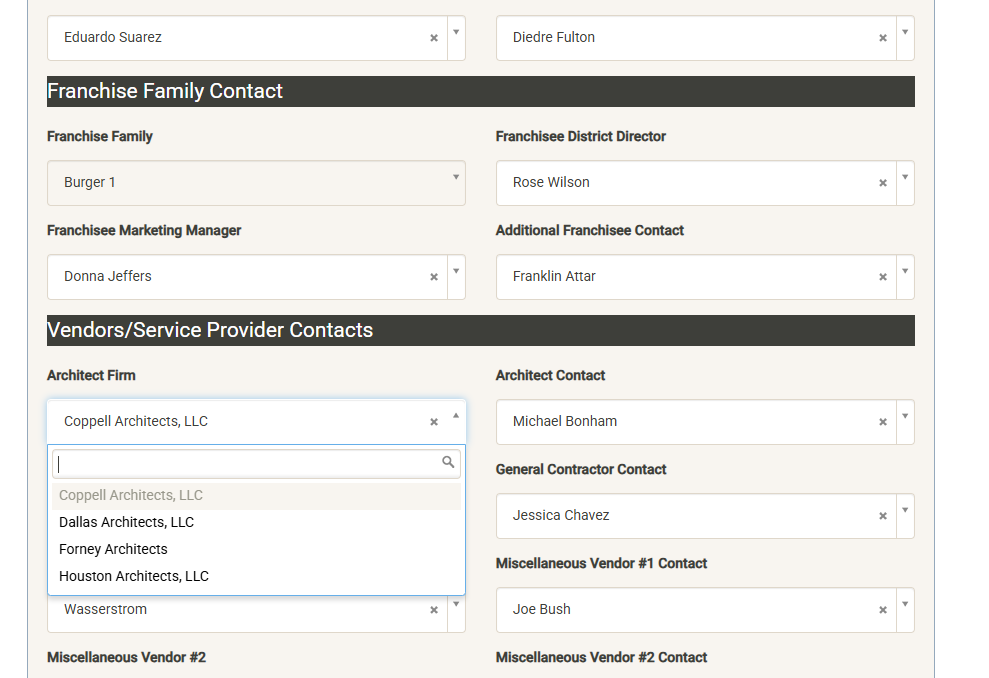
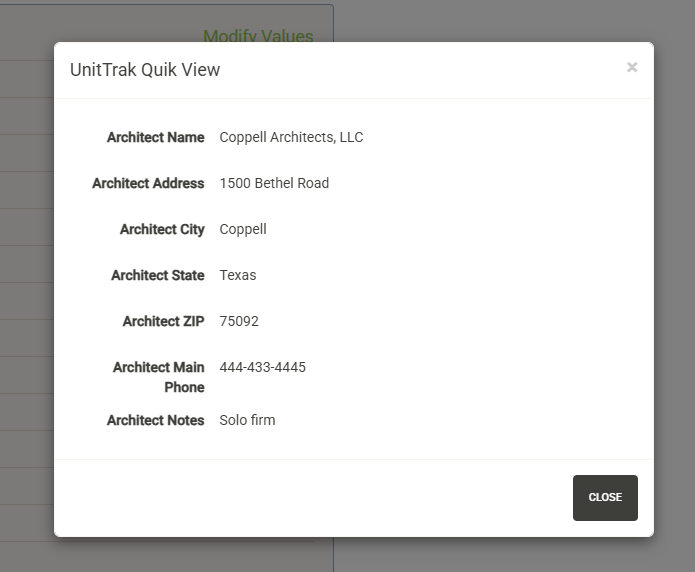
Populating this data allows for generation of the Project Contact Report from the Contacts module. To get quick contact information for anyone assigned to the project, just click on the name.
Additional Narrative
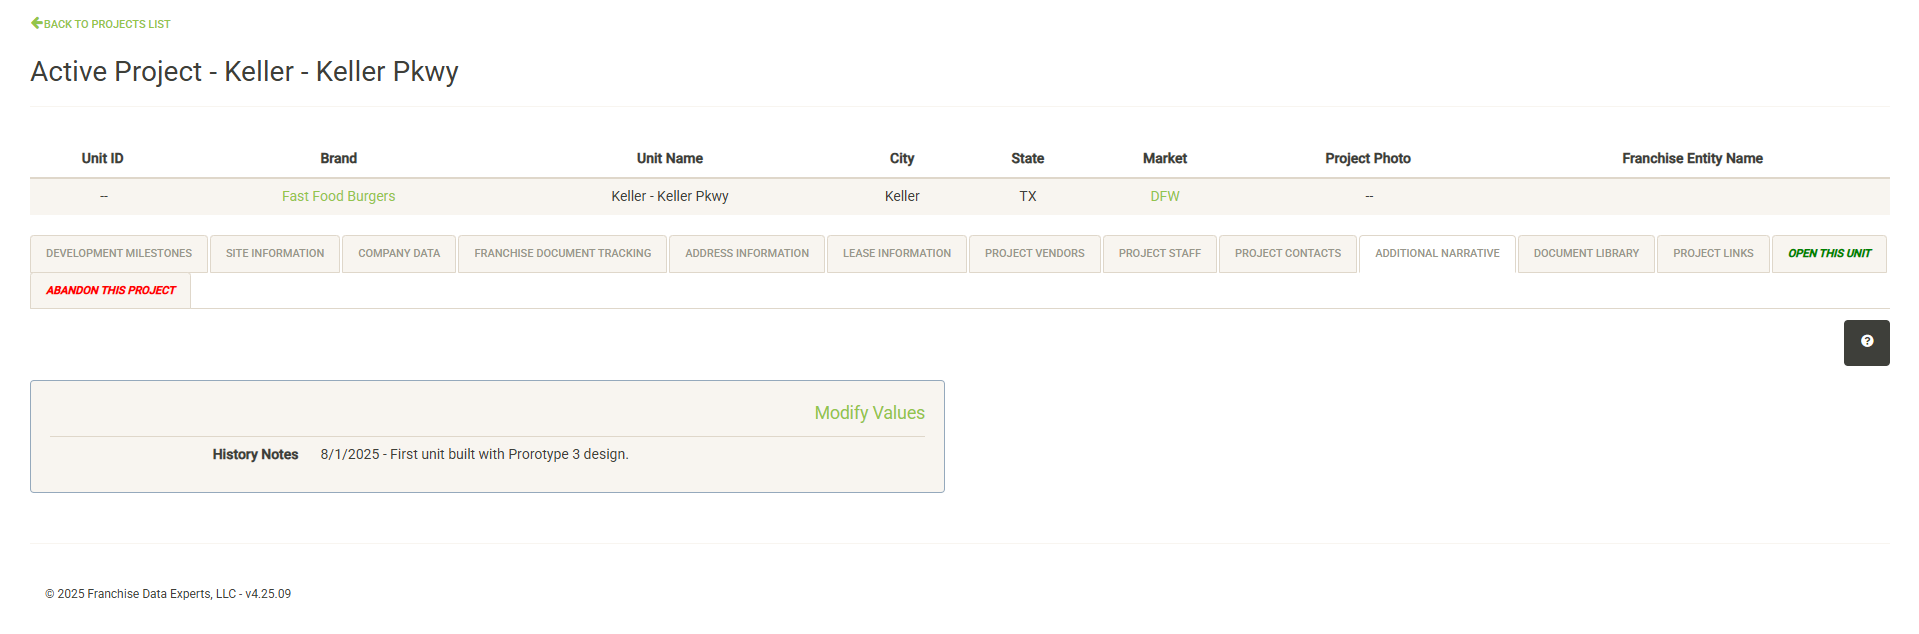
This section displays ongoing notes about the project. Click on Modify Values to add or edit notes. These notes will continue to follow the project through development and will be passed to the open unit once the project has been opened.
Document Library
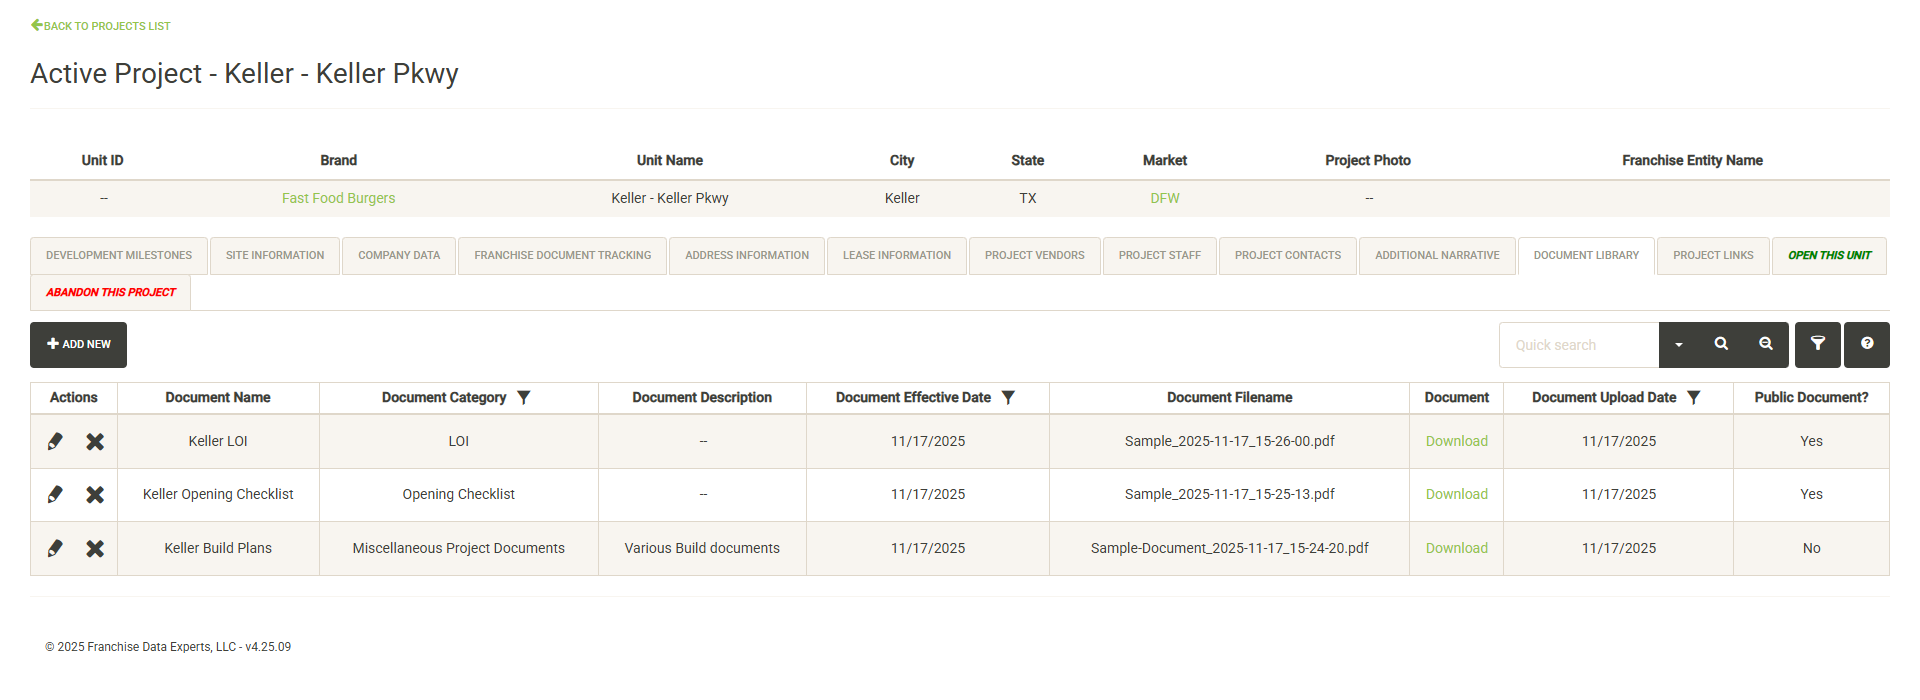
Displays the documents saved with the project. Each document includes a category (defined in the Administration section), description, effective date, and upload date. You can also see if the document has been saved as a public or private document.
To download a document, click on the download link and the document will open in a new window.
To share a public document, you can simply copy the URL from the document window and share it with anyone inside or outside of your organization. Note – Private documents cannot be shared this way, the URL used to download the document is a private URL that cannot be shared outside of UnitTrak. These documents can only be viewed within UnitTrak.
The Actions column includes the ability to edit the data associated with a document (edit pencil) or delete the document from the server (X button).

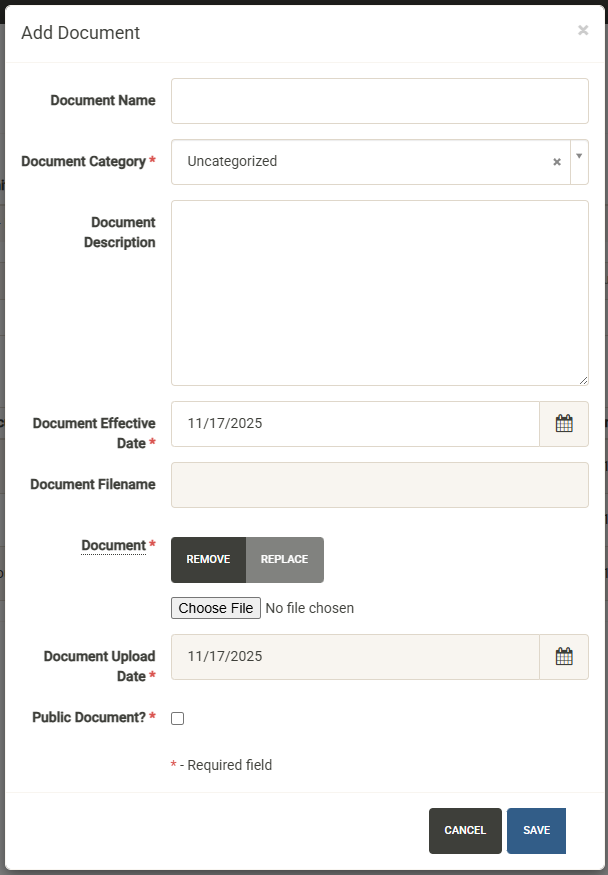
To add a new document, click the Add New button. The Add Document form allows you to add a document name, category, description and effective date. Click Choose File to select your document. Finally, decide if the document will be public or private with the Public Document checkbox.
Hit Save to upload the document to the secure file server.
Project Links
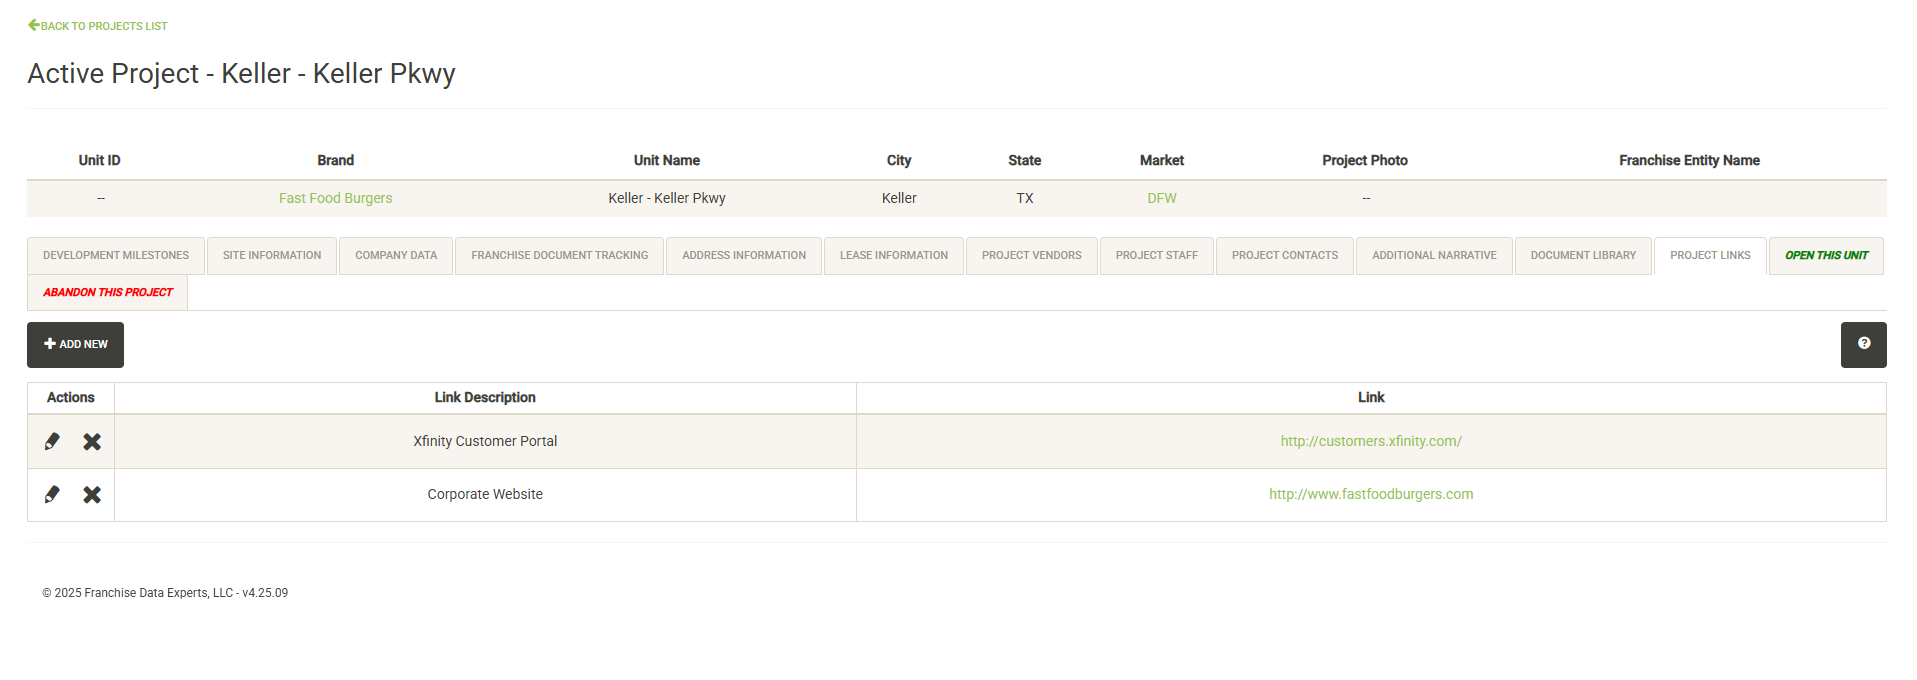
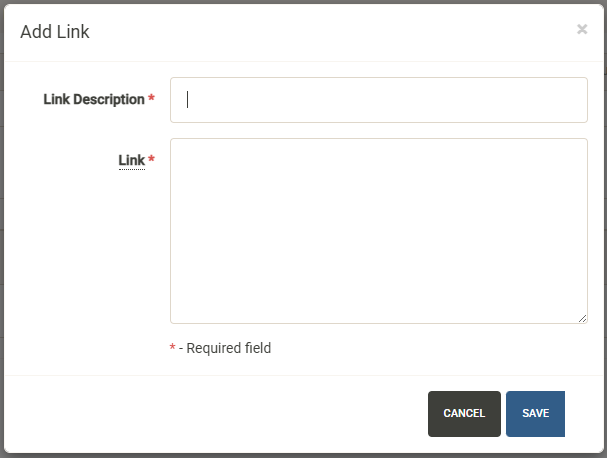
Displays URL’s associated with the project including vendor URL’s and company URL’s. If you have a web link for online bill payment or support services, it can be added here. To access a link, simply click on the URL to open it in a new window. To add a new link, click on the Add New button.
Open This Unit
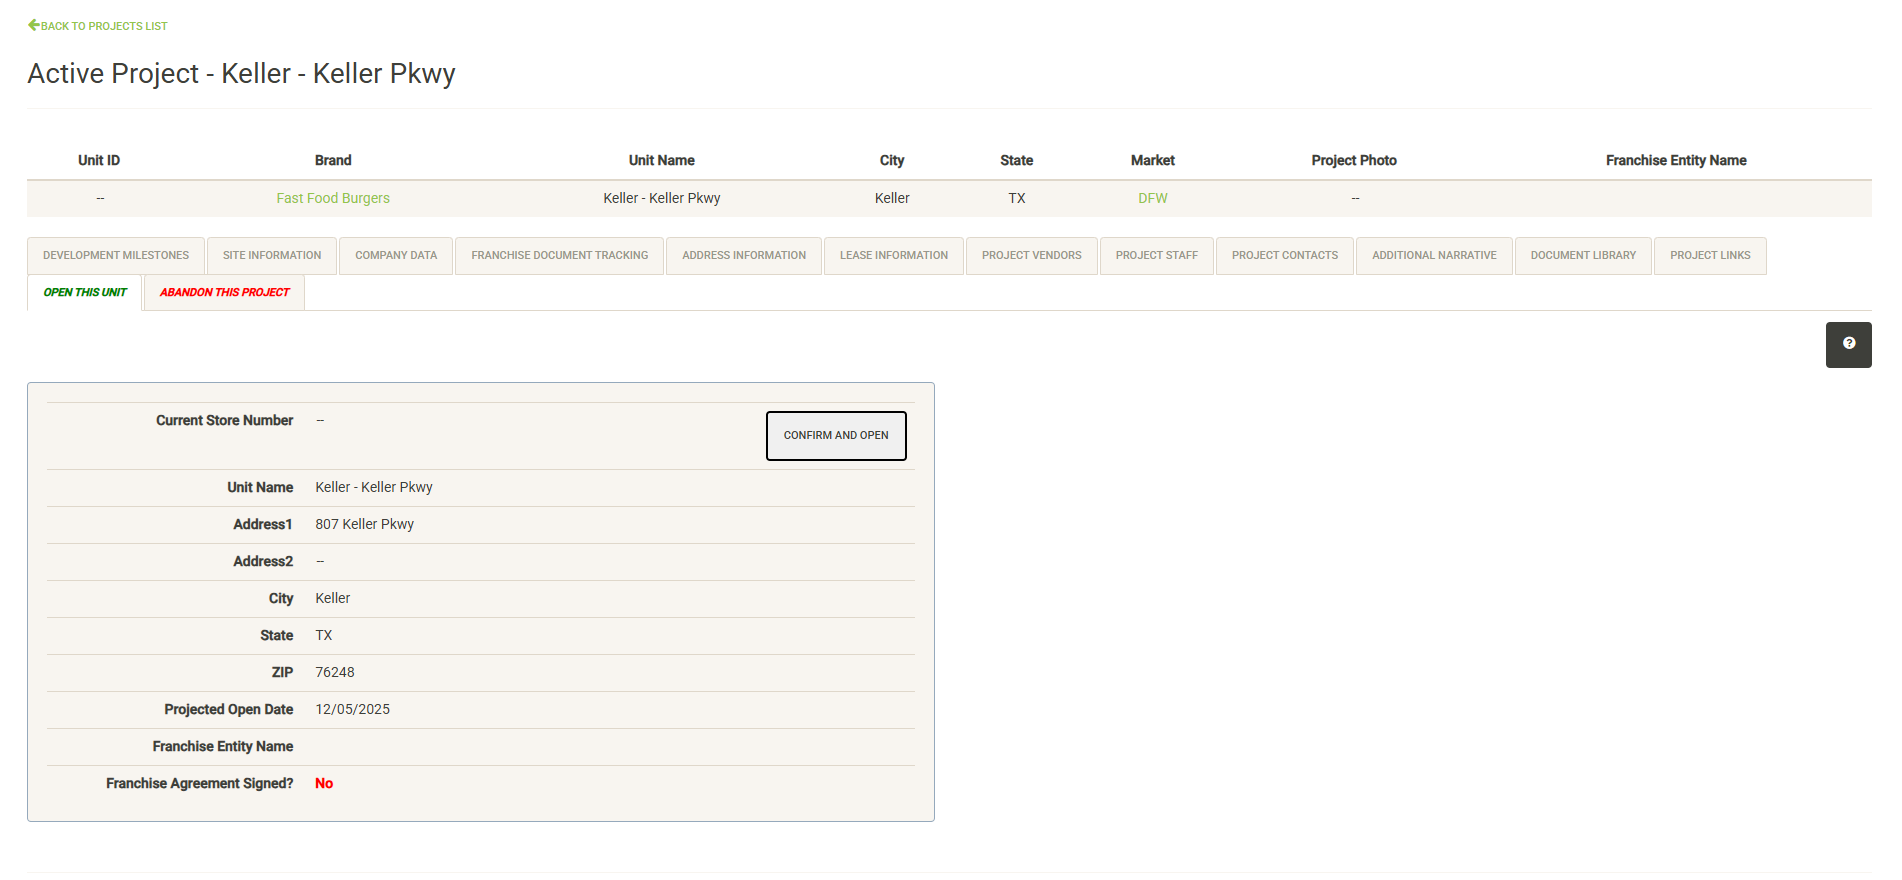
Once your project is complete and ready for opening, use this tab to log the opening and transfer the project to the open units list.
Note – depending on the type of project, certain criteria will need to be met and specific data available before a unit can be opened. See the Opening a Unit section for more information about opening a unit.
Abandon Project
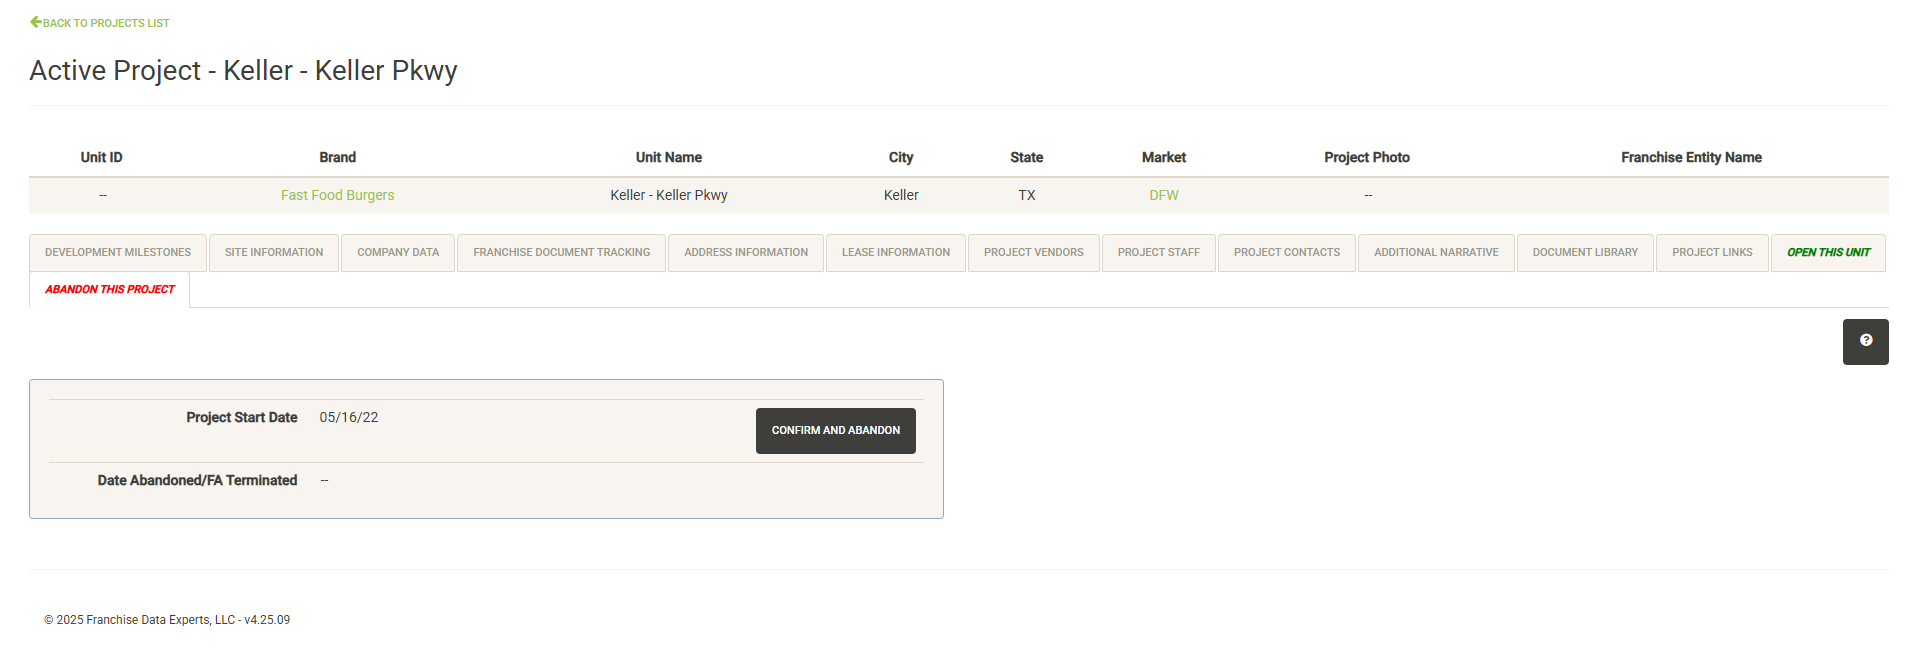
If a project has been abandoned and will not be opened, you can abandon it here by hitting the Confirm and Abandon button. You will be required to enter the date the project was abandoned. Note that if a franchise agreement was logged for the project, it will be terminated on the date the project is abandoned.
Main Dashboard
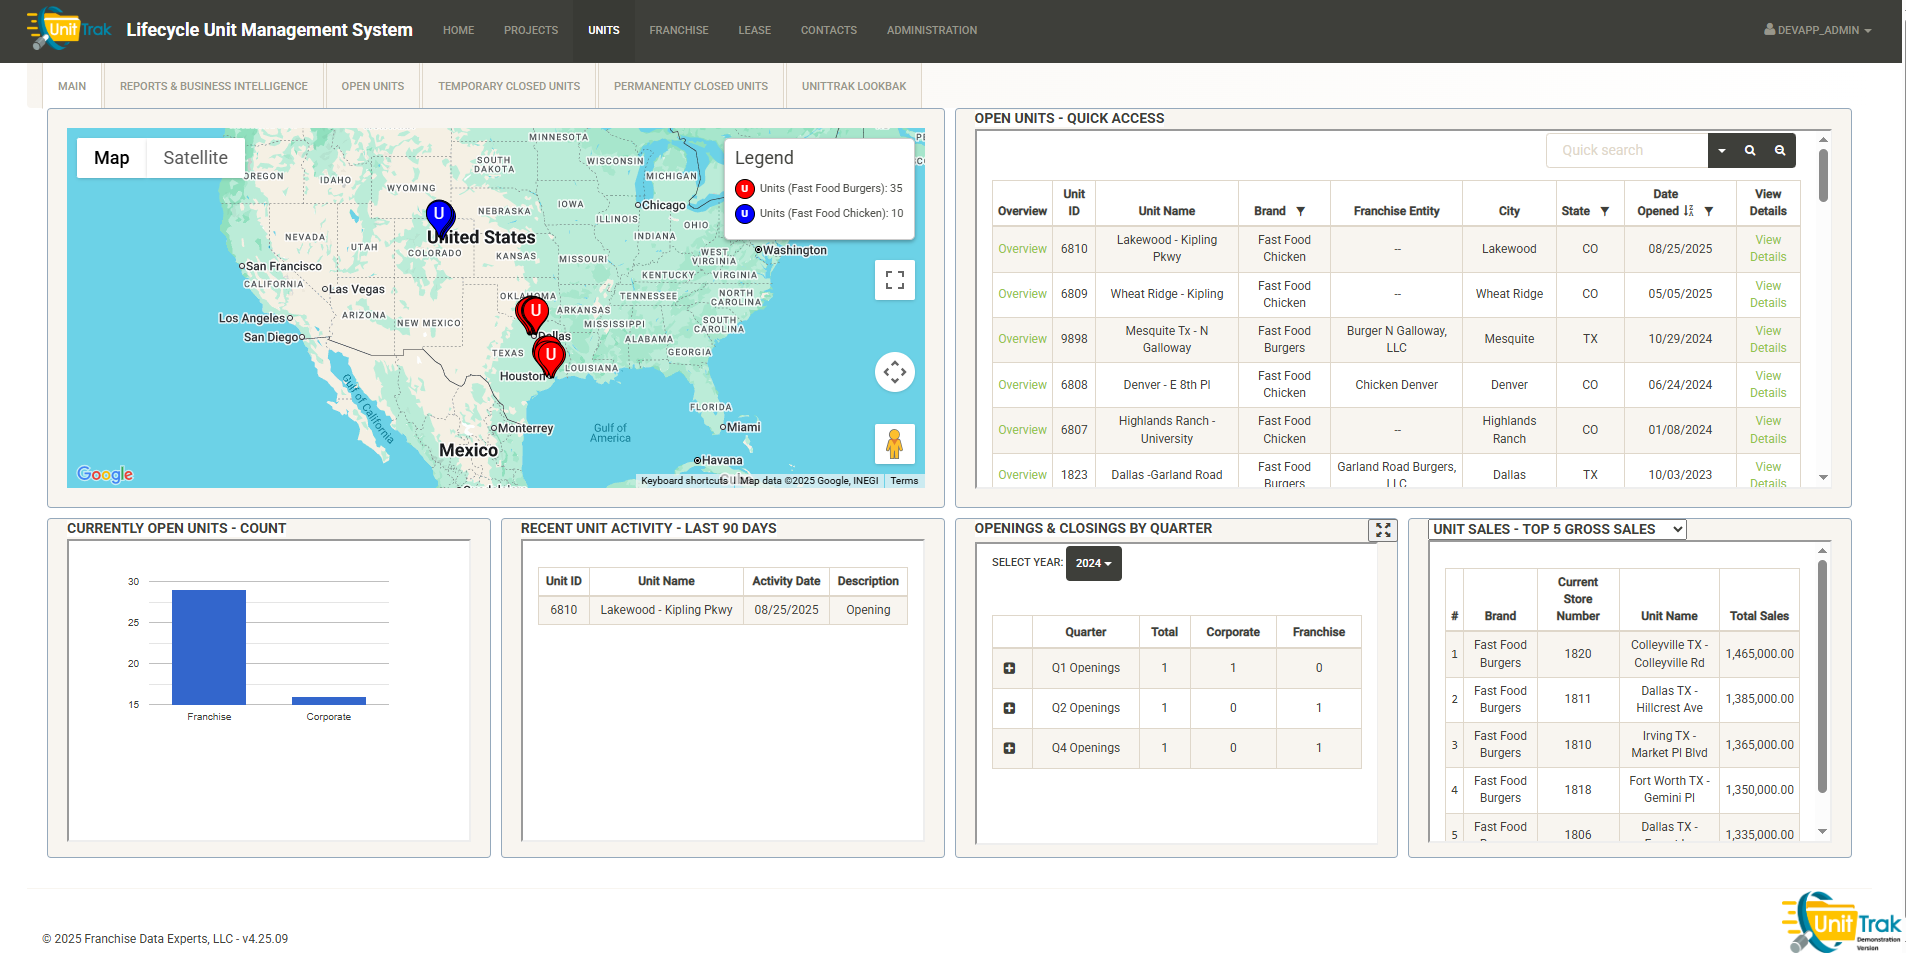
Units Map
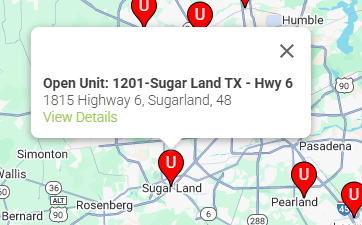
The map is a fully featured Google map displaying Open Units by brand. You can use the various controls to change the map type, zoom in or out, pan the view, make the map full-screen or enter Streetview mode.
Hovering over any unit will display a popup with information about the unit and a link to generate a Unit Overview Report:
Open Units – Quick Access
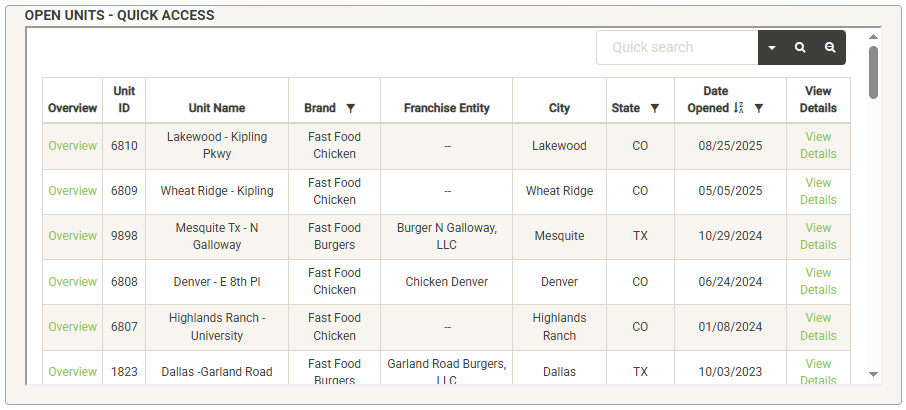
The Quick Access widget allows you access to your open unit list directly from the main page. You can easily locate your targeted unit using the search and sort tools in this widget. You can click on any of the content headers to re-sort the list by that column. The columns that contain a filter icon can be filtered by clicking on it. You can also use the search box to search for attributes such as Unit ID or Unit Name.
Once you’ve located your unit, you can quickly access the unit’s overview report by clicking on the “Overview” link next to the Unit ID. To access or edit the unit details, click on the “View Details” link to the far right of the project information.
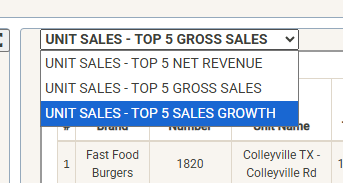
Units Dash Widgets
Across the bottom half of the Units dashboard are widgets to provide quick updates about recent system activity (Note – these widgets can be customized by client). Widgets in our sample show open unit counts by ownership type, recent unit activity, openings and closing by quarter, and a multi-function sales widget. Note that many widgets include drop-down modifiers.
Reports & Business Intelligence
The Units module includes a dedicated reports tab to generate built-in and custom reports about your units.
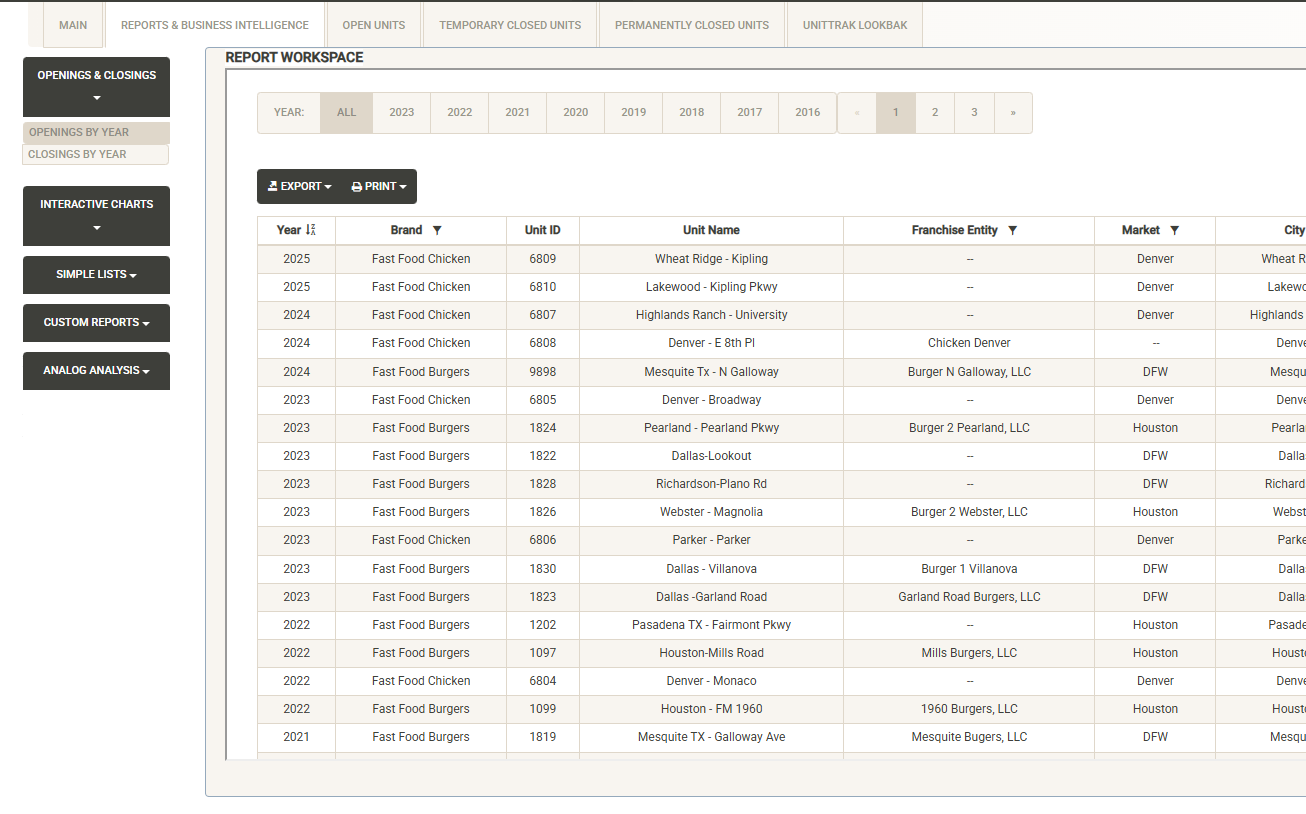
The left side of the page includes report categories including Simple Lists, Interactive Charts and Custom Reports (Note – Reports can be customized by client). Click on a category to open the report list, then select the report you wish to view. The Report Workspace window shows the selected report. Here you can again use the sorting and filtering options to customize your report output. You can export or print the report. Export options include PDF, Excel and CSV output of your report.
See the Reports section for more details about the reports included in the base system.
Open Units
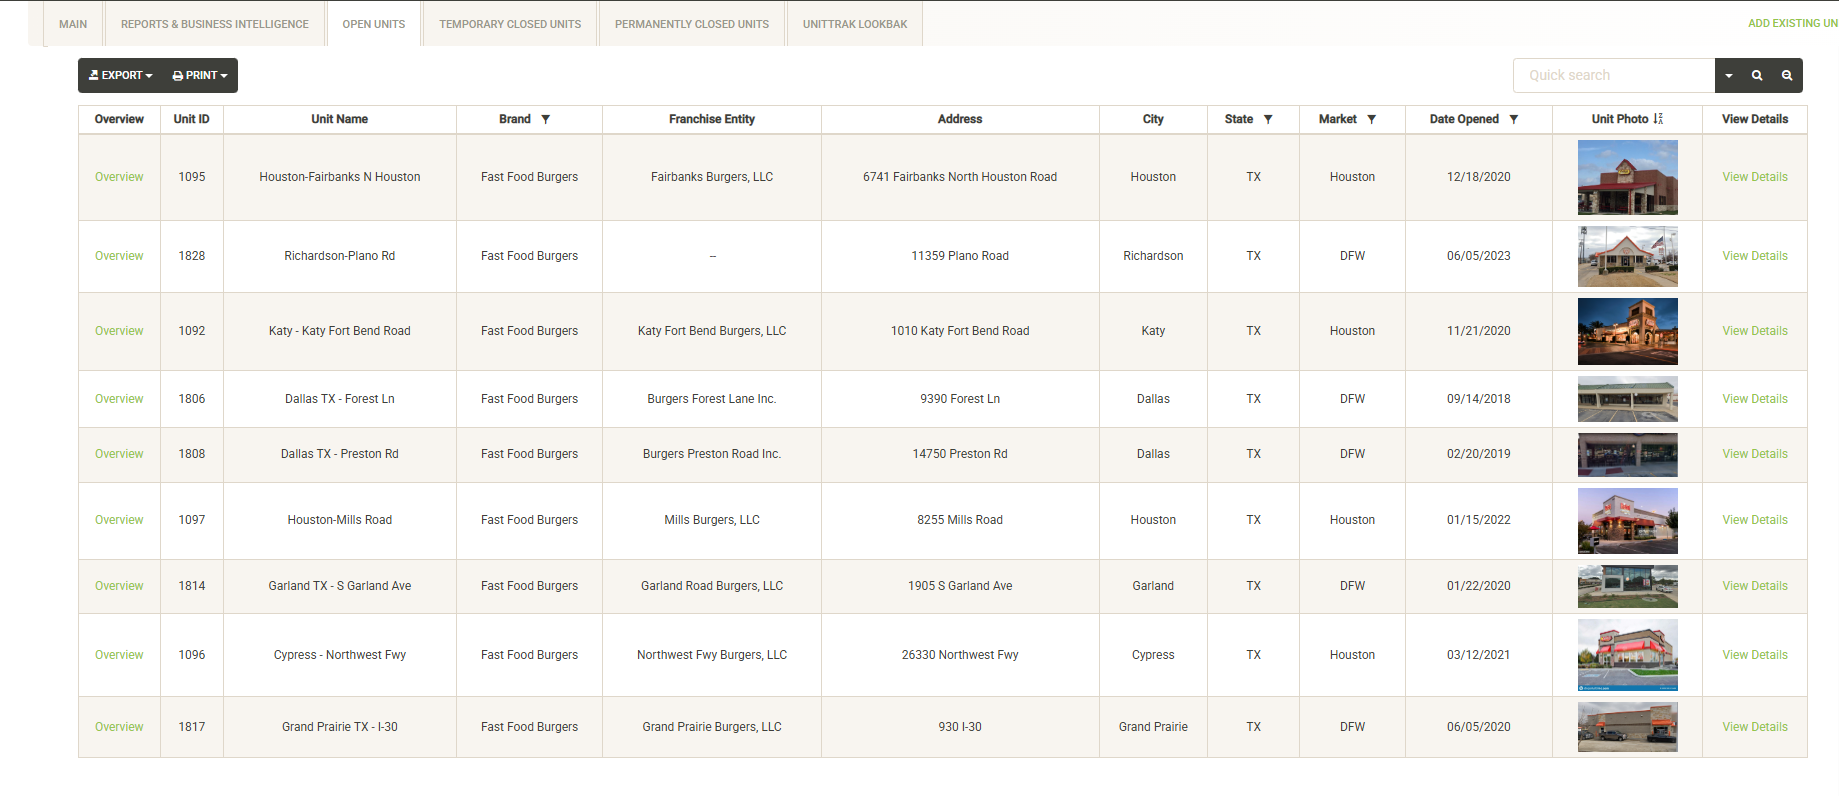
The open units tab allows you to navigate your full list of open units. You can use the sort and filter options in the column headers to customize the list. You can also print or export the unit list from this screen. Once you’ve located your unit, you can quickly access the unit’s overview report by clicking on the “Overview” link next to the Unit ID. To access or edit the unit details, click on the “View Details” link to the far right of the unit information. See the Unit Details section for more information about the various options within Unit Details.
You can also add an existing (already open) unit here by clicking on the Add Existing Unit dropdown in the upper right corner of the screen. See the Adding an Existing Unit section for more information about this.
Temporary Closed Units

Displays units that are temporarily closed including remodels and relocations. You can use the sort and filter options in the column headers to customize the list. You can also print or export the temporary closed list from this screen. Once you’ve located your unit, you can quickly access the unit’s overview report by clicking on the “Overview” link next to the Unit ID. To access or edit the unit details, click on the “View Details” link to the far right of the unit information. See the Unit Details section for more information about the various options within Unit Details.
Permanently Closed Units
Displays units that have been permanently closed including sold units. You can use the sort and filter options in the column headers to customize the list. You can also print or export the permanently closed list from this screen. Once you’ve located your unit, you can quickly access the closed unit’s overview report by clicking on the “Overview” link next to the Unit ID. To access the closed unit’s details, click on the “View Details” link to the far right of the unit information. See the Unit Details section for more information about the various options within Unit Details.
UnitTrak LookBak
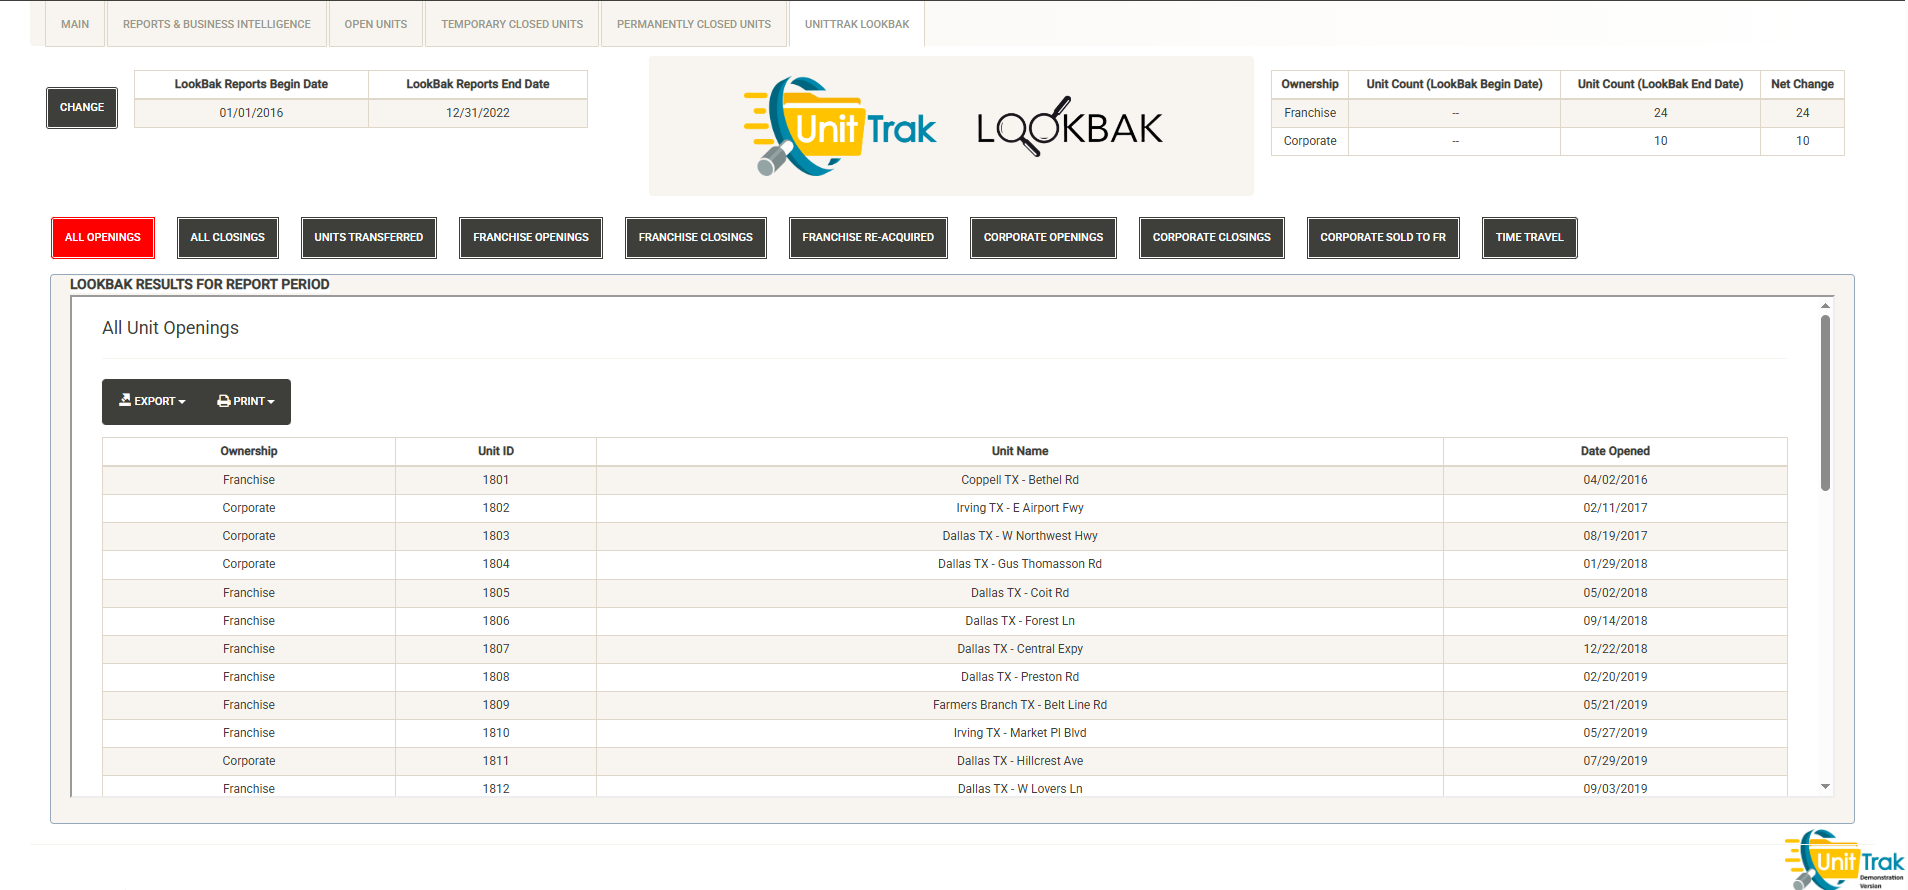
Access historical information about your portfolio for any custom reporting period. UnitTrak Lookbak is designed to make compliance reporting such as the Franchise Disclosure Document easier by displaying information about openings, closings and ownership transfers. The Time Travel feature allows you to choose a specific date and view your portfolio information as of that date.
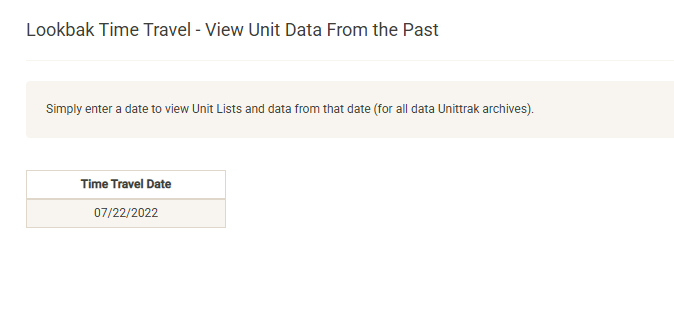
After entering the date, you can view your open, temp closed, and permanently closed units by ownership type as of the date entered. You can also click on the Overview link to view the Unit Overview information as of the date selected.
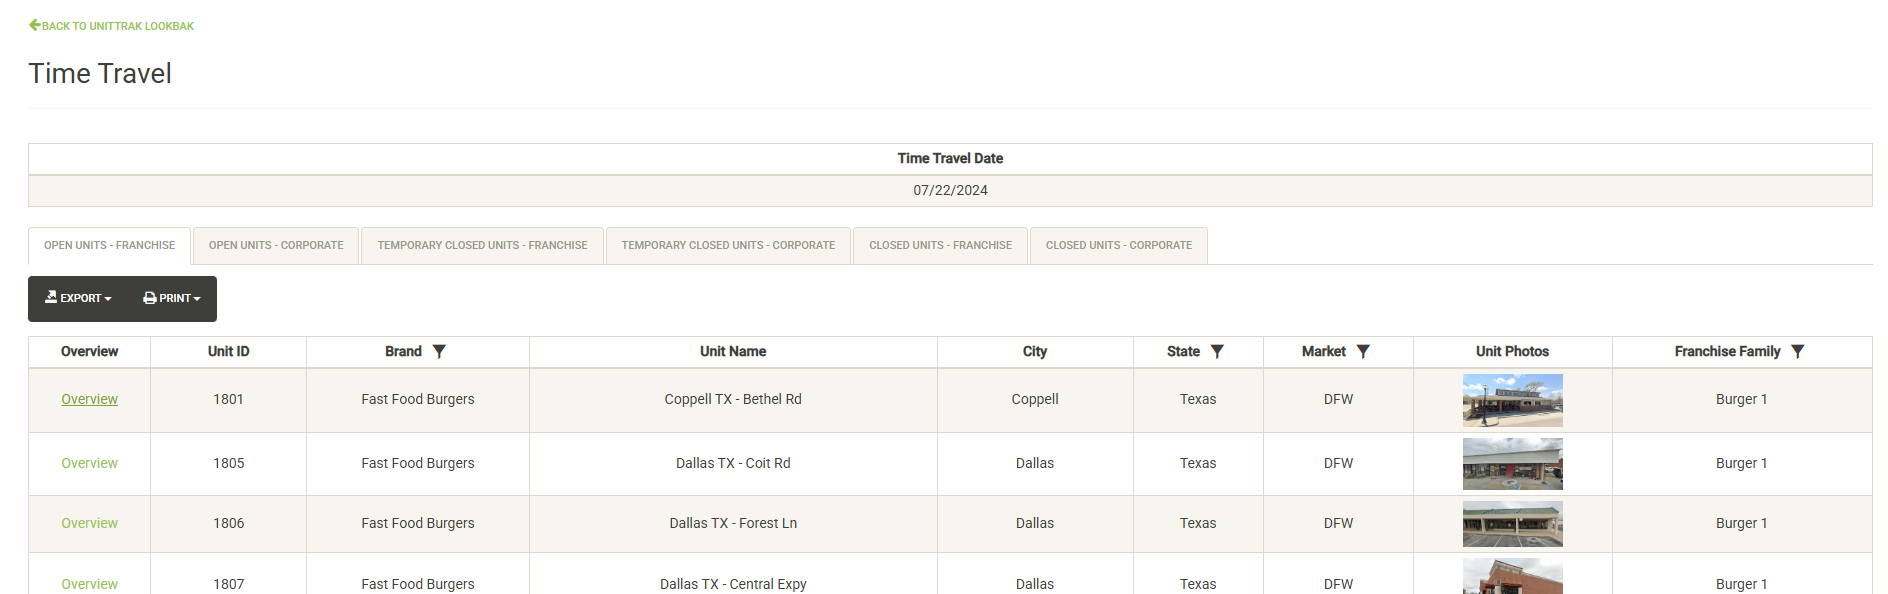
Time Travel accounts for lifecycle changes when presenting these results – if a currently closed unit was still open on the time travel date, it will be listed in the open units list. If a unit was purchased by a new franchisee after the time travel date, the previous ownership information will be shown on the Time Travel Overview report.
See the UnitTrak LookBak section of this guide for more information about UnitTrak LookBak.
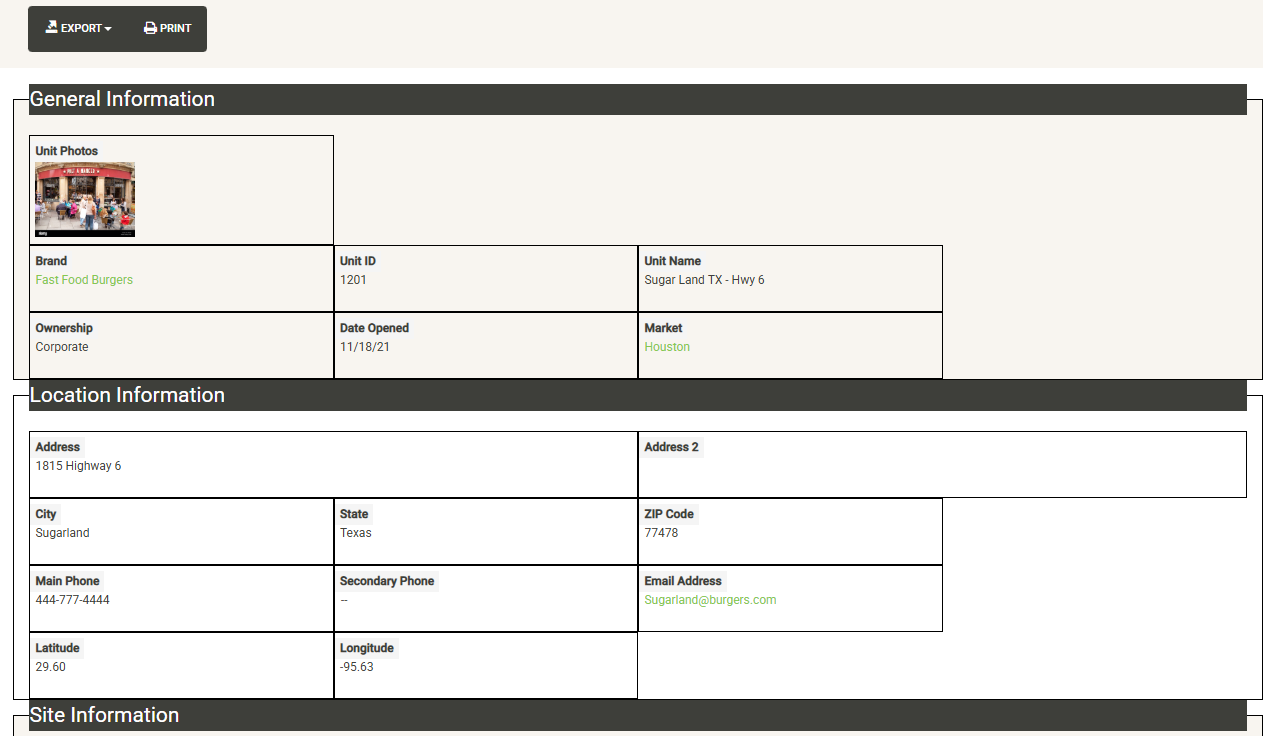
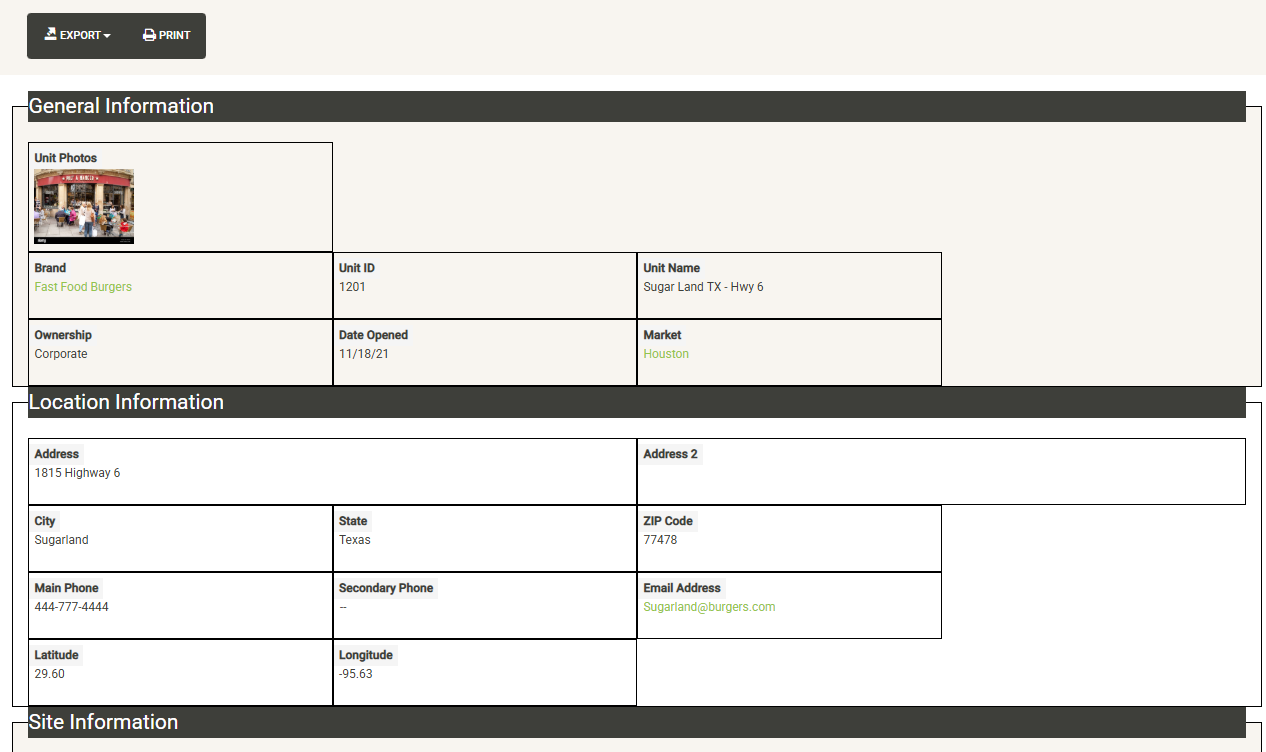
Unit Details
Once you’ve located your unit and clicked on “View Details” from one of the various unit lists, you will be taken to the Unit Details page for your selected unit.
Across the top of the page are key details about the unit visible in each section. Below this are tabs covering various categories of data (note – the tabs visible in your version may vary).
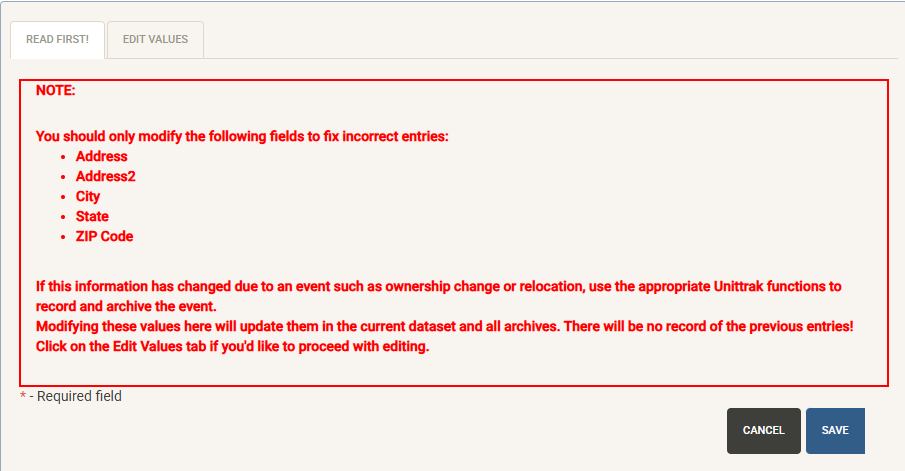
Address Information
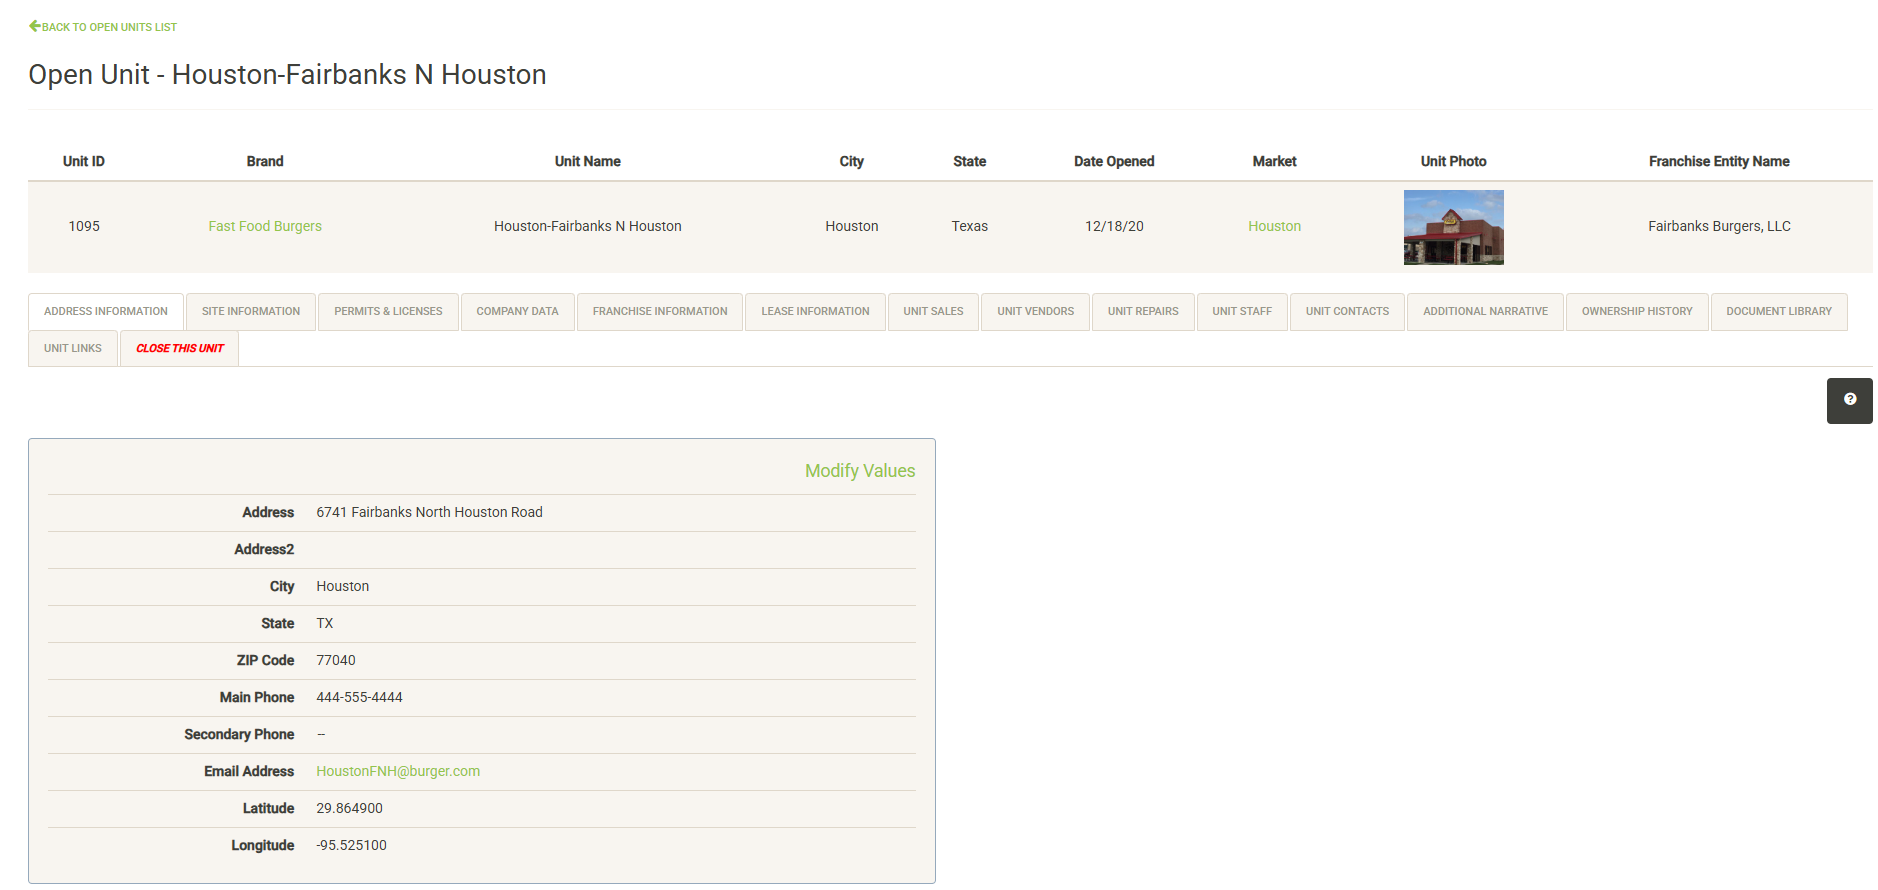
Displays Address information for the unit. Users with the proper permissions can click on Modify Values to make changes or additions. If the unit has actually changed addresses due to a relocation you should always follow the proper relocation steps to ensure that the relocation information is properly archived in UnitTrak. You will be warned of this when you click on Modify Values.
Note: Lat/Long data must be entered for the project to display on the maps. You can use Google maps to quickly obtain a lat/long for your site.
Site Information
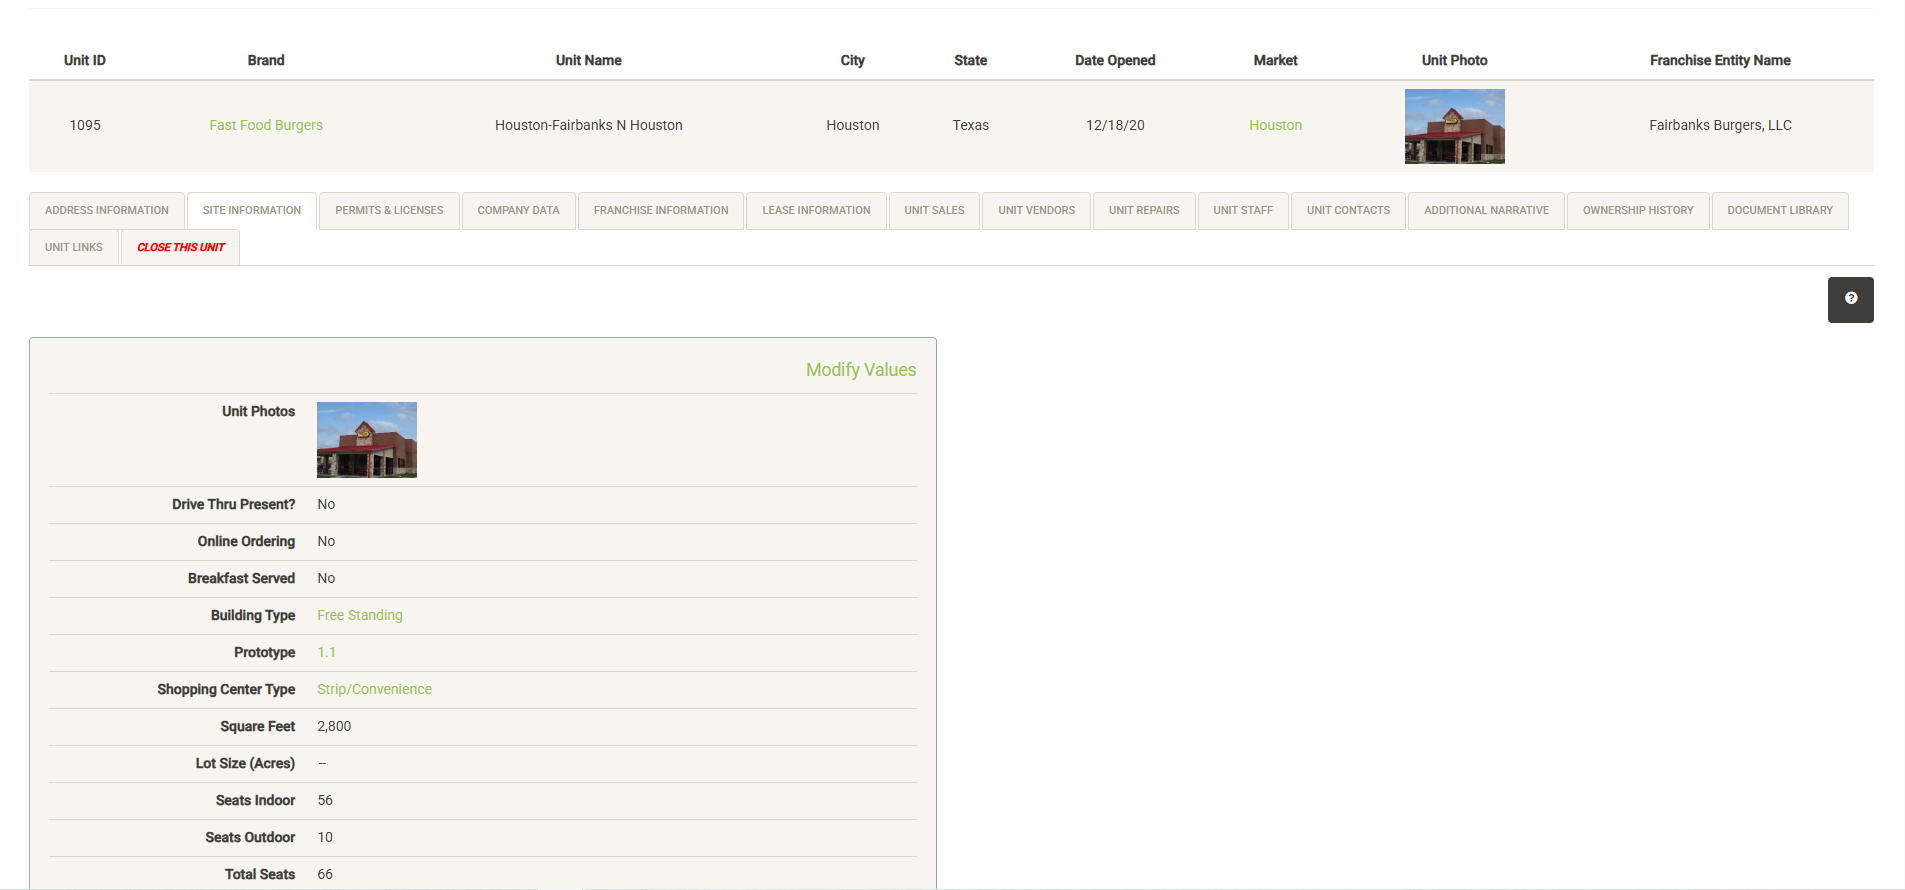
Displays attributes and information about the site of your unit (Note – the available items may be different in your version). This includes building and lot information, unit photos and site ratings. Click “Modify Values” (only visible with proper permissions) to update the information on this page. Many of the options available here can be modified in the Administration section.
Many of these attributes can be used in the Analog tool for measuring unit performance by attribute.
Permits & Licenses
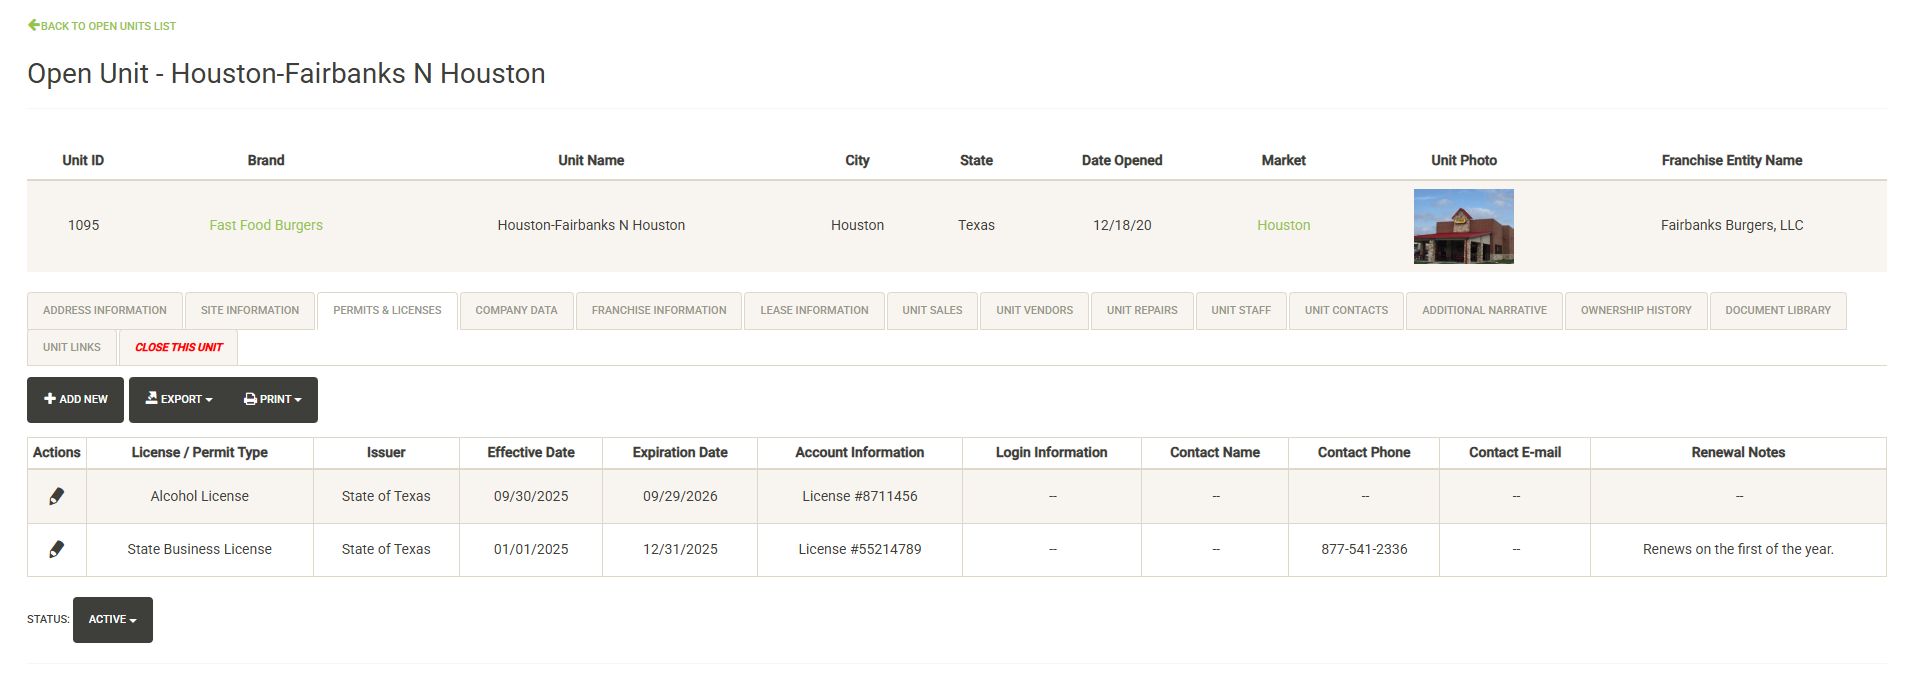
Displays the list of permits and licenses being tracked for the unit within UnitTrak. The list includes the license issuer, effective and expiration dates and additional information for managing or renewing. You can quickly print or export the list using the controls above the list.
Use the edit pencil to edit or update the information for any permit or license. To add a new item, click the Add New button.
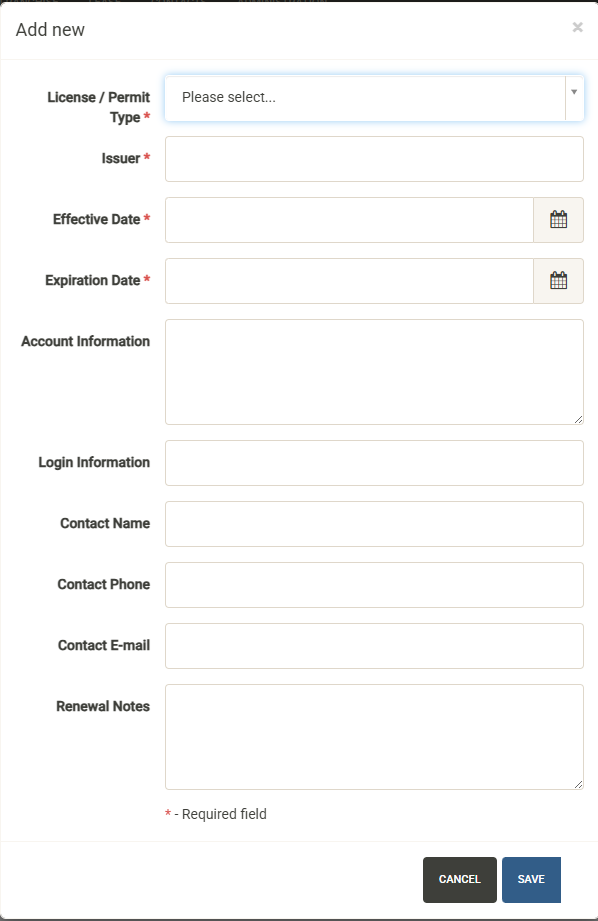
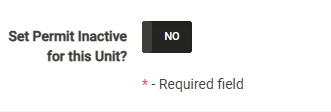
If you are no longer tracking a permit or license, you can mark it inactive in the edit form.
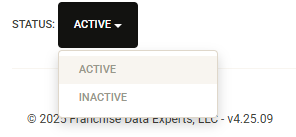
To view inactive items, use the status item below the list to switch between active and inactive.
Note – if you track permits and licenses, you can add a widget to the main dash page displaying upcoming expirations.
Company Data
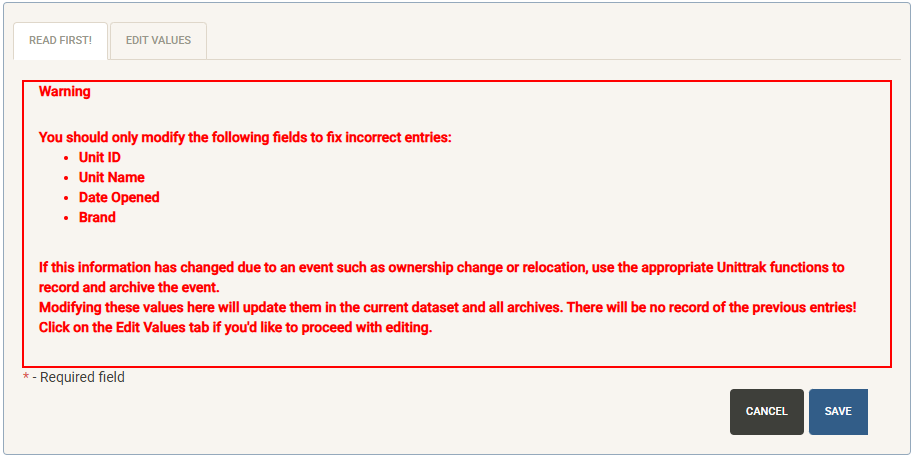
Displays internal classifications and attributes about your project including Ownership information, name and ID, Brand and Market. Most of the data on this tab must be finalized before the unit is open including Unit ID, Unit Name, Brand, Market and ownership type. If you need to make changes to any items here, you will receive a warning first that you must follow the proper procedures in the event of a milestone event such as an ownership change or remodel that may have warranted the change. As noted, edits here are only for correcting errors. Making changes to critical items such as Date Opened without tracking a corresponding event will prevent the archival tracking from working properly.
Ownership Transfers
If you are tracking both franchisee-owned and corporate-owned units, you will have the option to transfer ownership here.
Transfer to Franchisee
![]()
If your unit was opened as a corporate unit, you will have the option to transfer ownership to a franchisee. Selecting this option opens the Transfer form. You will be required to complete critical information about the Franchise Agreement, so it is recommended you complete this process once the transfer paperwork has been finalized.
![]()
First select the Franchise Family that is acquiring the unit. Next, provide the Franchise Entity Name as shown on the Franchise Agreement. Add the Effective and Expiration dates of the Franchise Agreement as well as a description of the Protected Area if one exists. Next, select the number of renewal options in the agreement and the renewal term in years. Finally, if the unit will fulfill a portion of a Development Agreement for the Franchise Family, select the agreement this unit applies to.
Upon completion of the required information, the unit will be transferred to franchise ownership and the transfer will be logged in UnitTrak for later retrieval using tools such as UnitTrak LookBak.
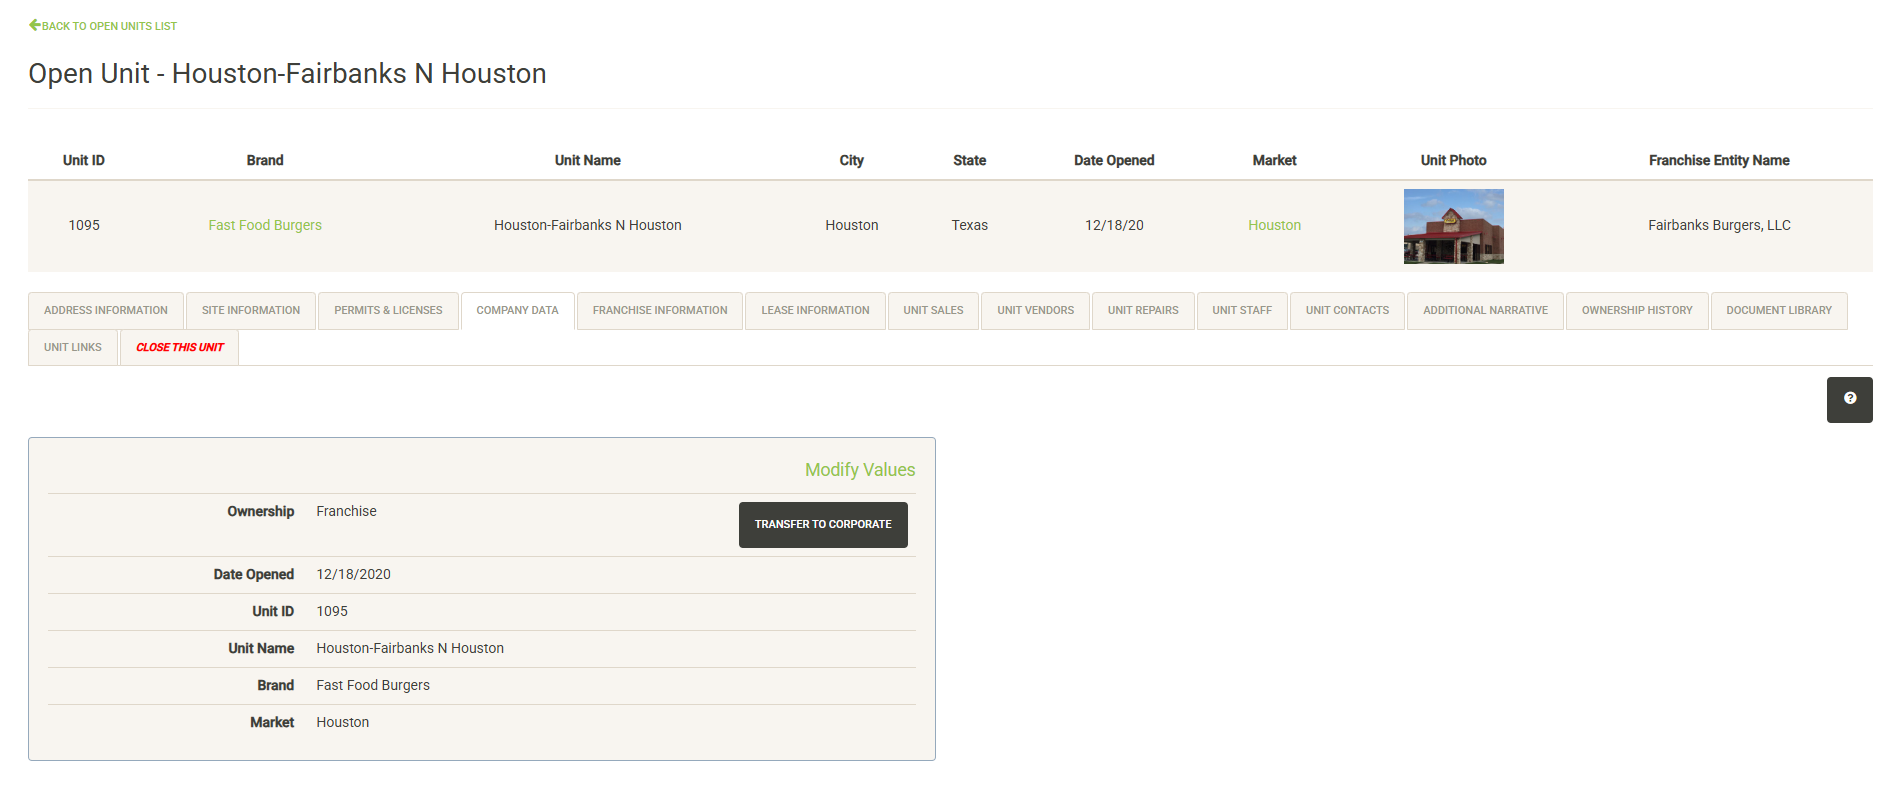
Transfer to Corporate
![]()
If a unit was opened as a franchise unit, you will have the option to transfer it to corporate ownership here. Selecting this option opens the transfer form.
![]()
Transferring ownership to corporate will automatically terminate the franchise agreement. You will be required to enter the FA termination date and the transfer date in order to complete the transfer.
Upon completion of the required information, the unit will be transferred to corporate ownership and the transfer will be logged in UnitTrak for later retrieval using tools such as UnitTrak LookBak.
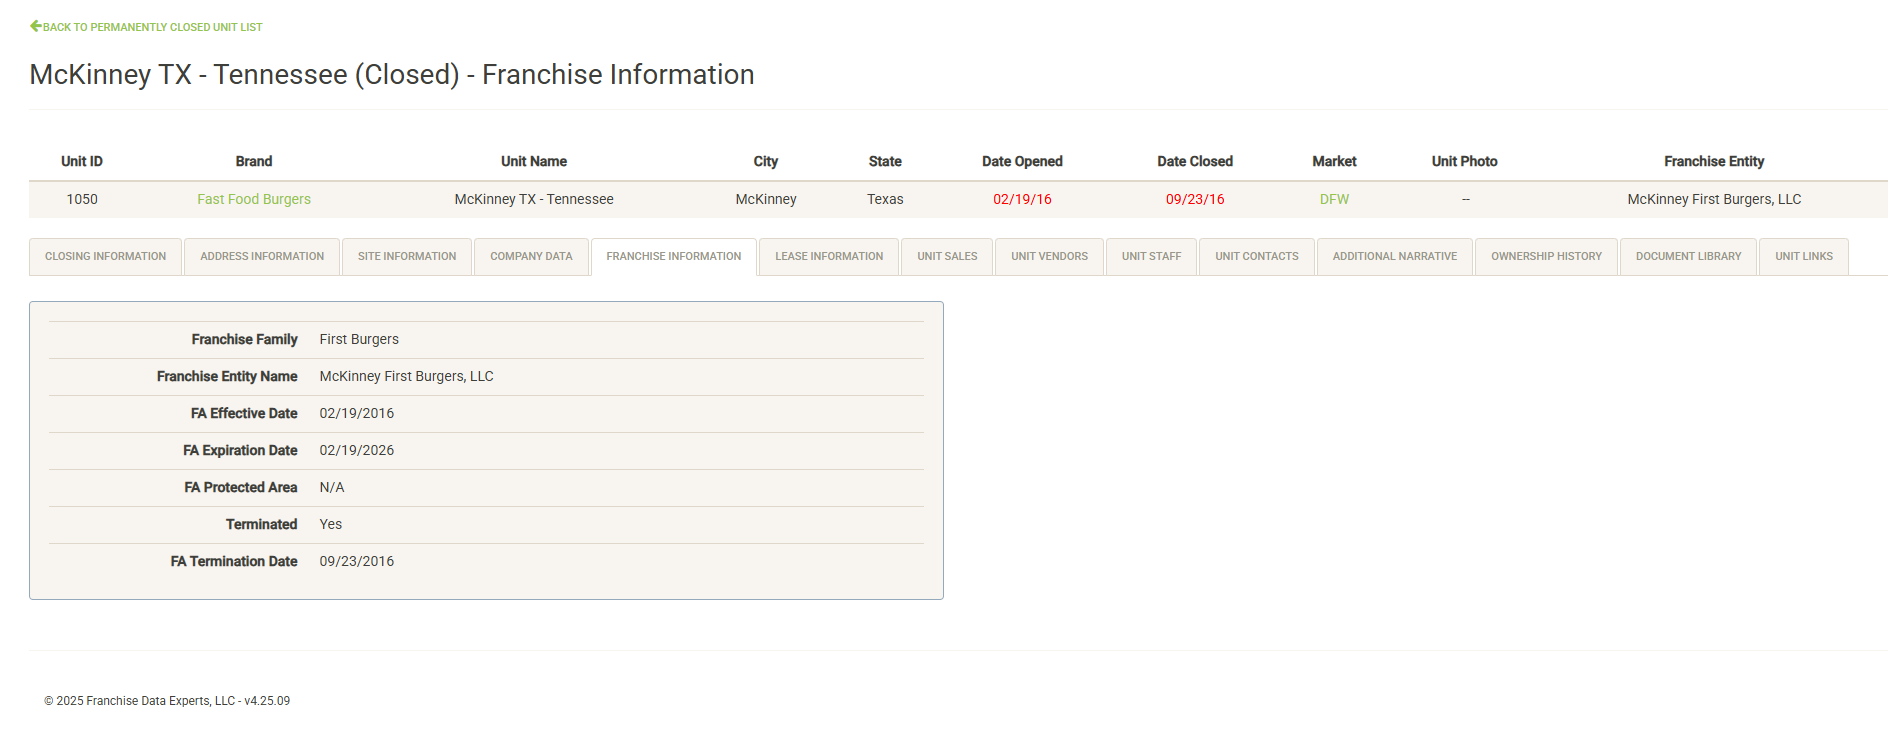
Franchise Information
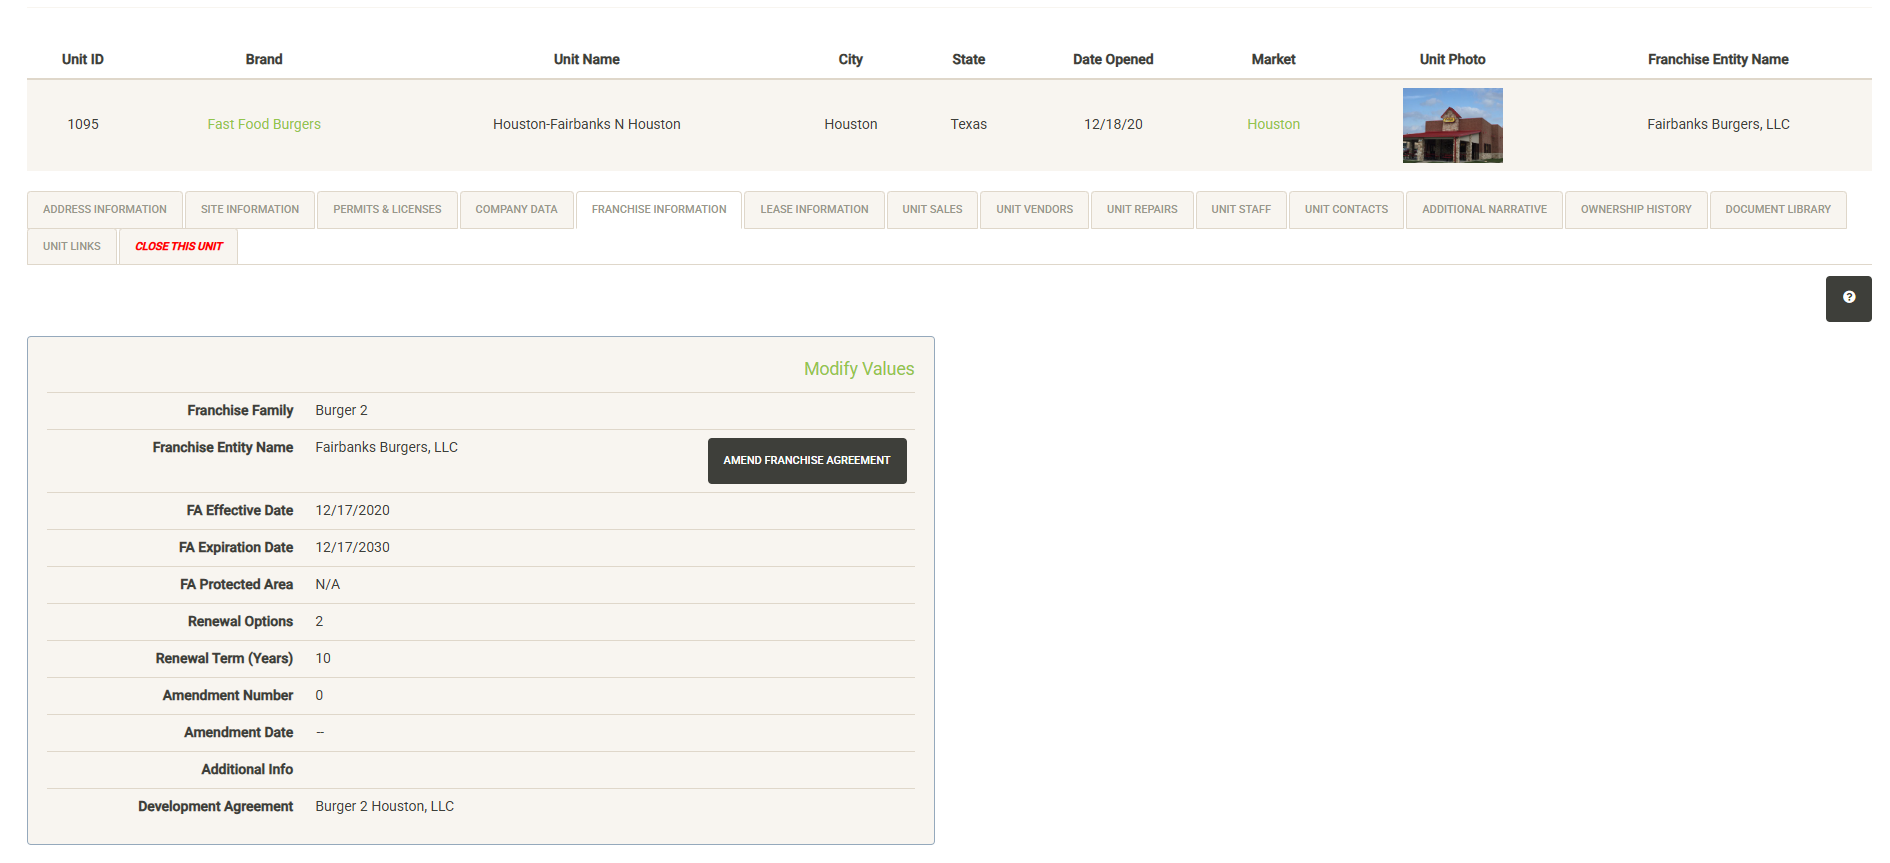
If your unit is configured as a Franchise unit you will see this tab within the unit details. This tab displays the status of your Franchise Agreement including the Franchise Family, milestone dates before signing as well as the details of the signed agreement. See the Franchise Agreements section for more details about UnitTrak’s various franchise configurations.
Once an agreement has been signed (a requirement to open a franchise unit in UnitTrak) most information cannot be edited unless you process an amendment to the agreement. Click on Modify Values (only visible with proper permissions) to add additional notes to the agreement or to assign this unit to a development agreement.
Click Amend Franchise Agreement (only visible with proper permissions) to process an amendment to the agreement.
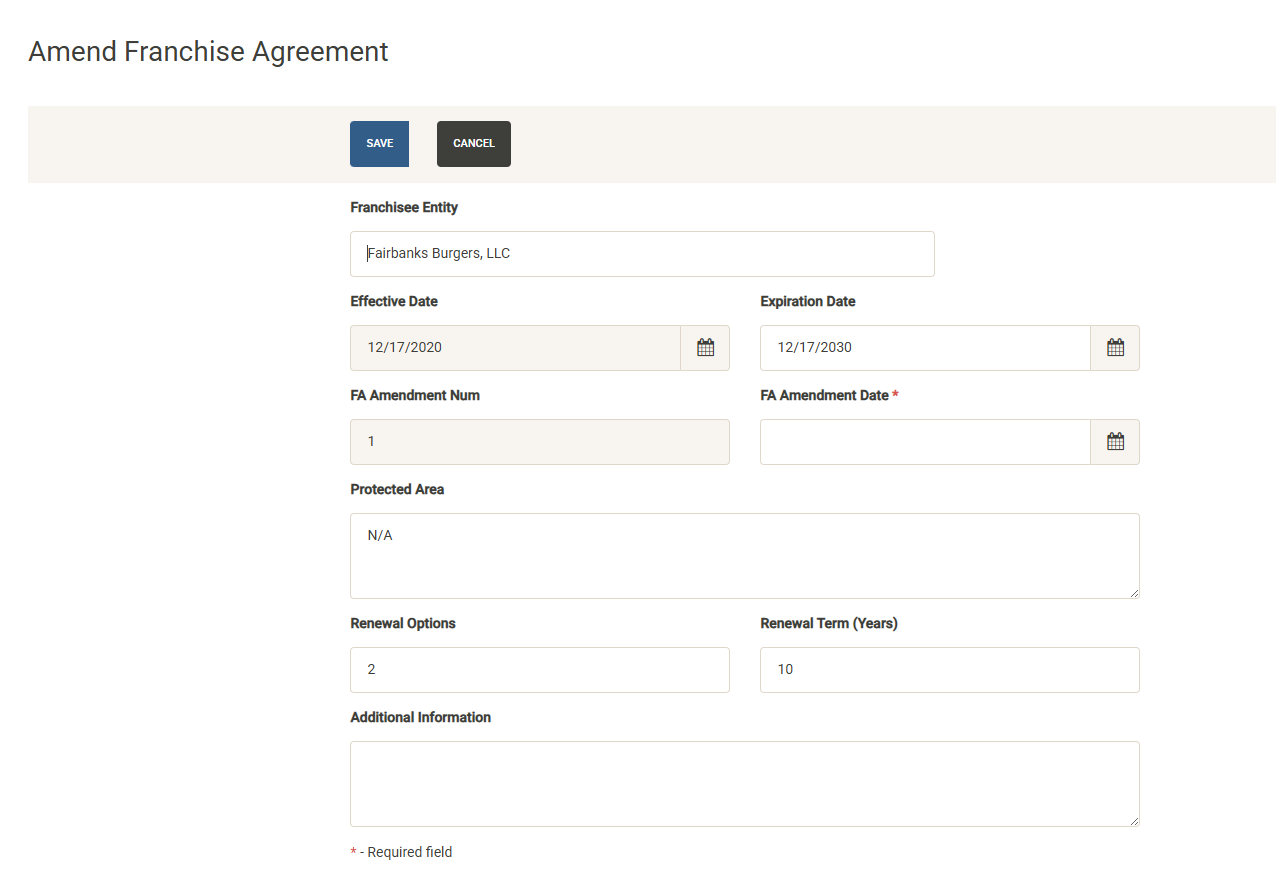
The Amend Franchise Agreement form allows you to change information about the agreement. Note that the effective date cannot be changed (in order to change the effective date, terminate the current agreement and start a new agreement). You can modify the entity name, change the expiration date, update the protected area, the number of renewal options and the renewal term, and add additional information to the amendment. You are required to enter the amendment date, the system will automatically track the amendment number.
Once saved the system will be updated with the new terms and reminder widgets will reflect the revised data.
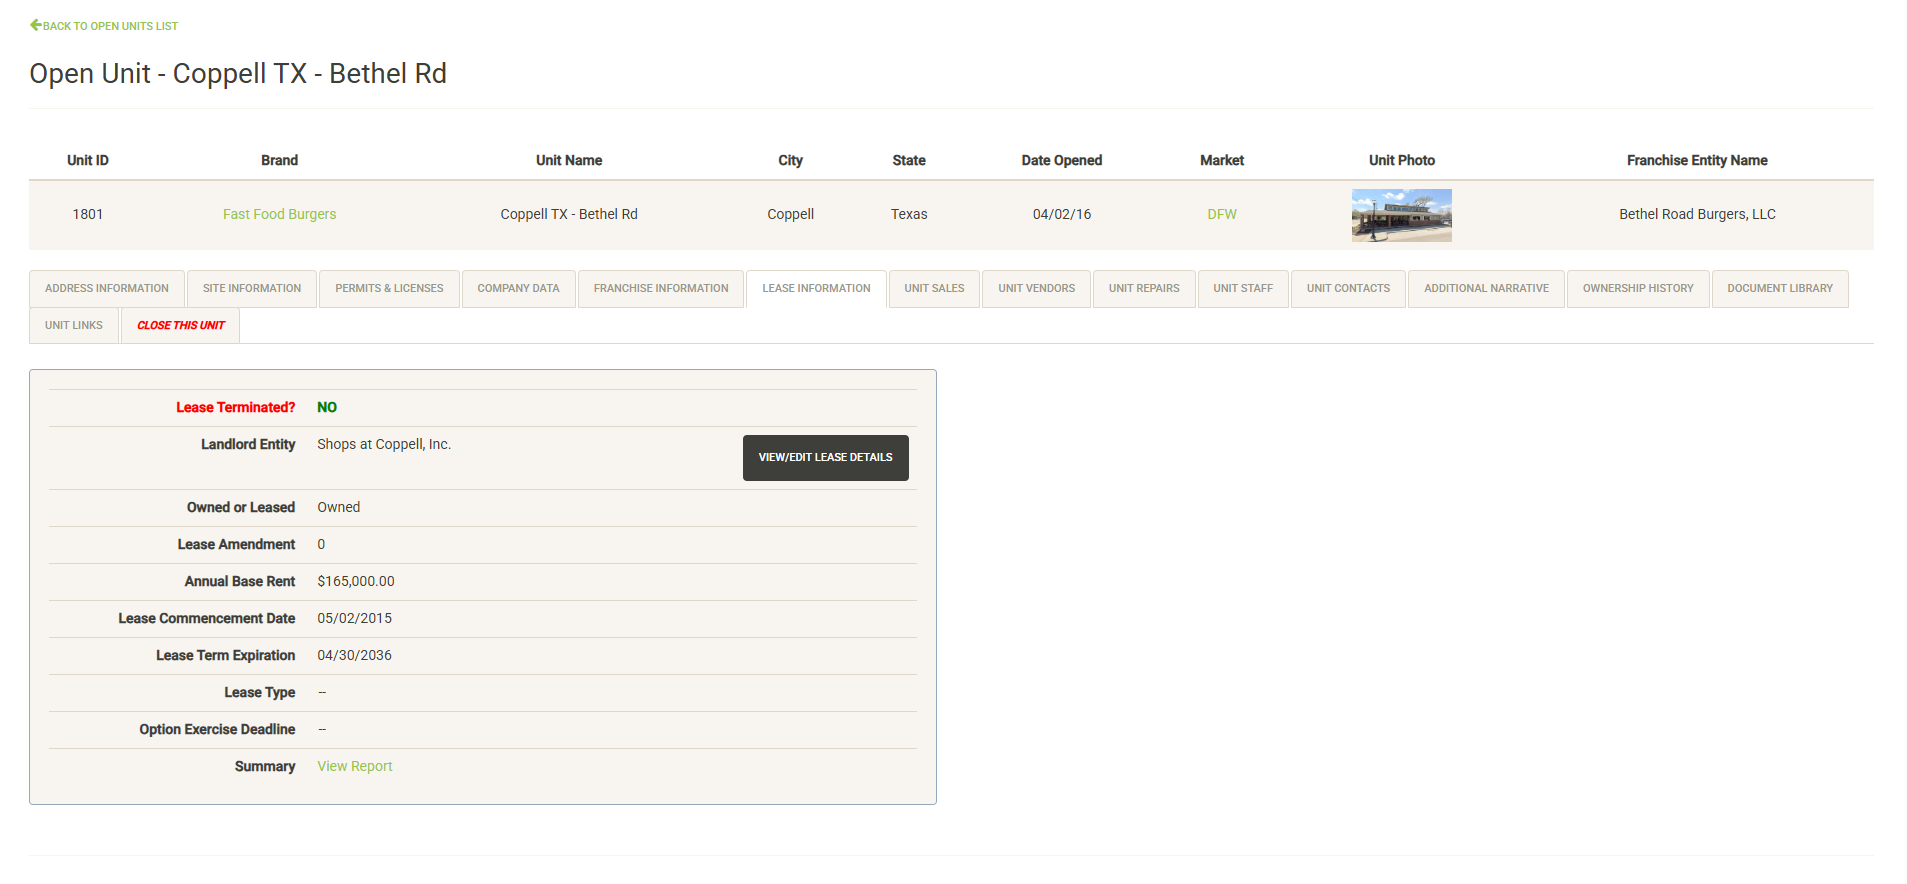
Lease Information
Displays information about the most current lease for the unit. If no lease currently exists, you have the option to add a new landlord and new lease.
If there is an active lease for the unit and you have the proper permissions, the View/Edit Lease Details button will be visible. Clicking the button will take you into the Lease Module where you can view or edit all of the lease information. You can read more about the Lease Module here.
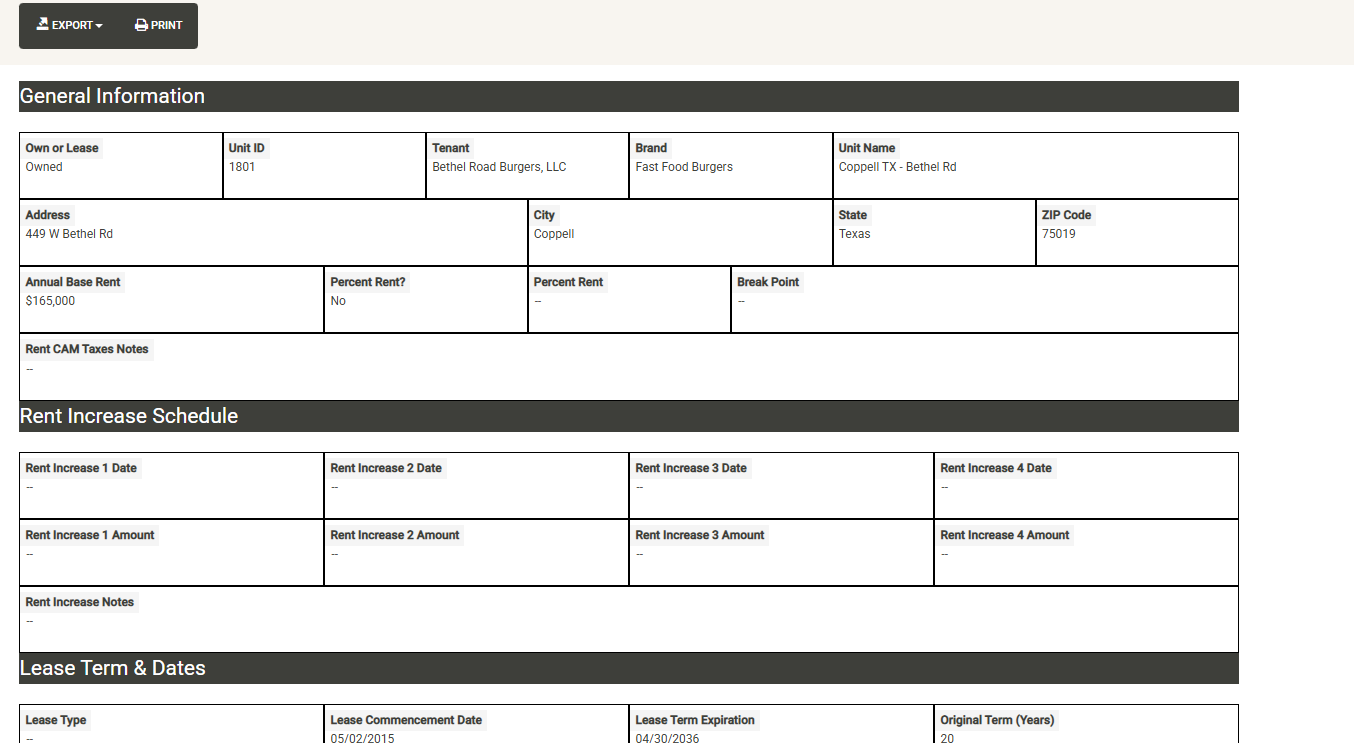
The Summary link provides a quick lease overview report that can be printed or exported and shared.
Unit Sales
If you are loading sales data into UnitTrak (contact us for various methods of importing sales data) this page will display sales information for the unit for the active sales period (changed in the Administration module).
Sales data adds significant functionality to UnitTrak, enhancing available reports and enabling the Analog Analysis tool and is highly recommended but not required in UnitTrak.
Unit Vendors

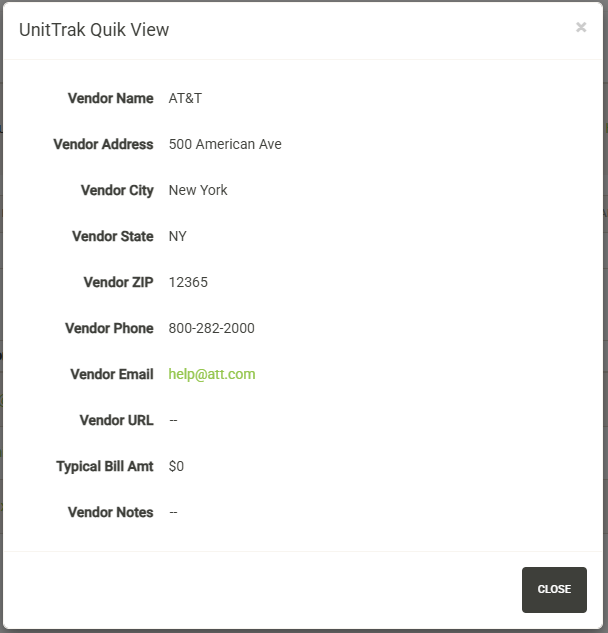
Displays the list of vendors assigned to the unit. The vendor list includes details such as unit-specific contact information, account information and notes about the account. You can quickly print or export a report with this data. You can also click on the Vendor Name to view the master information about the unit from the vendor directory.
You can add new vendors to the unit (with the proper permissions) by clicking on the “Add New” button.
Note that the vendor must first be added to the vendor directory before it can be assigned to a unit or project. You can follow the link in the instructions to add the vendor to the directory if needed.
The vendor directory contains master contact information for the vendor. If the contact information is the same for each unit, or the vendor only serves one unit, no new contact information needs to be added here.
Select the Vendor Type from the dropdown, followed by the vendor name. You can then add unit/project-specific information for the vendor including phone number, email, account information, login information and payment information along with unit-specific notes.
Hit save to add the vendor to the project.
From the vendor list you can also filter the vendors to include those marked as inactive or just show active/inactive vendors:
You can edit existing vendor entries by hitting the edit pencil to the left of the vendor:
You can edit any of the unit/project specific data here or you can set the vendor to be inactive (with the proper permissions).
Unit Repairs
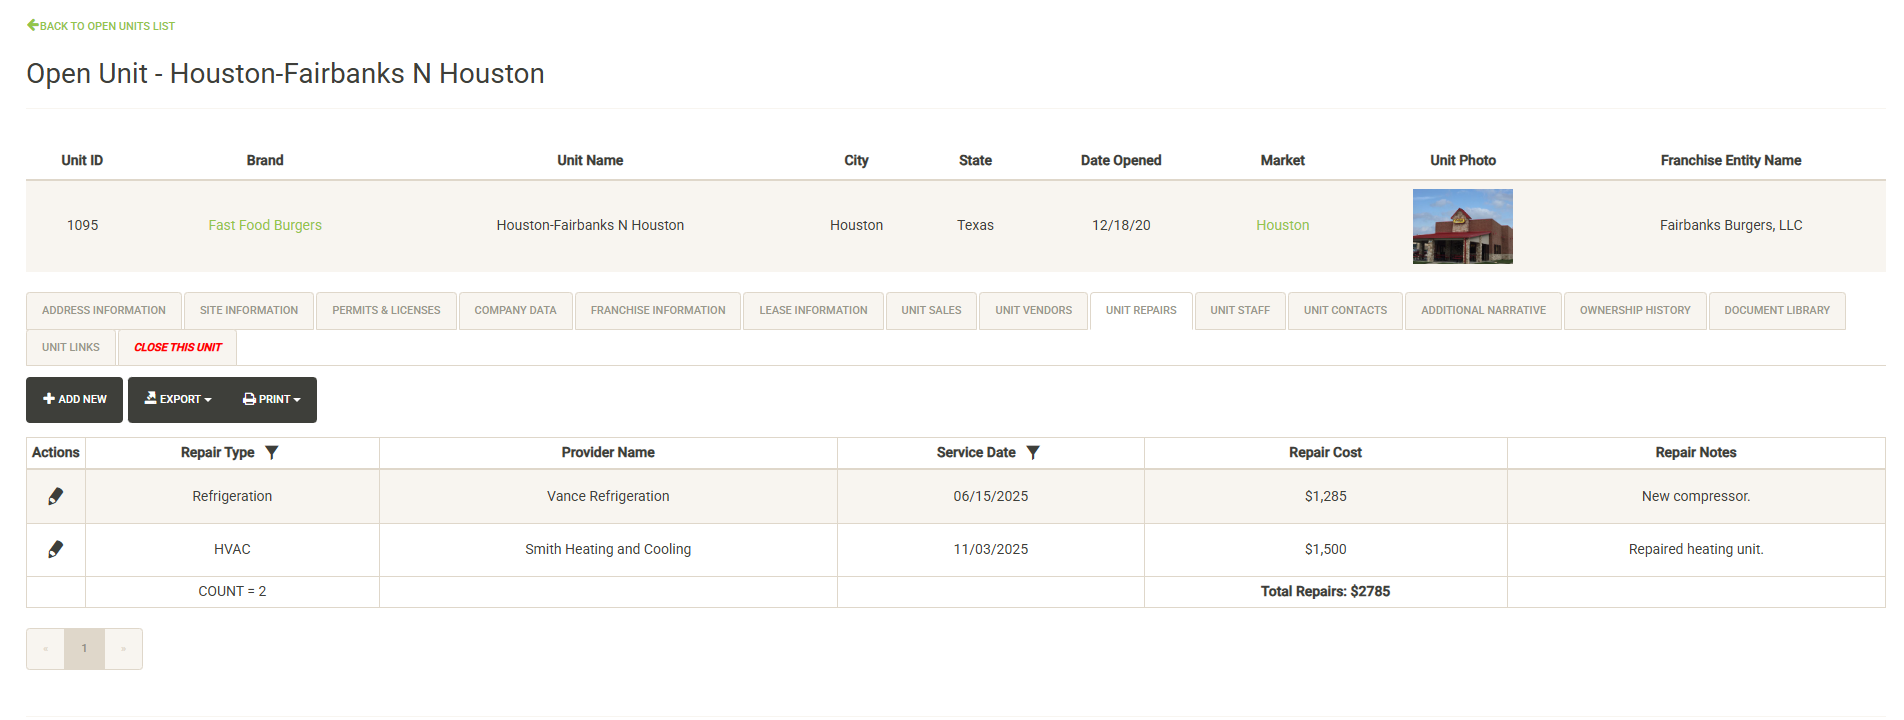
Displays the list of tracked repairs by unit. You can filter the list by repair type or service year to quickly see a summary of recent or outstanding problems. The bottom of the list provides a running total of repairs logged and total repair costs. Applying filters to the list will update these values.
Click Add New (with the proper permissions) to log a new repair for the unit.
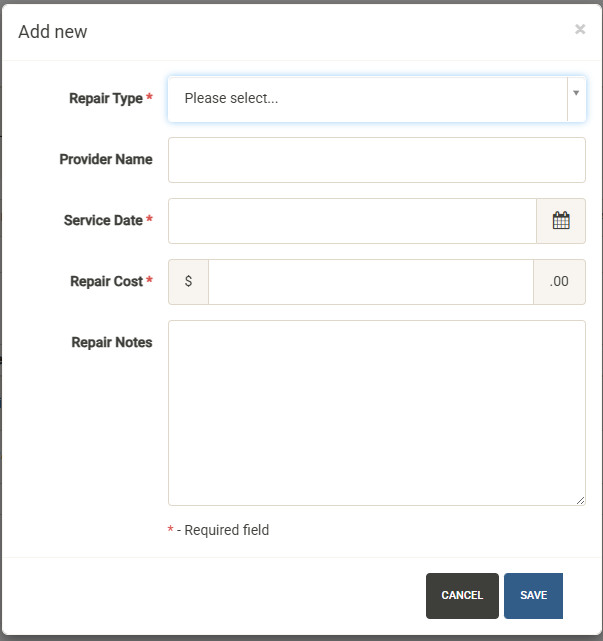
Repair Types can be configured in the Administration section. Hit save to log the repair after completing the required information.
Unit Staff
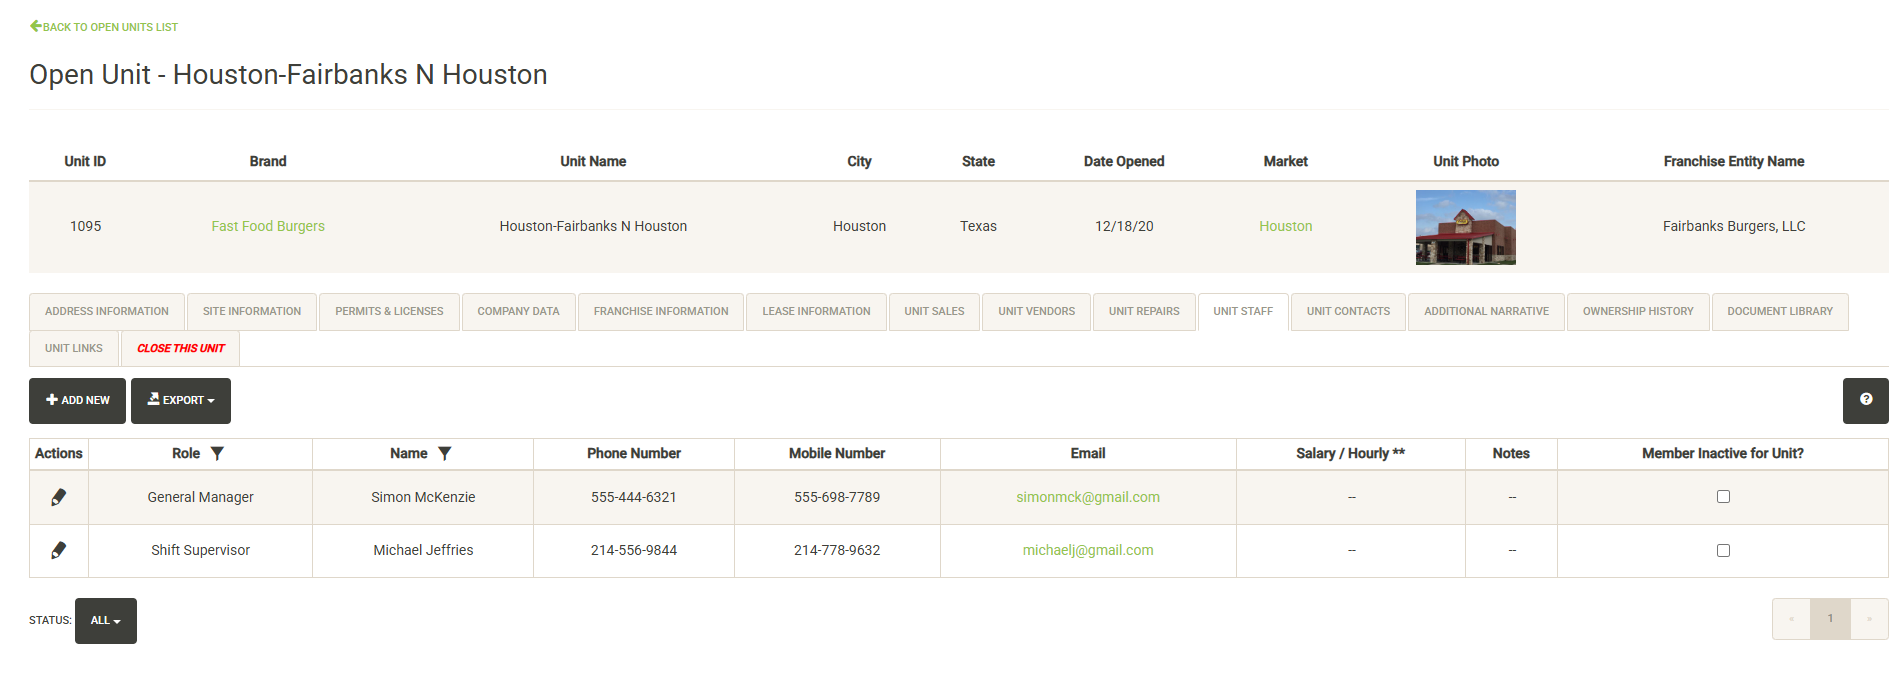
Displays members of the company staff assigned to the unit. The staff list includes details such as contact information, role and notes about the staff member. You can quickly print or export a report with this data.
You can add new staff members to the unit (with the proper permissions) by clicking on the “Add New” button.
Note that the staff member must first be added to the Company Staff page before they can be assigned to a unit or project. You can follow the link in the instructions to add the member to the Company Staff page if needed.
Select the Staff Role from the dropdown, followed by the member name. You can then add unit/project-specific notes for the member.
Hit save to add the staff member to the unit.
From the staff list you can also filter the members to include those marked as inactive or just show active/inactive vendors:
You can edit existing staff entries by hitting the edit pencil to the left of the vendor:
You can edit any of the unit/project specific data here or you can set the member to be inactive (with the proper permissions).
Note: If you need to change contact details about the member, these need to be edited in the Company Staff page.
Unit Contacts
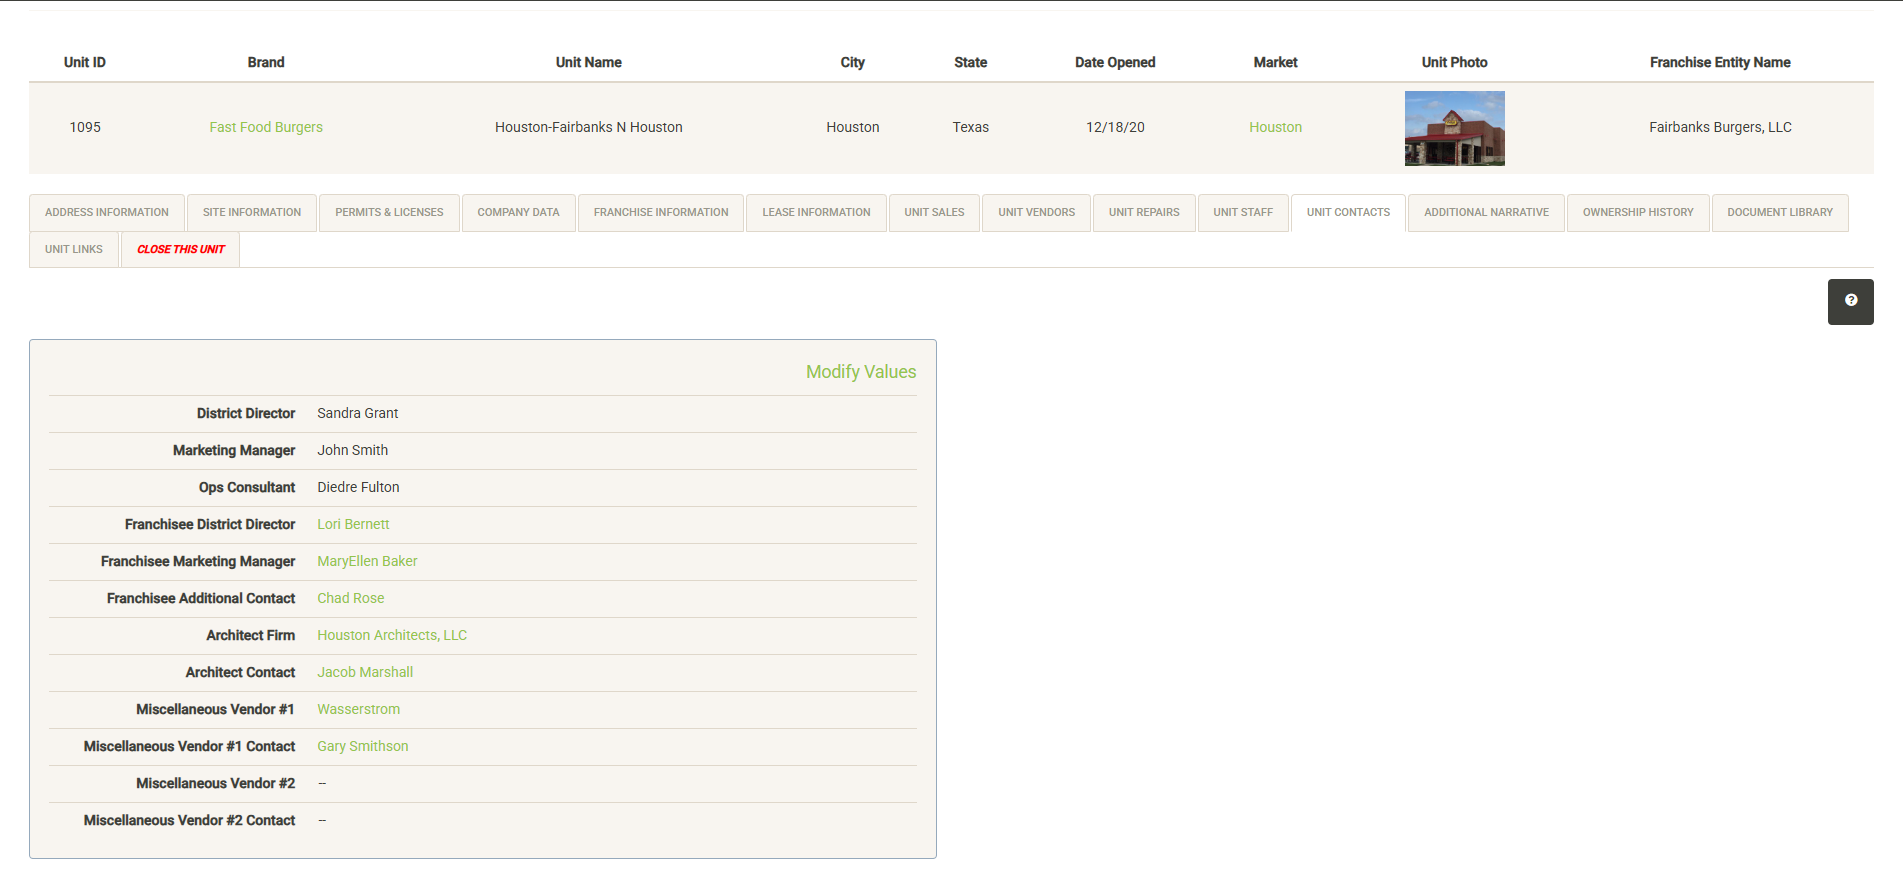
Displays contacts assigned to specific roles in each unit (these roles are customized during setup). Click on Modify Values to add or edit project contacts. Note that staff and outside contacts must first be added to the Contacts module in order to be available for selection here. When selecting internal staff, selections are filtered by role. Franchise Family Contacts are filtered by the assigned Franchise Family, while vendor contacts are filtered by the selected vendor.
Populating this data allows for generation of the Unit Contact Report from the Contacts module. To get quick contact information for anyone assigned to the project, just click on the name.
Additional Narrative
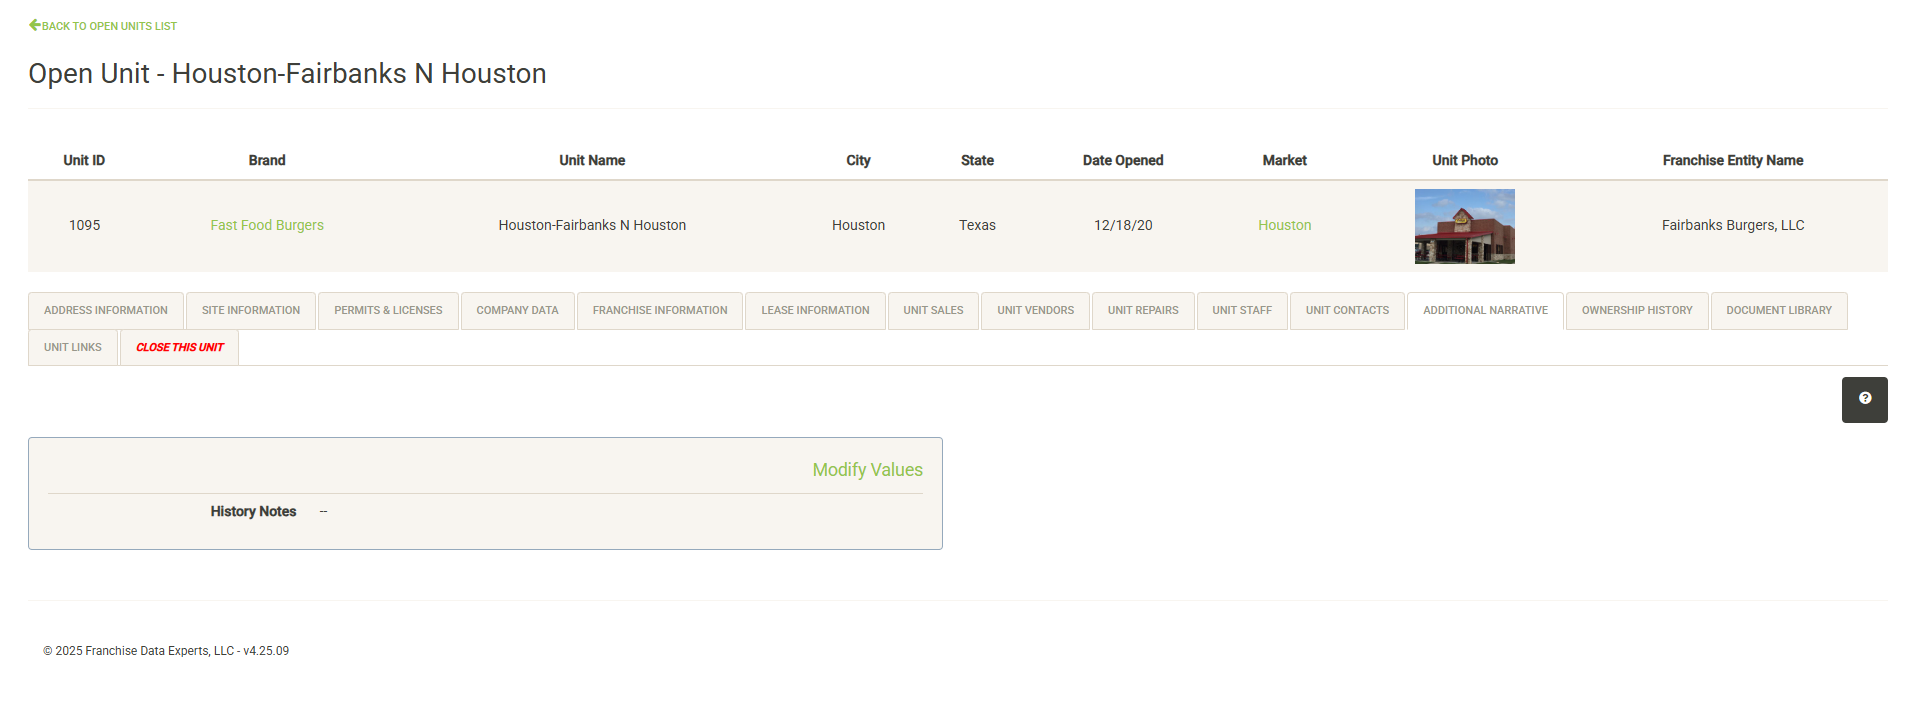
This section displays ongoing notes about the unit. Click on Modify Values to add or edit notes. These notes will continue to follow the unit through its lifecycle.
Unit History
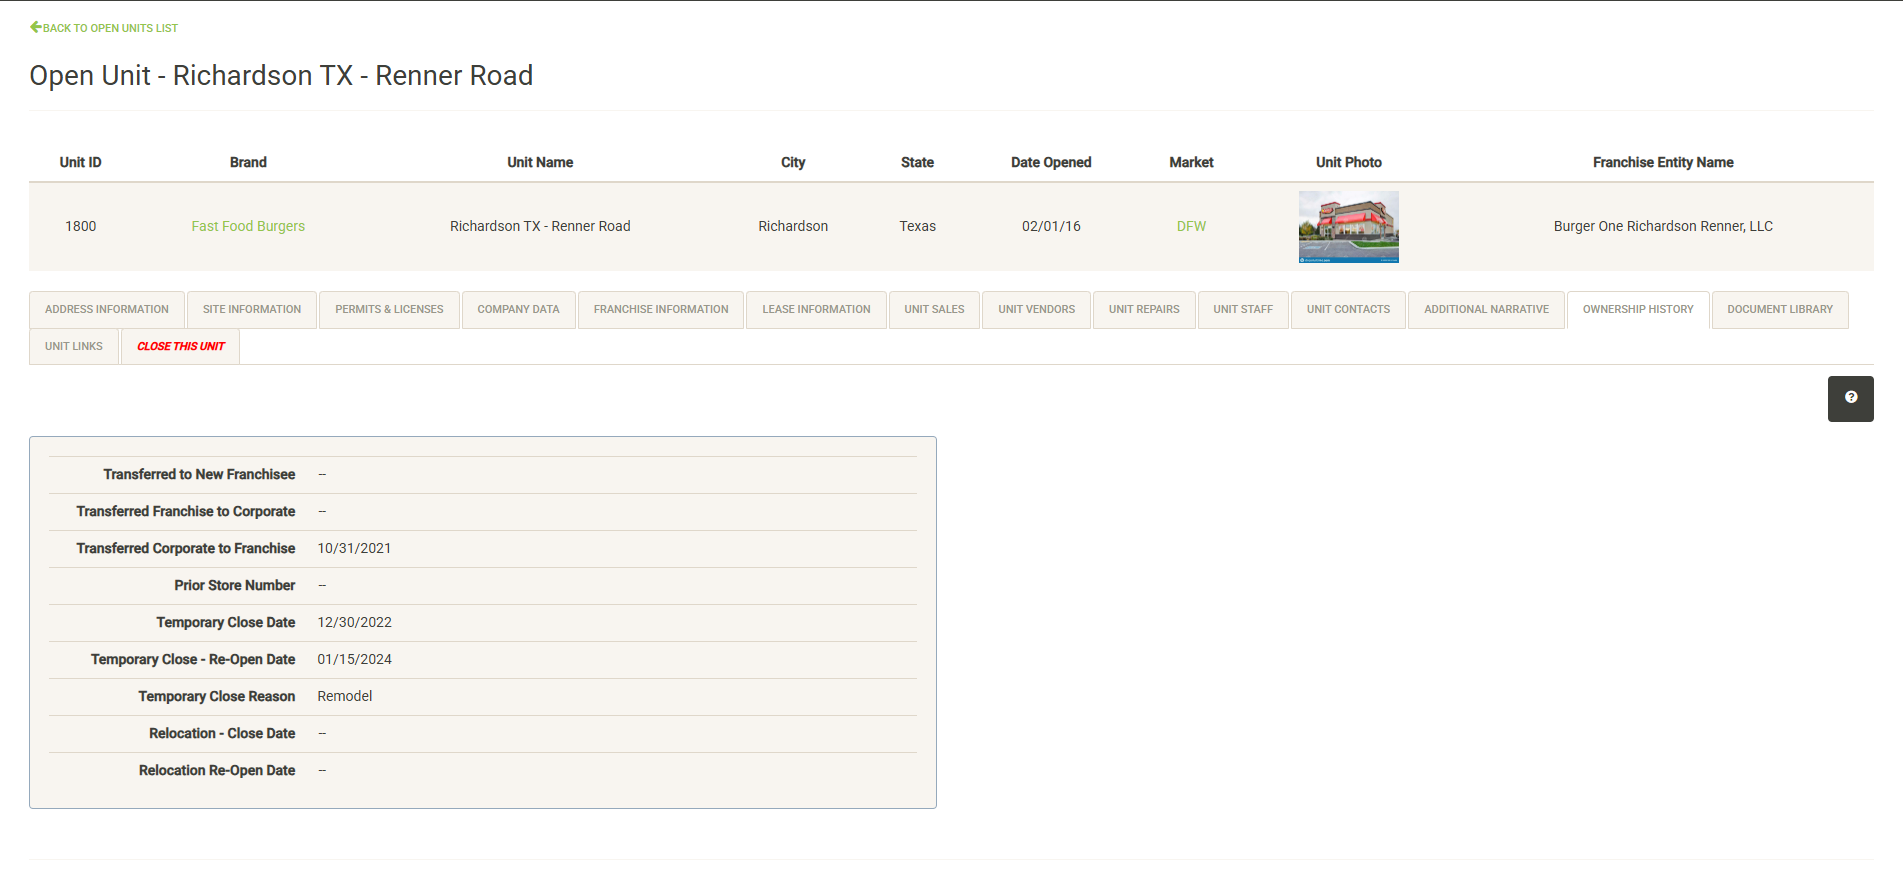
Displays the lifecycle events that have occurred for the unit so you can quickly track its journey. This is a non-interactive page, all entries here are based on following the steps to complete ownership transfers, temporary closures and other events.
Note – this information is included on the Unit Overview report.
Document Library
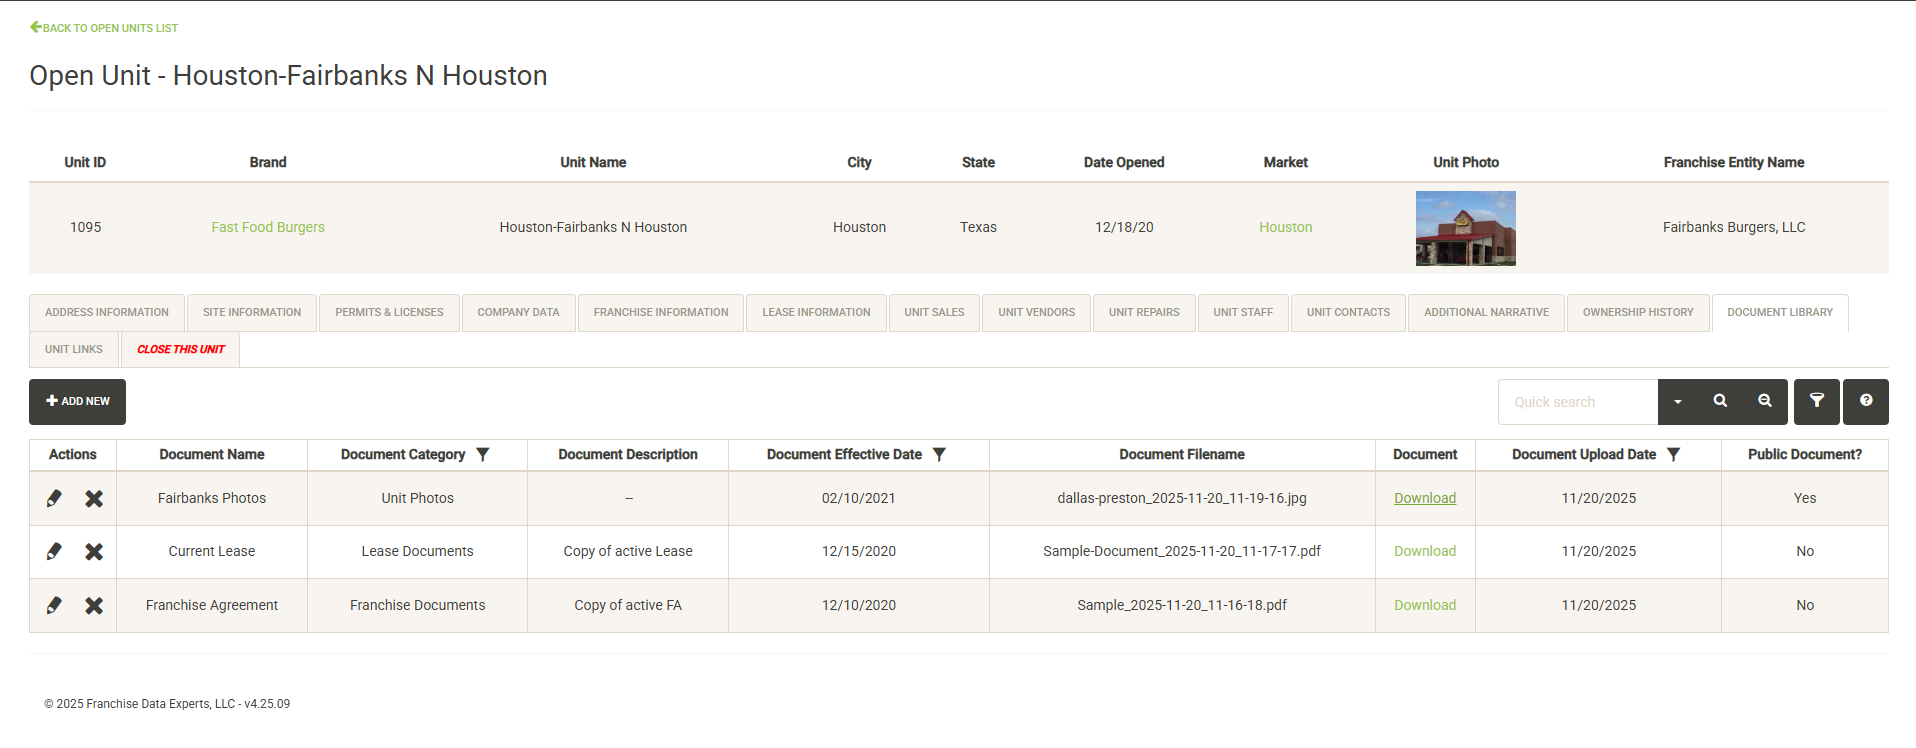
Displays the documents saved with the unit. Each document includes a category (defined in the Administration section), description, effective date, and upload date. You can also see if the document has been saved as a public or private document.
To download a document, click on the download link and the document will open in a new window.
To share a public document, you can simply copy the URL from the document window and share it with anyone inside or outside of your organization. Note – Private documents cannot be shared this way, the URL used to download the document is a private URL that cannot be shared outside of UnitTrak. These documents can only be viewed within UnitTrak.
The Actions column includes the ability to edit the data associated with a document (edit pencil) or delete the document from the server (X button).
To add a new document, click the Add New button. The Add Document form allows you to add a document name, category, description and effective date. Click Choose File to select your document. Finally, decide if the document will be public or private with the Public Document checkbox.
Hit Save to upload the document to the secure file server.
Unit Links
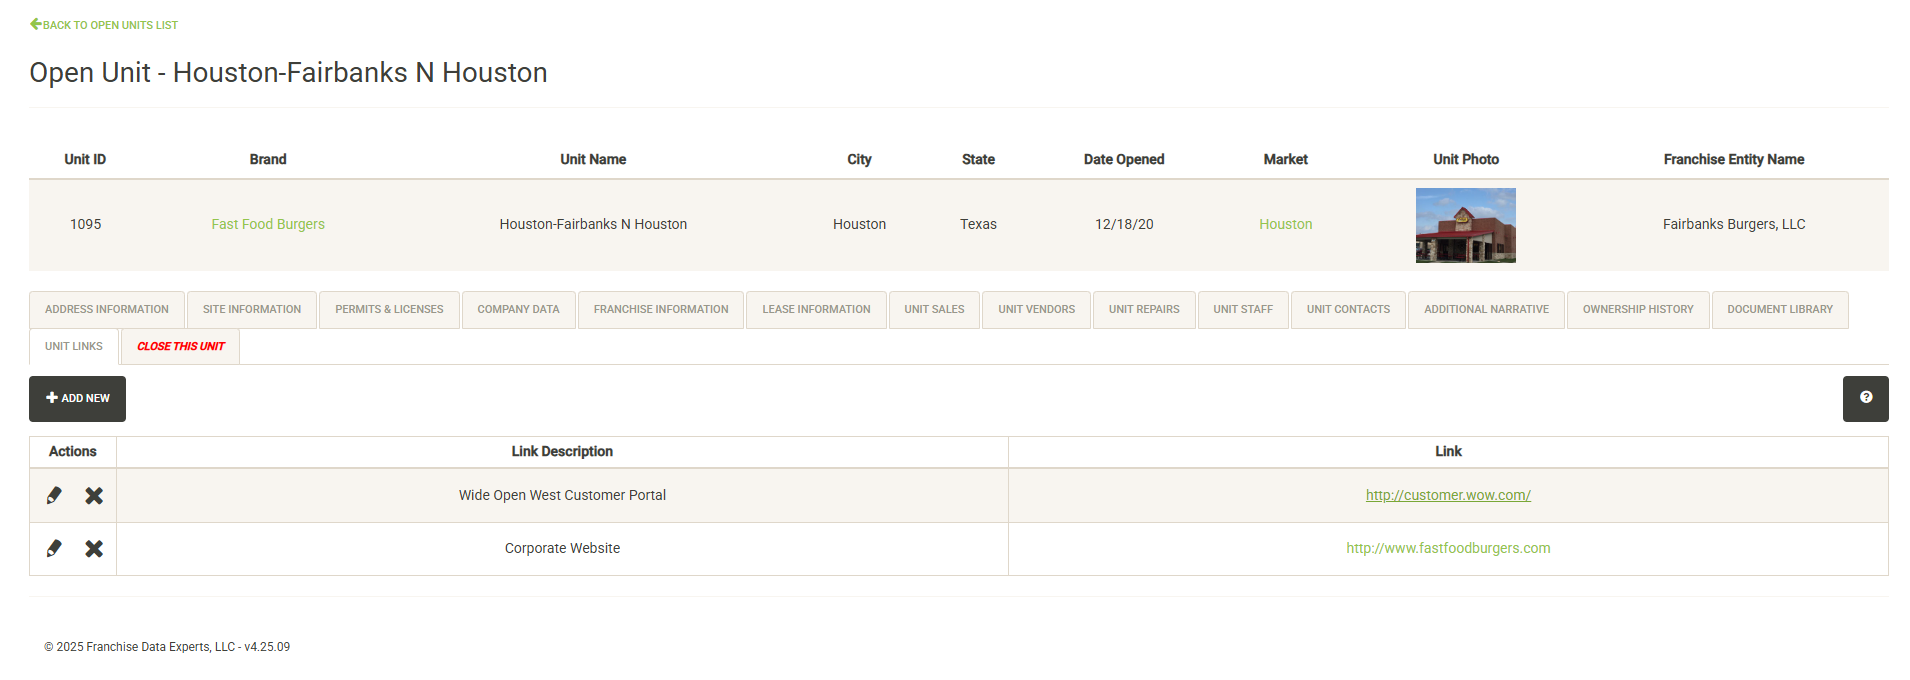
Displays URL’s associated with the unit including vendor URL’s and company URL’s. If you have a web link for online bill payment or support services, it can be added here. To access a link, simply click on the URL to open it in a new window. To add a new link, click on the Add New button.
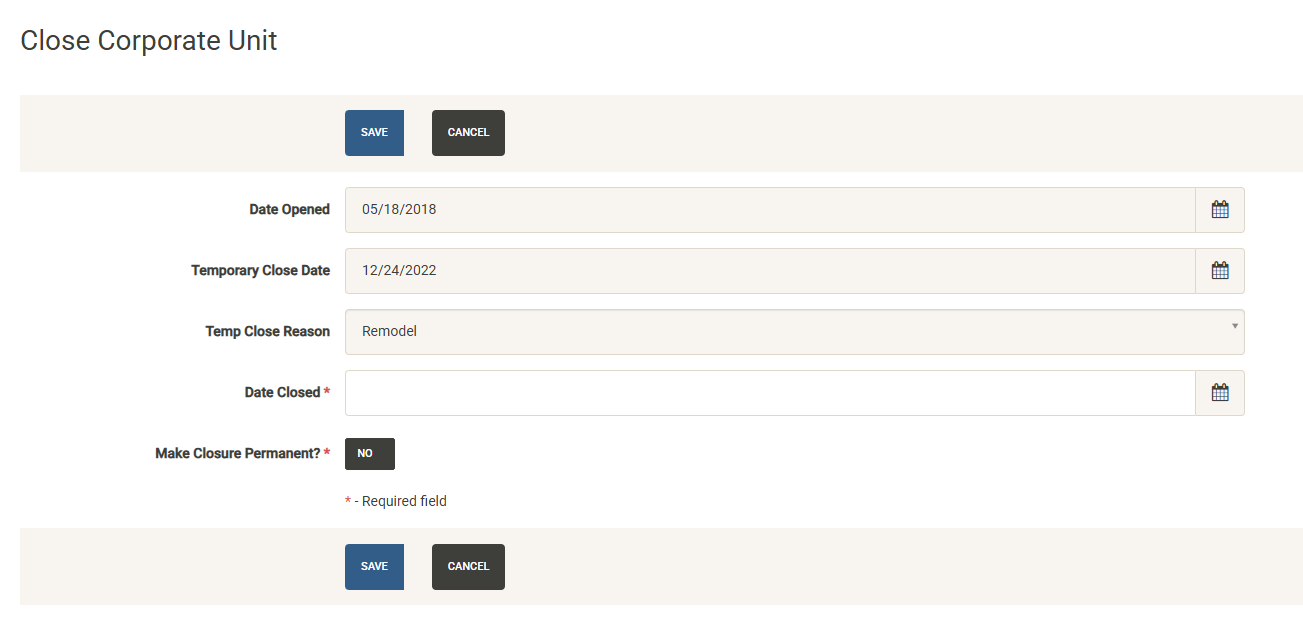
Close This Unit
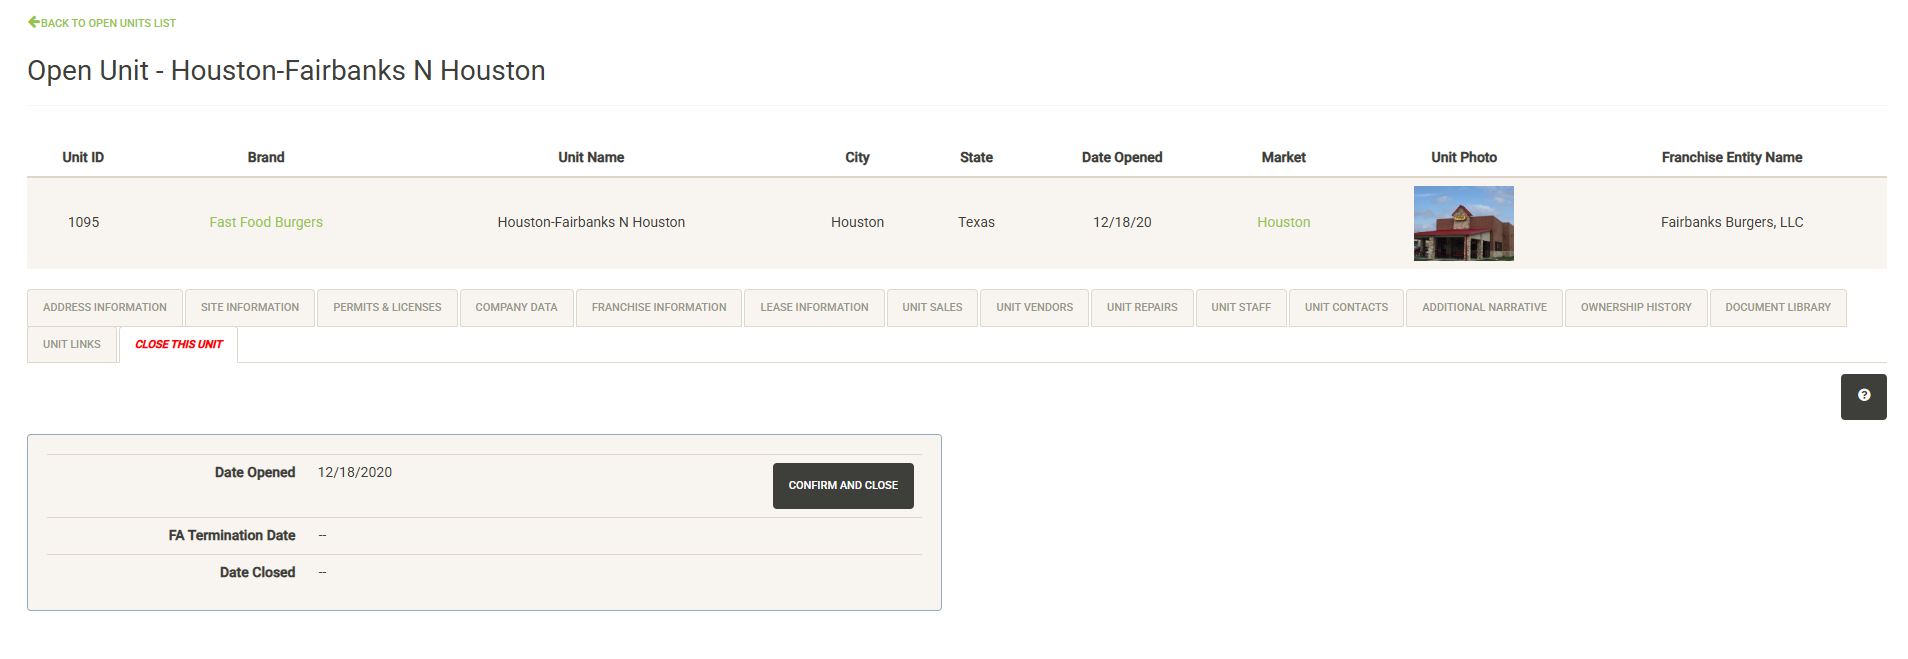
If your unit has closed either temporarily or permanently, you can log that information here. In order to permanently close a franchise unit, the active Franchise Agreement must first be terminated. If the agreement has been terminated, the date will display here. If not, you will have to specify a FA termination date to complete the permanent closure of a franchise unit.
Click on Confirm and Close to open the close form. Note that the form for corporate units does not include references to the franchise agreement.
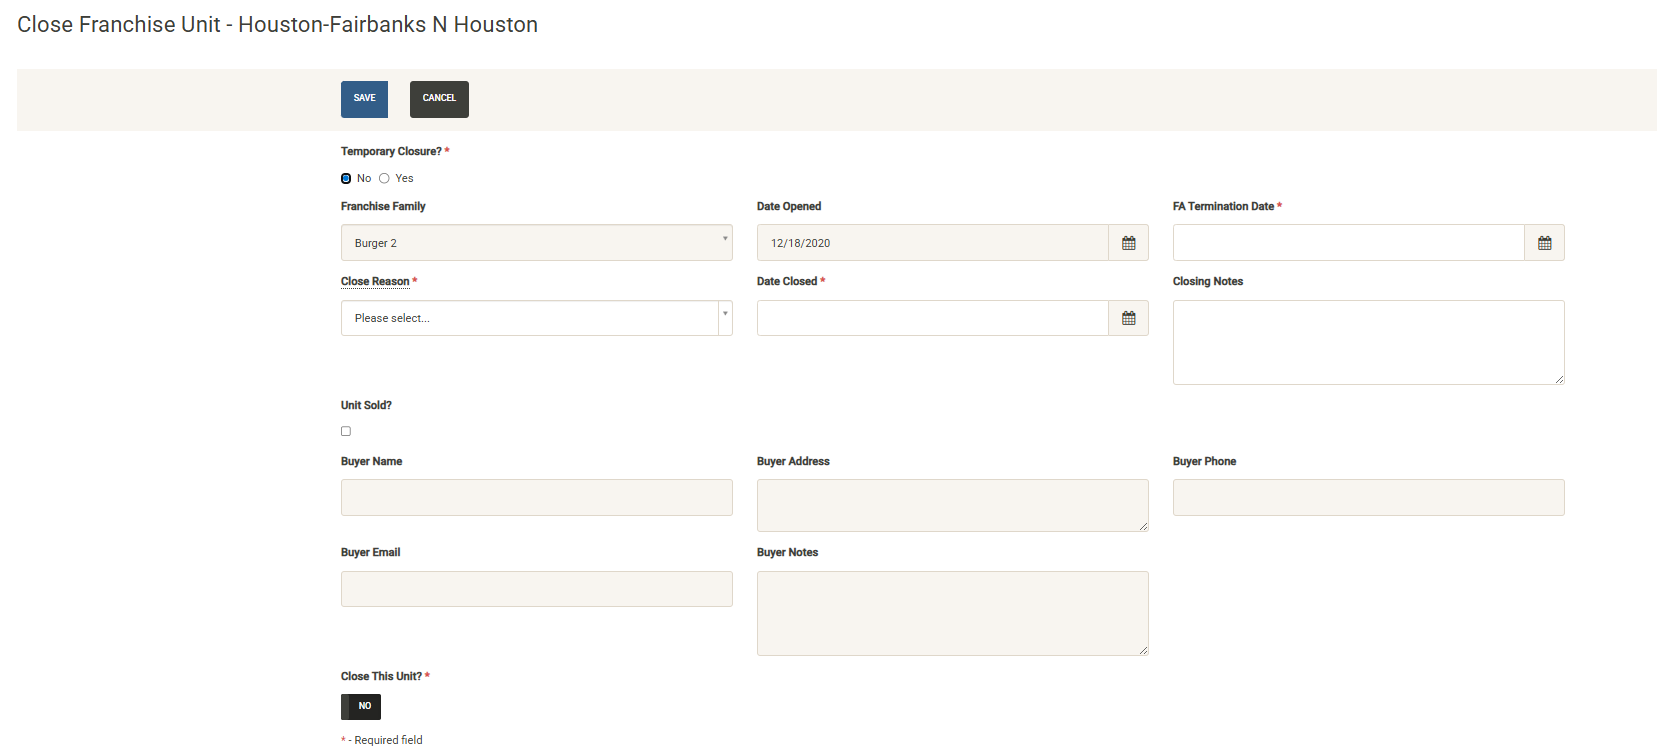
If this is a permanent closure, complete the required information. Note that close reasons can be defined in the Administration module. If the unit was sold, check the box and complete the information about the buyer. Once all required information has been completed, toggle the Close This Unit button and hit save. The unit will be removed from your active units roster and available in the Permanently Closed list.
If this is a temporary closure, choose that option on the form. The form will update with just the information required to process a temporary closure. Note – no changes will be made to the franchise agreement if a closure is temporary.
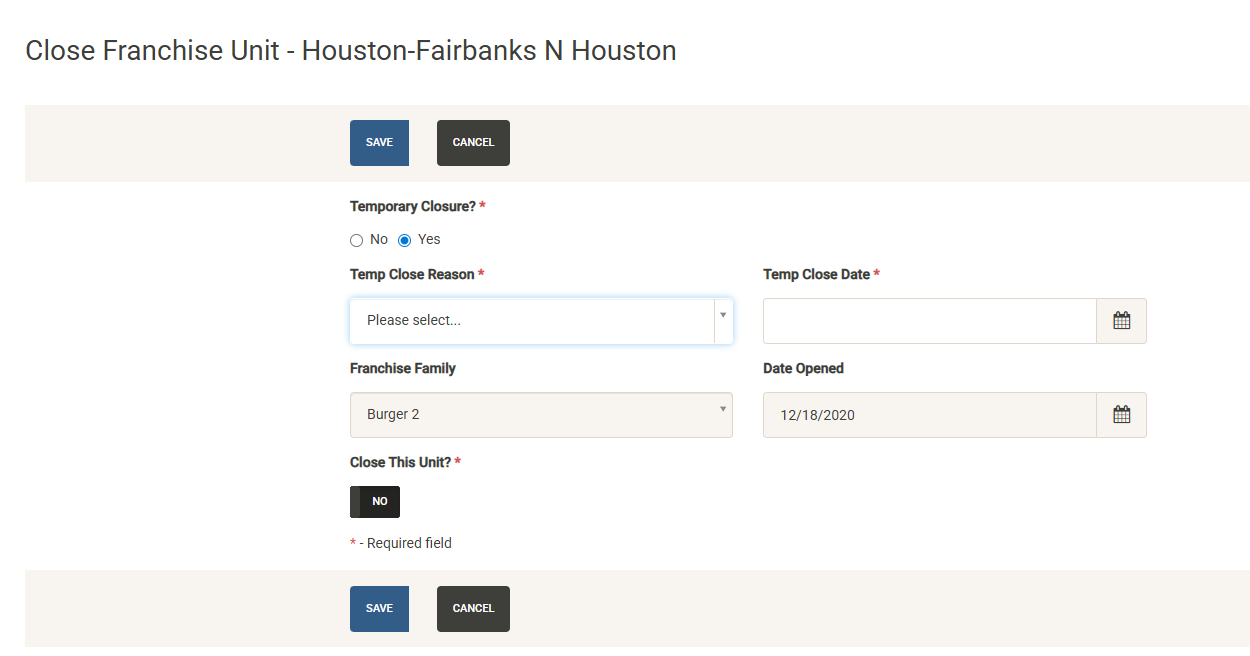
Once all required information has been completed, toggle the Close This Unit and hit save. The unit will be removed from your active units roster and available in the Temporary Closed list.
Temporary Closed Unit Details
Clicking on View Details on a Temporary Closed Unit displays the Unit Details for the temporary closed unit. Many of the details are the same as for Active Units – a temporarily closed unit is considered active for most functions. This section will highlight the settings unique to the temporary closed unit details, all other settings will match the descriptions for Active Units.
Re-Open This Unit
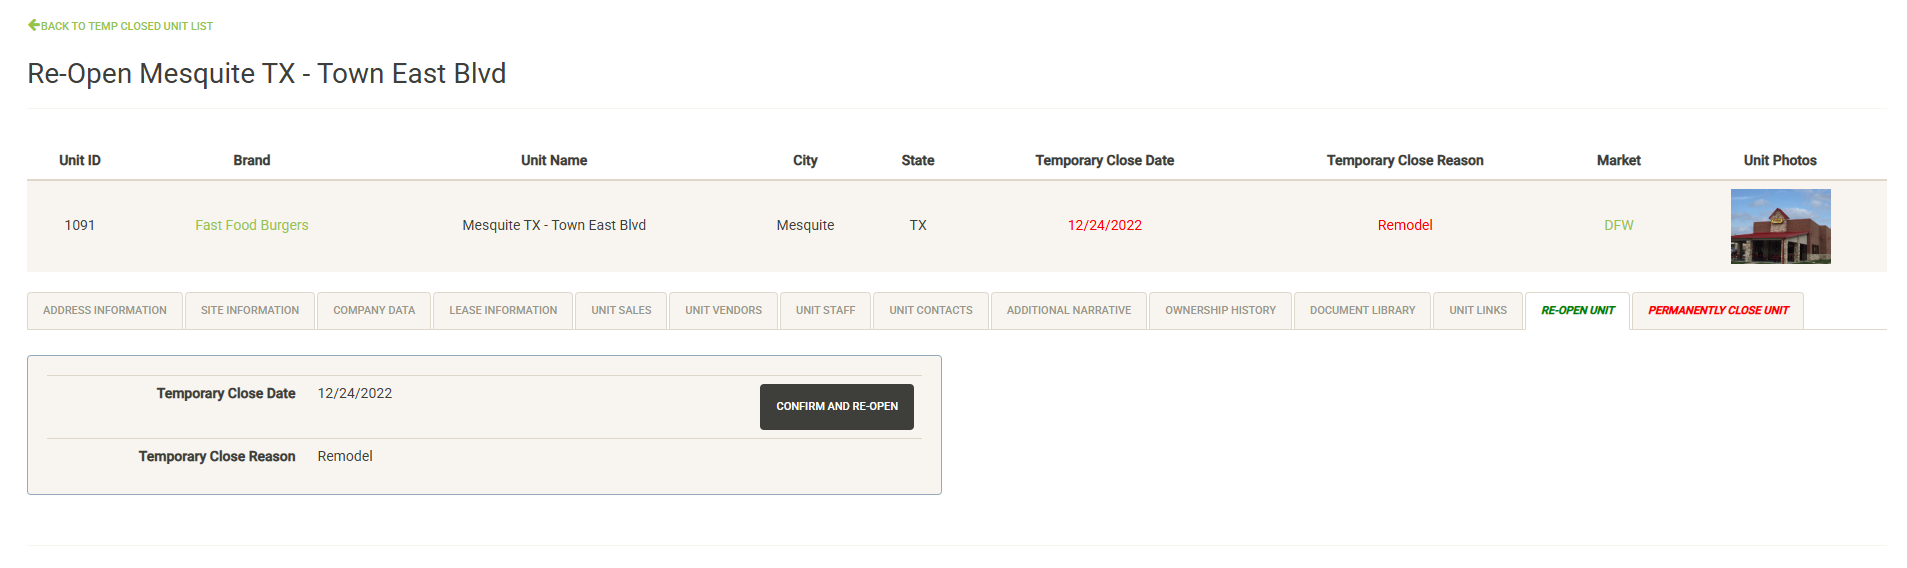
Once you are ready to re-open the unit, click on Confirm and Re-Open to re-open the unit.
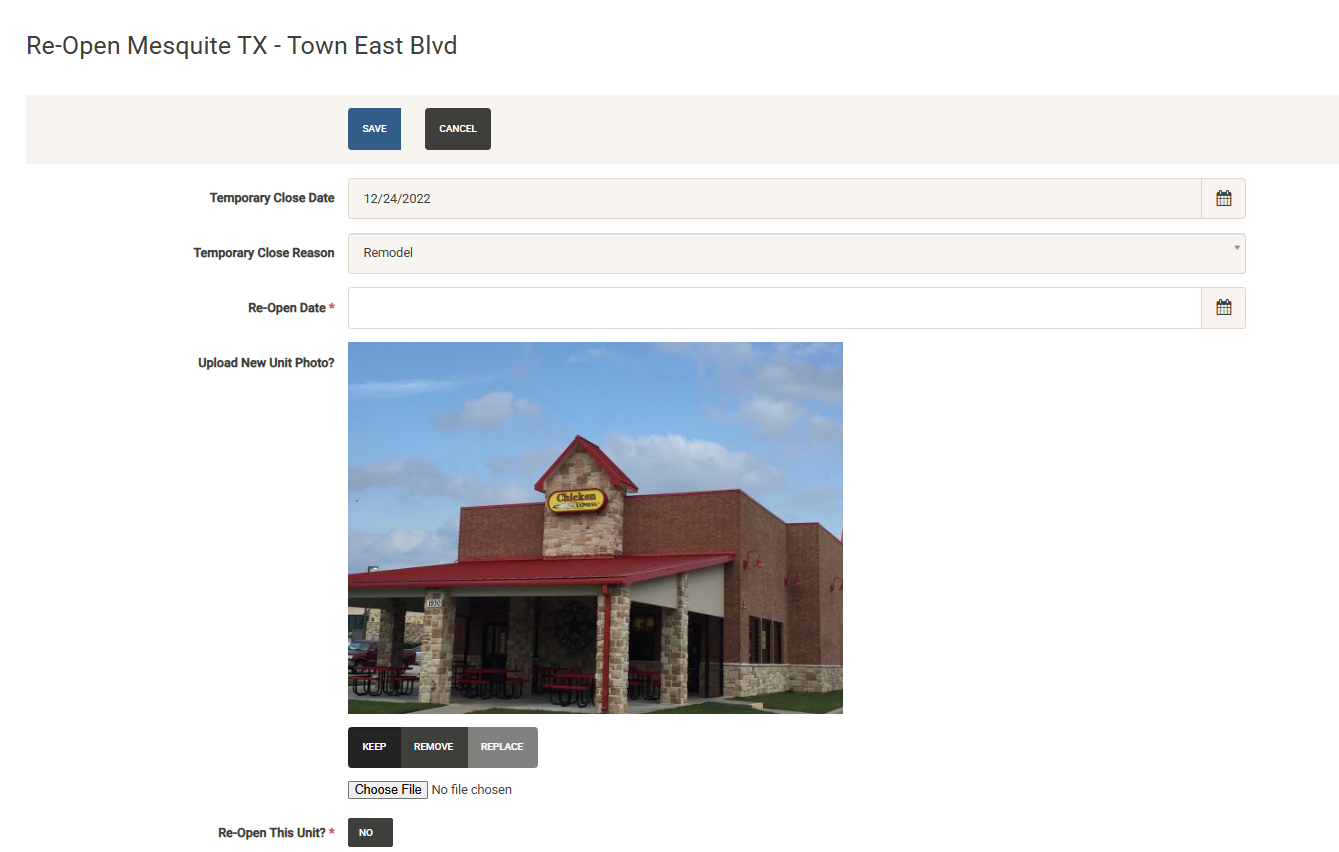
You can view the temp closed date and reason and provide the re-open date. You can also update the unit photo displayed in UnitTrak here. Once you have completed the required information, toggle Re-Open this unit to Yes and save.
The unit will be added back to your active unit roster and removed from the temporary closed list. You can view the Ownership History tab for the unit to view the record of the temporary closure.
Permanently Close Unit
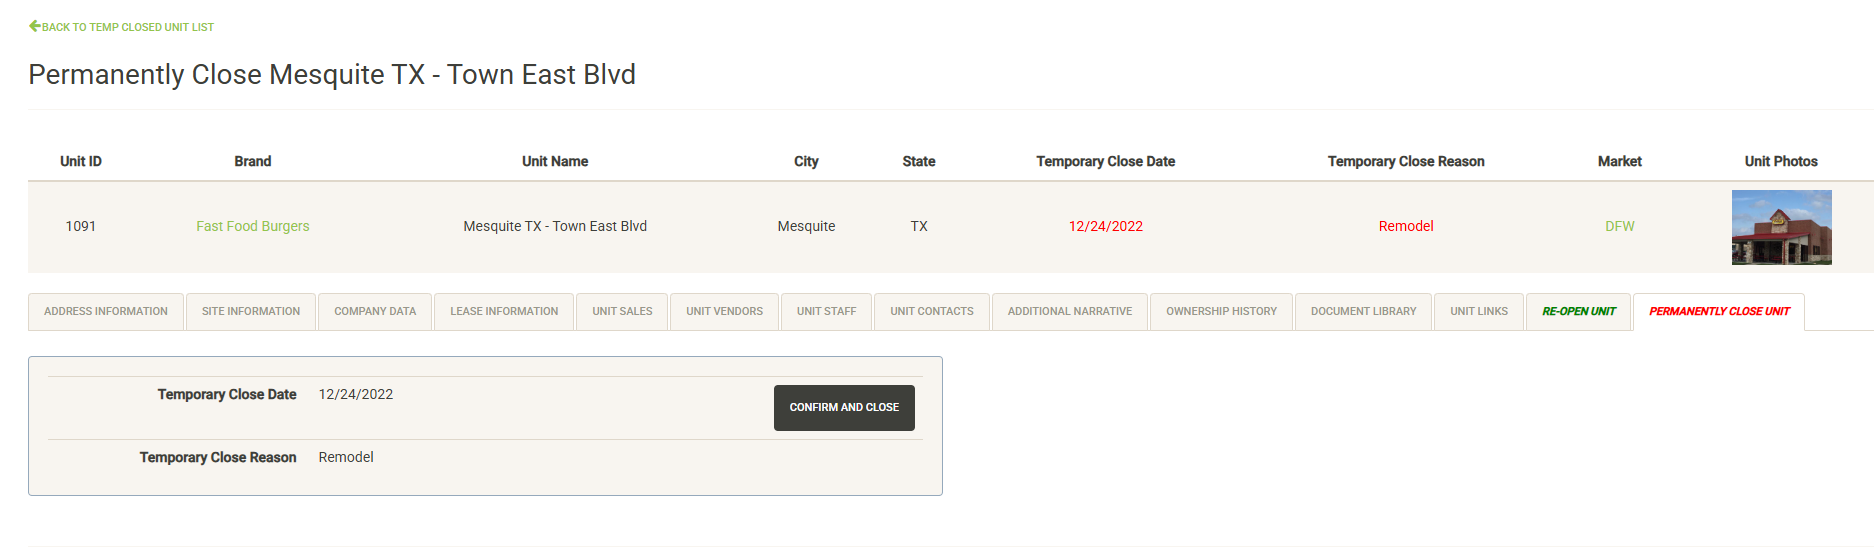
If your temporary closed unit will instead be permanently close you can process that here. Click on Confirm and Close to close the Unit.
In order to permanently close a franchise unit, the active Franchise Agreement must first be terminated. If the agreement has been terminated, the date will display here. If not, you will have to specify a FA termination date to complete the permanent closure of a franchise unit.
Once you’ve completed the required information, toggle the Make Closure Permanent button and click on Save. The unit will be removed from the temp closed roster and added to the permanently closed list.
Permanently Closed Unit Details
Clicking on View Details on a Permanently Closed Unit displays the Unit Details for the closed unit. Many of the details are the same as for Active Units but most of the data in not editable for a permanently closed unit. This section will highlight the settings unique to the permanently closed unit details, all other settings will match the descriptions for Active Units.
Closing Information
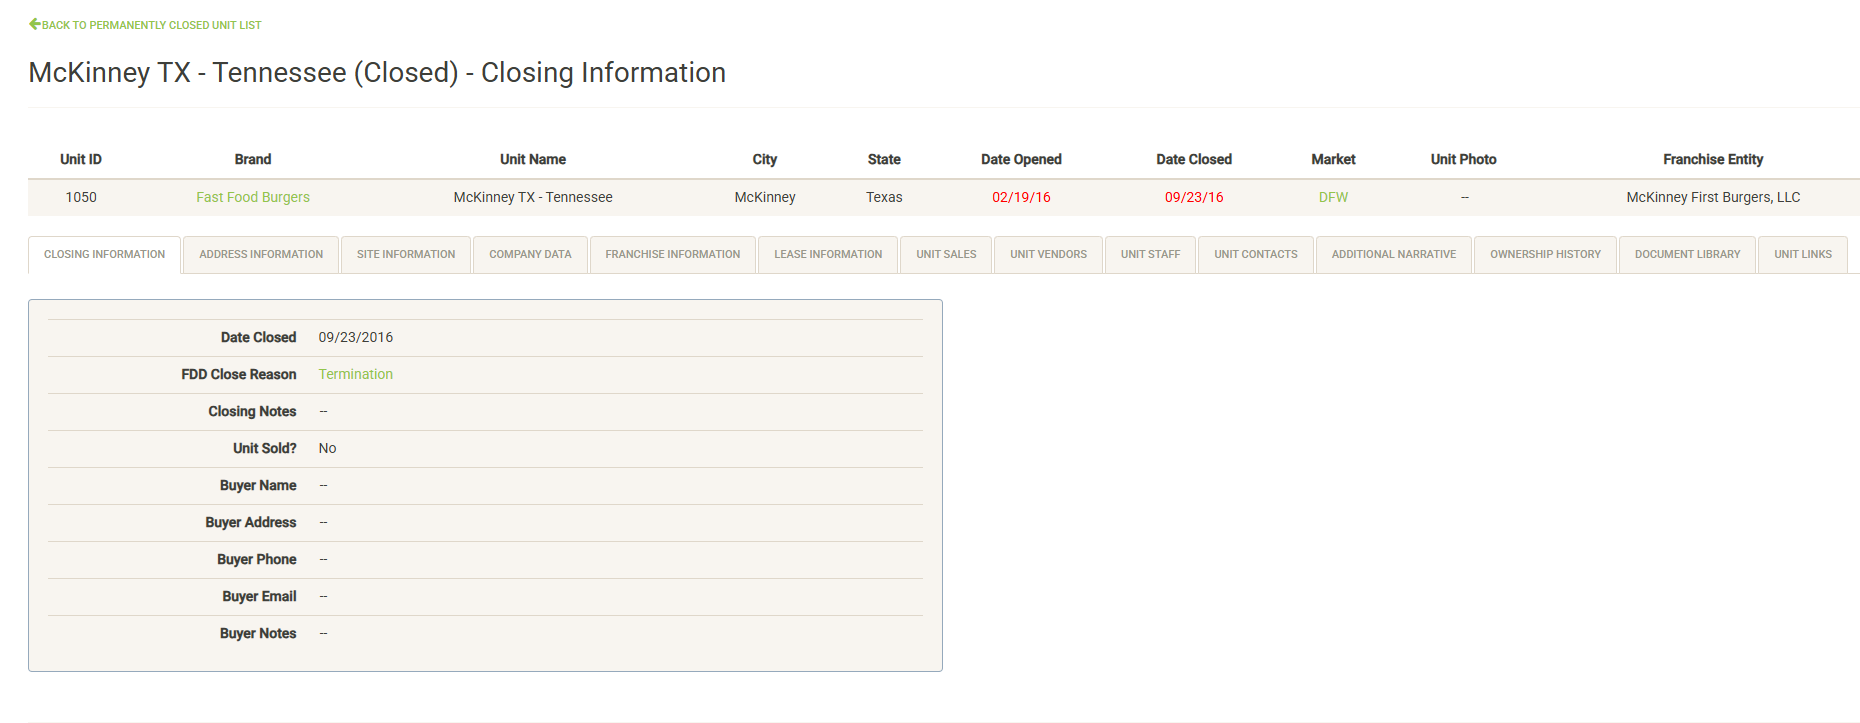
Displays information logged about the closure of the unit including date closed, close reason, and buyer details if the unit was sold.
Franchise Information
In order to permanently close a franchise unit, the active franchise agreement must be terminated. That information will be reflected on this tab with information about the terminated agreement.
Lease Information
It is possible to continue to maintain a lease for a permanently closed unit. If there is still an active lease attached to the unit, you can manage it in the same way as your open units.
Document Library
You can continue to add or edit documents for permanently closed units. See the Document Library section of Open Unit Details for more information.
Main Dashboard
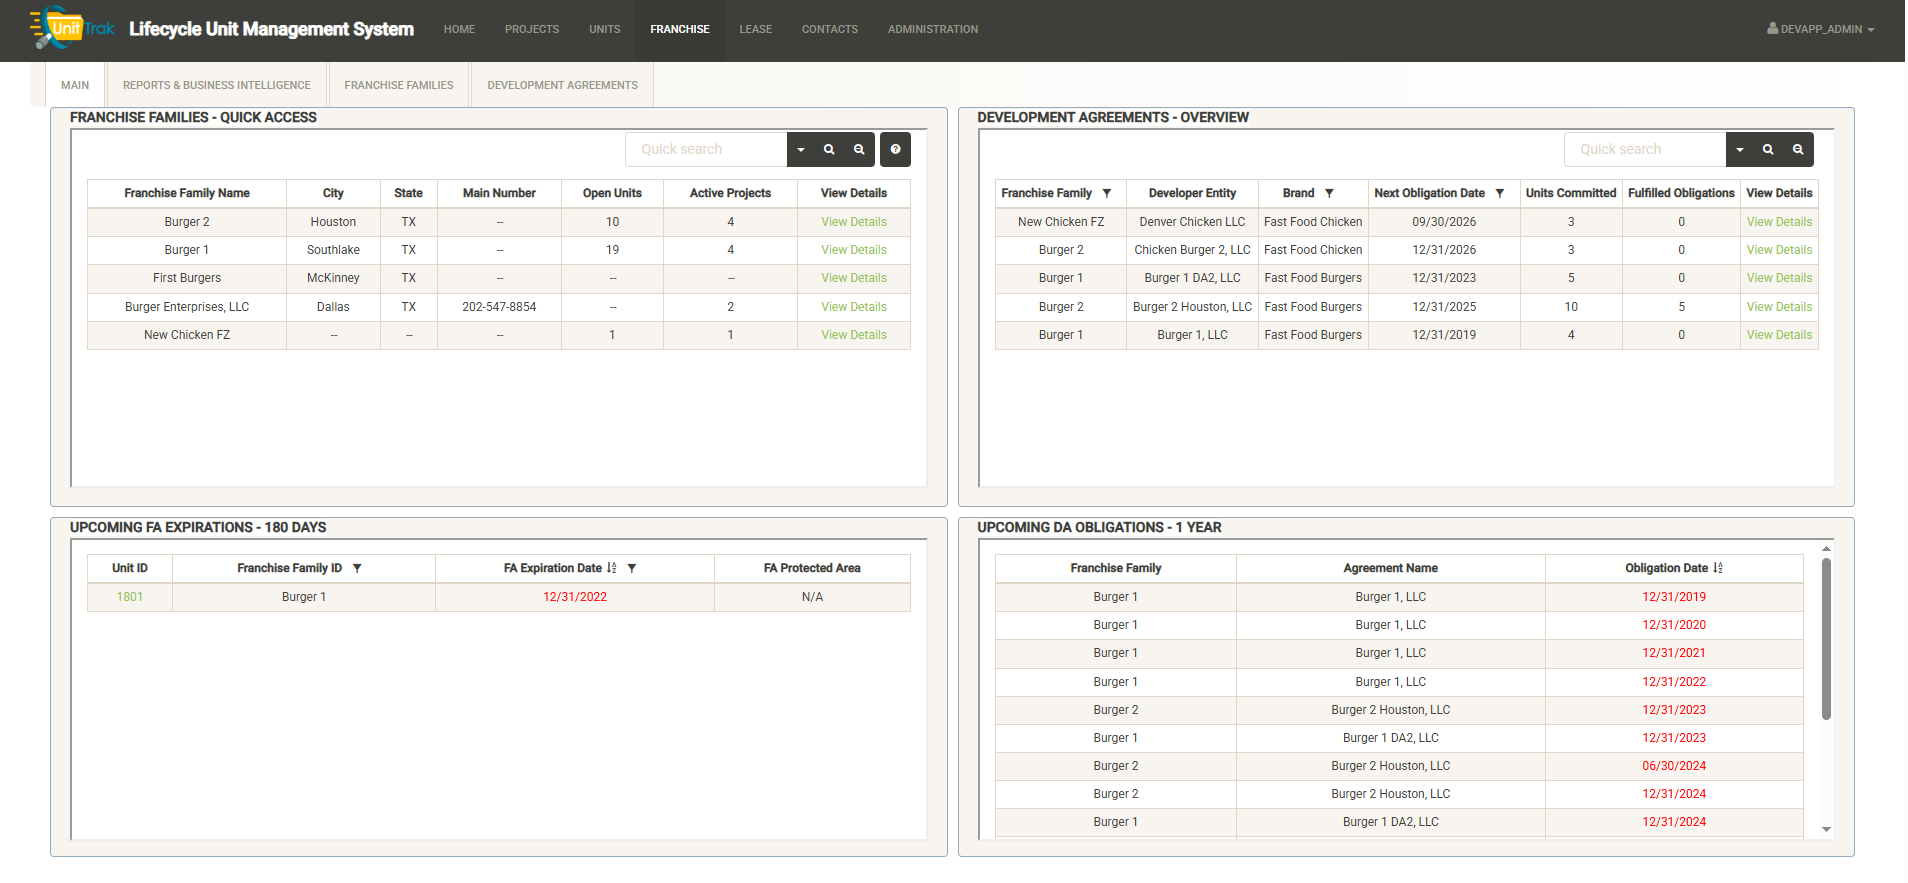
The main dashboard of the Franchise Module is broken into four sections:
Franchise Families – Quick Access
You can search and filter the list of franchise families to view information about them. The Quick Access window shows basic information about the Franchise Family including the number of open units and active projects owned by the franchisee. Click on View Details to view/edit the full set of information about the Franchise Family. See the Franchise Families section for more information about this.
Development Agreements Overview
Displays information about the active development agreements in effect for your Franchise Families. The overview page includes information about the agreement including the number of units committed and the number fulfilled. Click on View Details to view/edit the full set of agreement information. See the Development Agreements section for more information.
Upcoming FA Expirations
Displays a list of Franchise Agreements that are due to expire. The alert time can be modified (180 days shown)
Upcoming DA Obligations
Displays the upcoming and overdue Development Agreement Obligations. The alert time can be modified (1 year shown). See the Developments Agreement section for more information.
Reports & Business Intelligence
The Franchise module includes a dedicated reports tab to generate built-in and custom reports about your franchise operations.
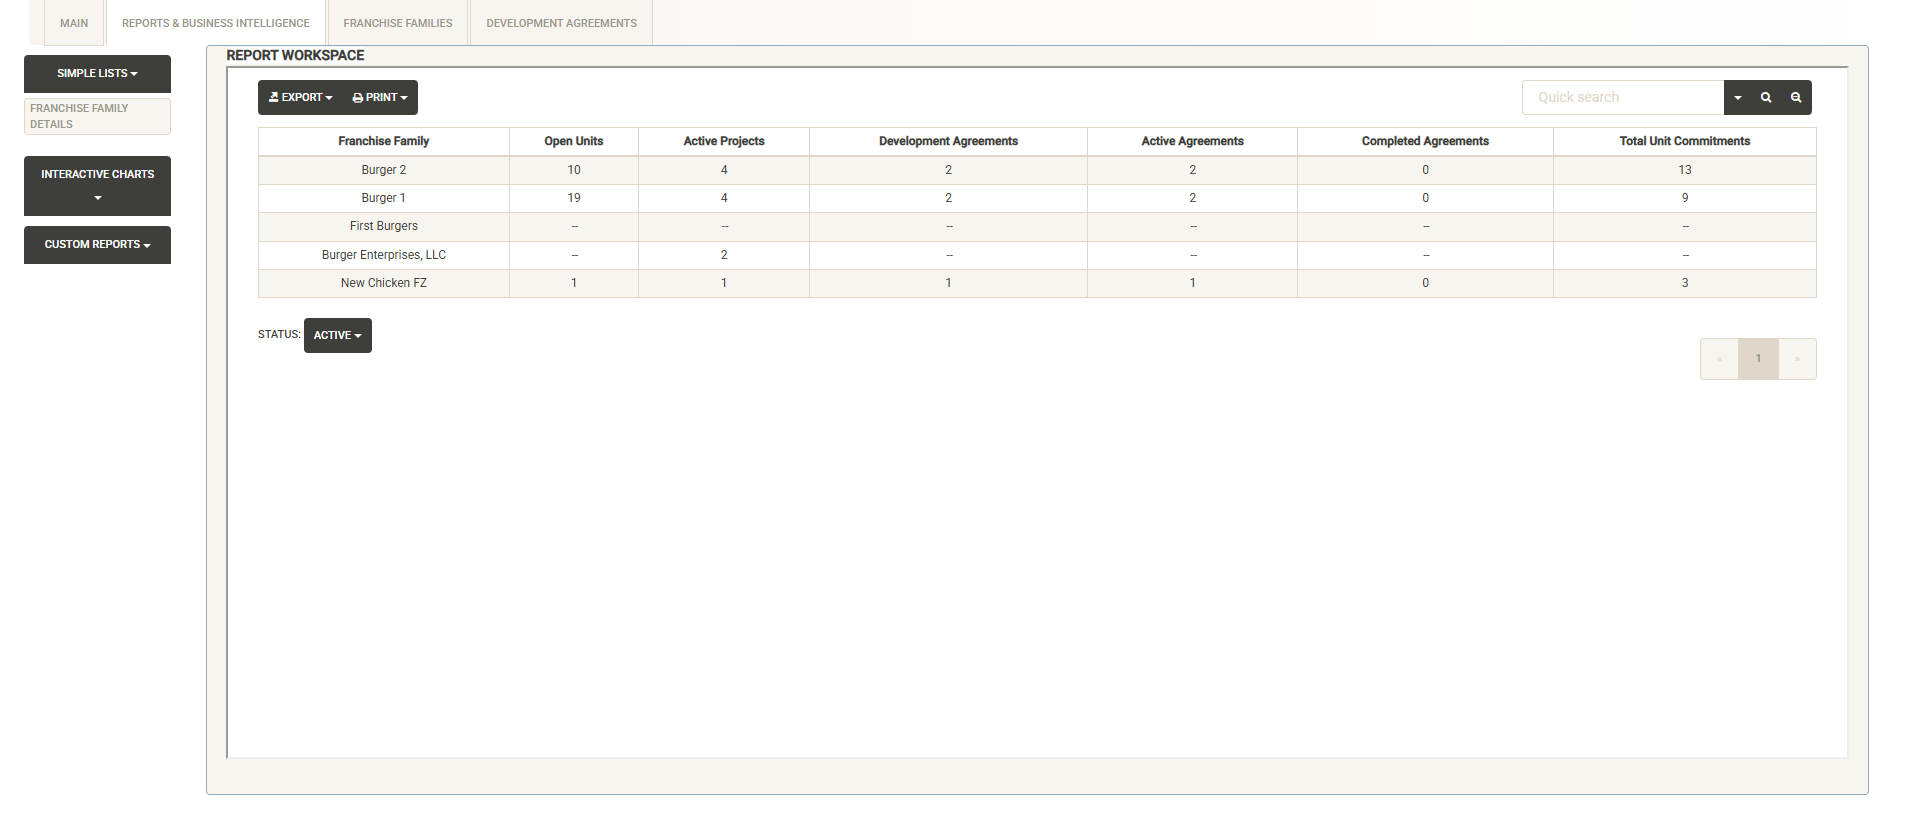
The left side of the page includes report categories including Simple Lists, Interactive Charts and Custom Reports (Note – available reports can be customized by client). Click on a category to open the report list, then select the report you wish to view. The Report Workspace window displays the selected report. Here you can again use the sorting and filtering options to customize your report output. You can export or print the report. Export options include PDF, Excel and CSV output of your report.
See the Reports section for more details about the reports included in the base system.
Franchise Families
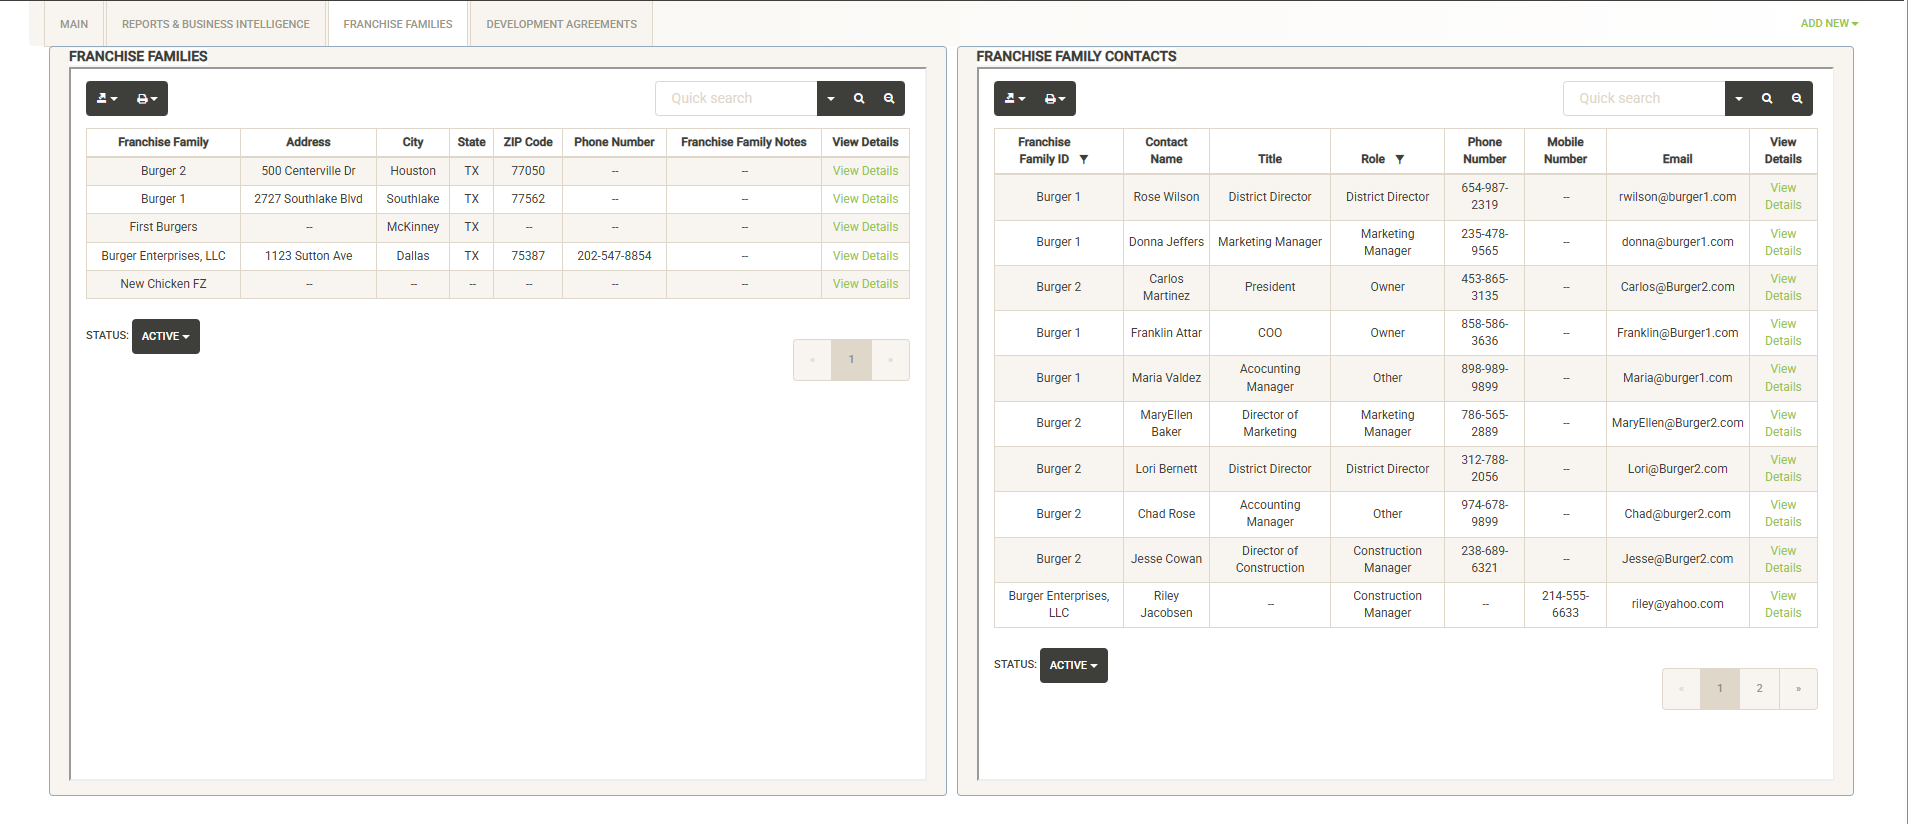
The Franchise Families tab is split into two sections, the Franchise Families list and the Franchise Family Contacts list:
Franchise Families List
Displays the full list of the Franchise Families in your system. You can use the sort and filter options in the column headers to customize the list. You can also print or export the unit list from this screen.
You can toggle the Status option below the list to toggle between active and inactive franchise families.
If you need to view or edit the details of the Franchise Family, click on the “View Details” link to the far right of the Franchise Family information.
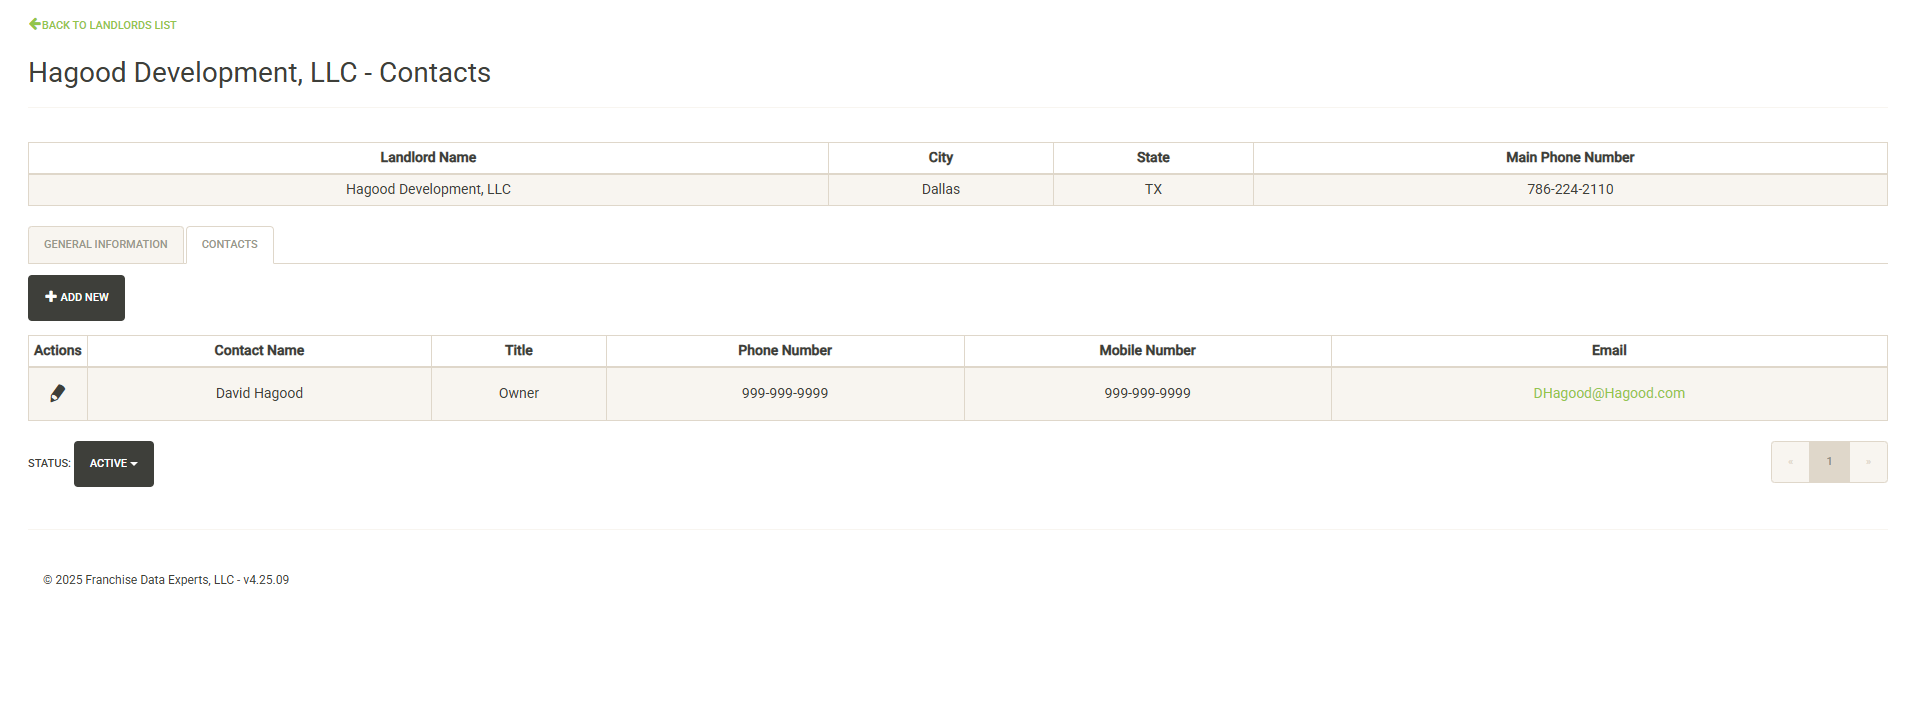
General Information
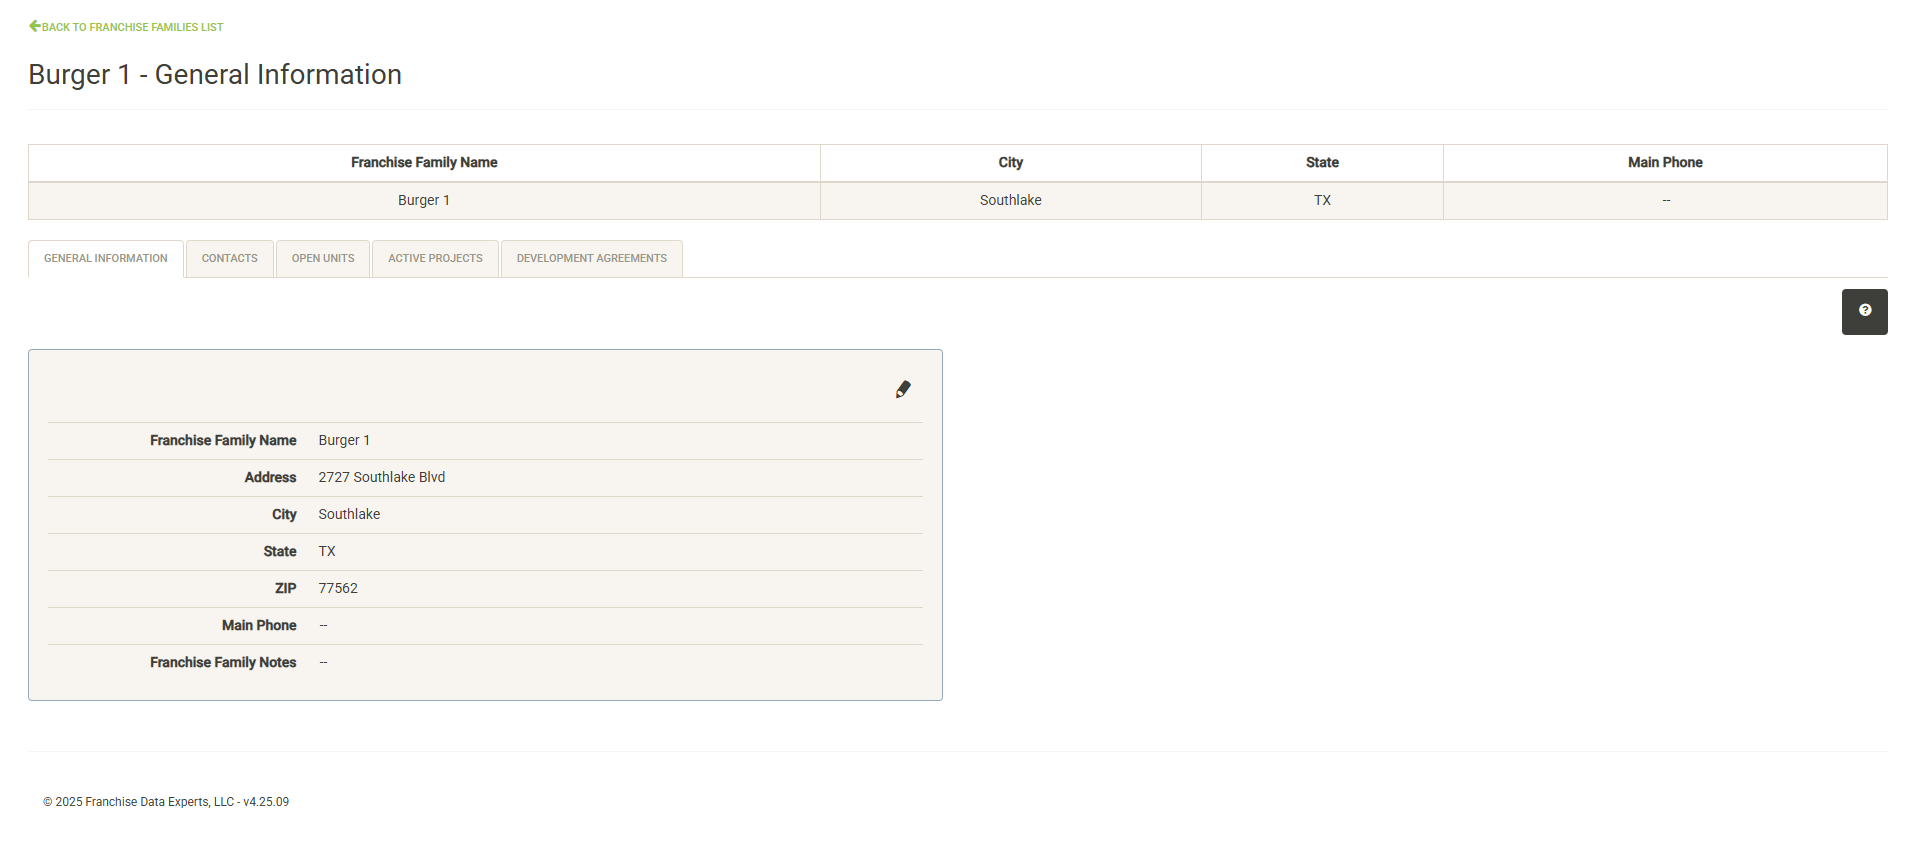
Displays basic information about the Franchise Family including address, phone and notes. Click on the pencil icon to edit values here (with the proper permissions).
Contacts
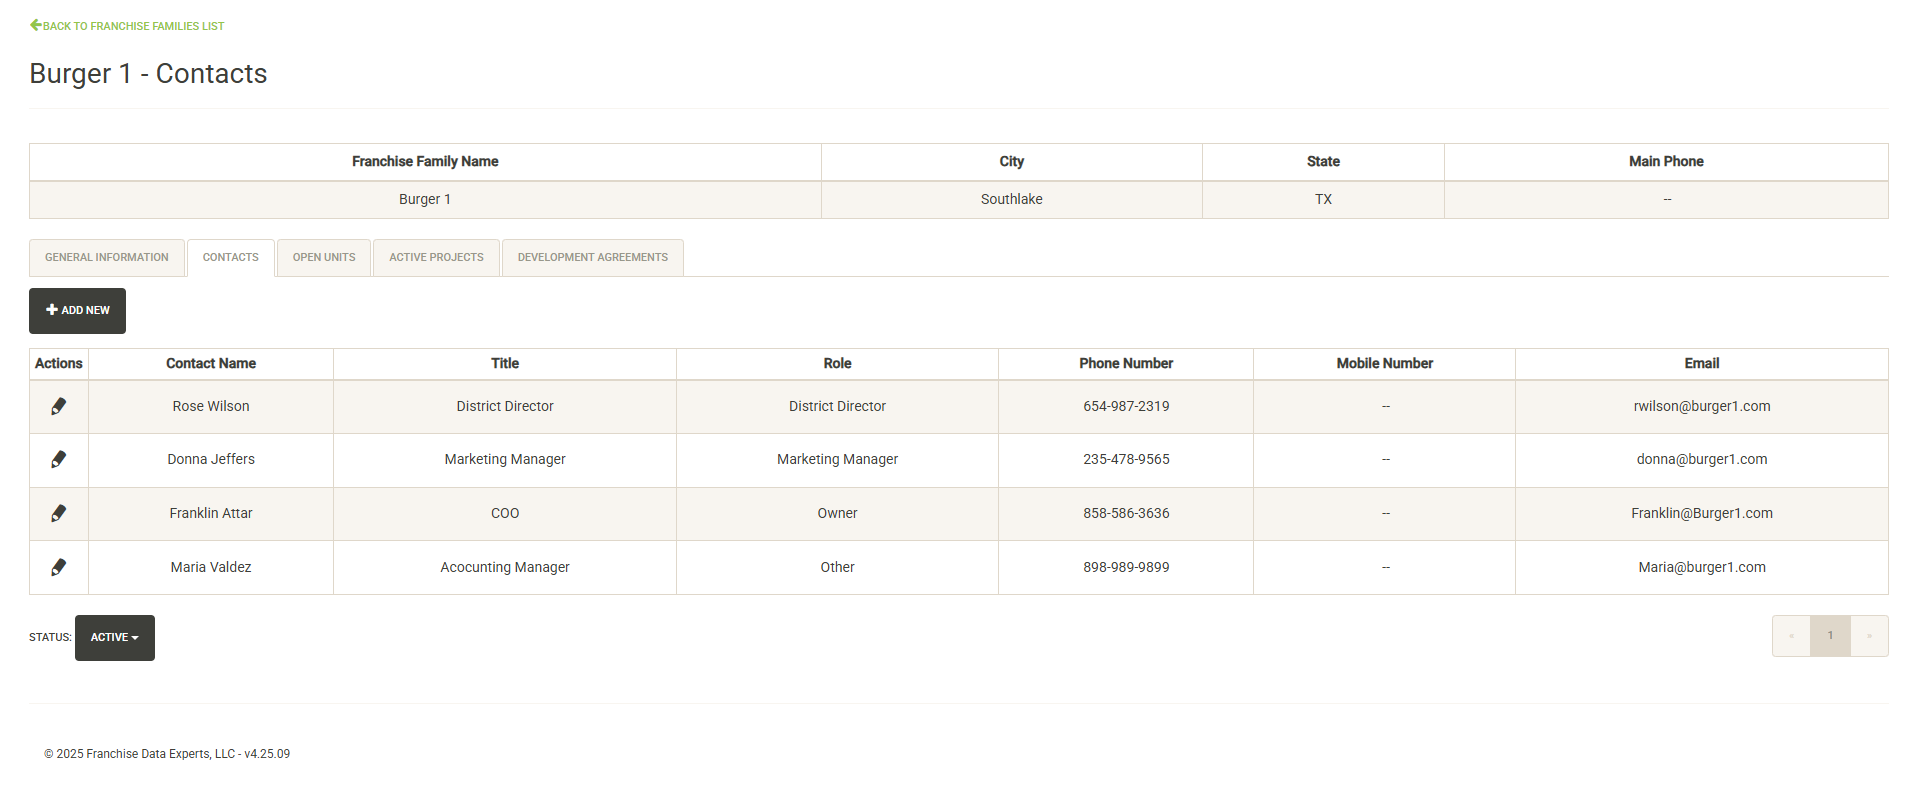
Displays contacts for the selected Franchise Family. You click on the pencil icon to the left of the contact name to edit the contact information or set it inactive. Click on Add New to add a new contact. Click on the Status dropdown to view active vs. inactive contacts for the Franchise Family.
Open Units
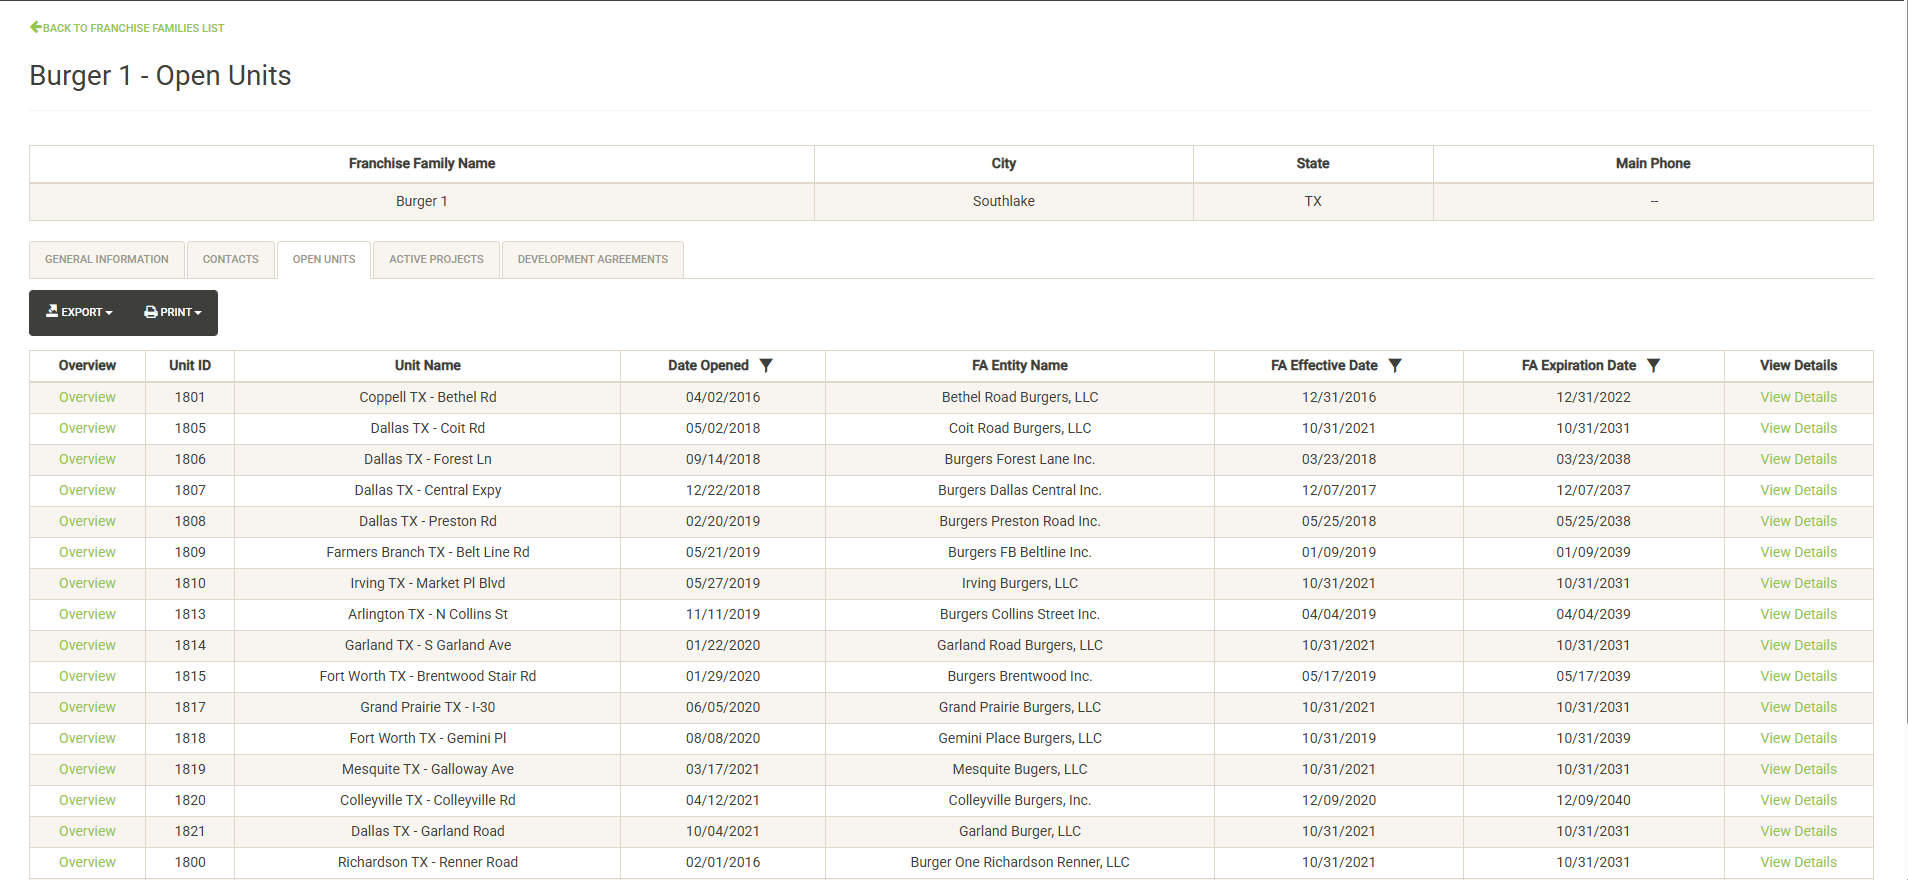
Displays a list of the open units that are associated with the selected Franchise Family. Also displayed are various attributes of the Franchise Agreement. You can sort and filter on these columns to customize the list, which can also be exported or printed directly from this screen.
Click on the Overview link to the left of the unit to view the unit’s Overview Report, or click View Details to the right of the unit to view/edit the full Unit Details.
Active Projects
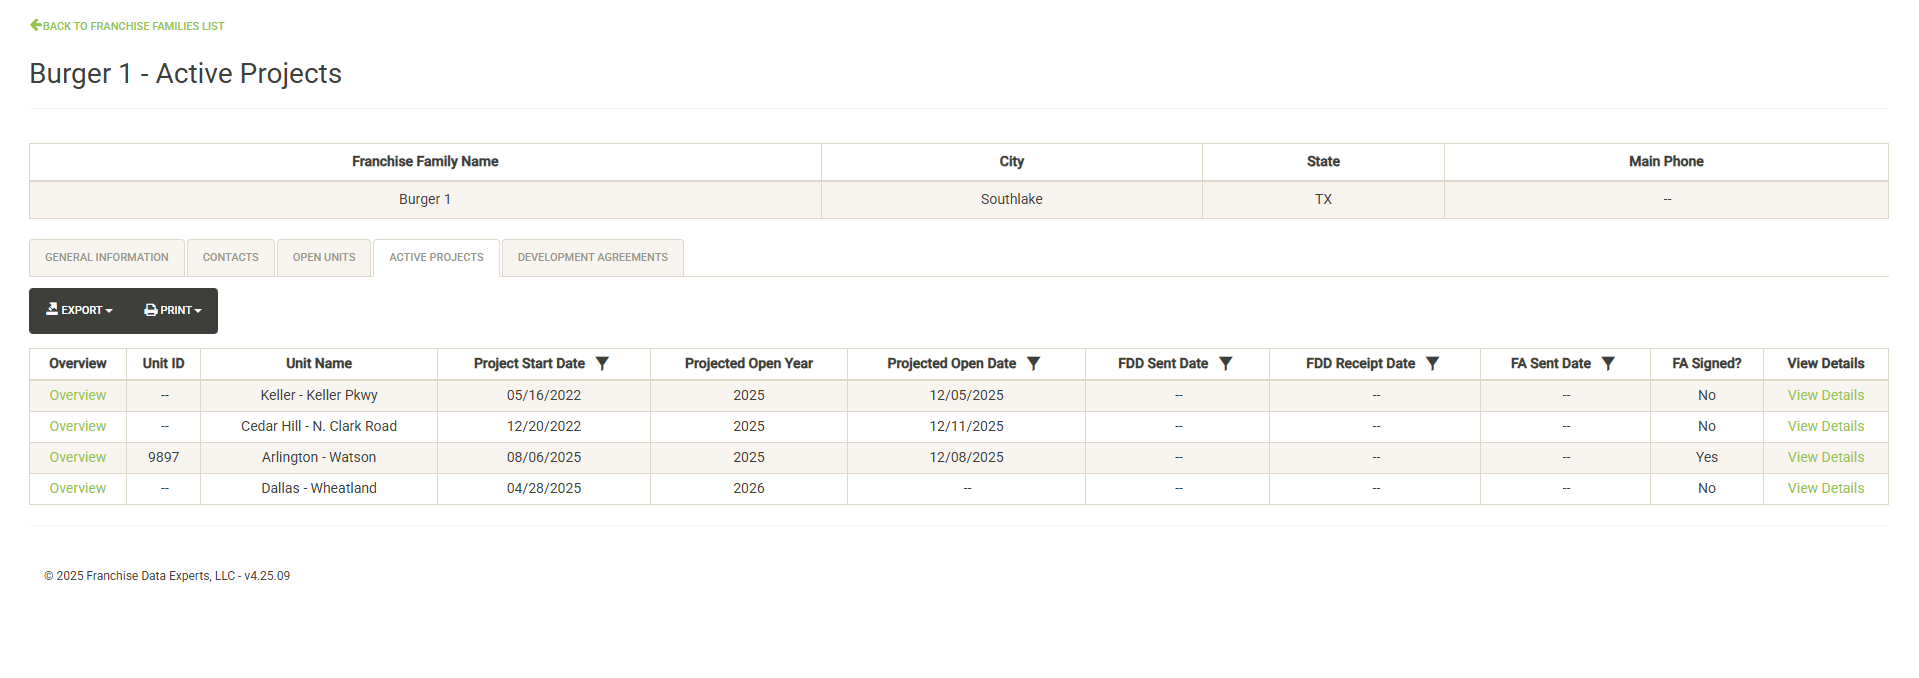
Displays a list of the active projects that are associated with the selected Franchise Family. Also displayed are various attributes of the Franchise Agreement (if an agreement has been signed). You can sort and filter on these columns to customize the list, which can also be exported or printed directly from this screen.
Click on the Overview link to the left of the project to view the project’s Overview Report, or click View Details to the right of the unit to view/edit the full Project Details.
Development Agreements
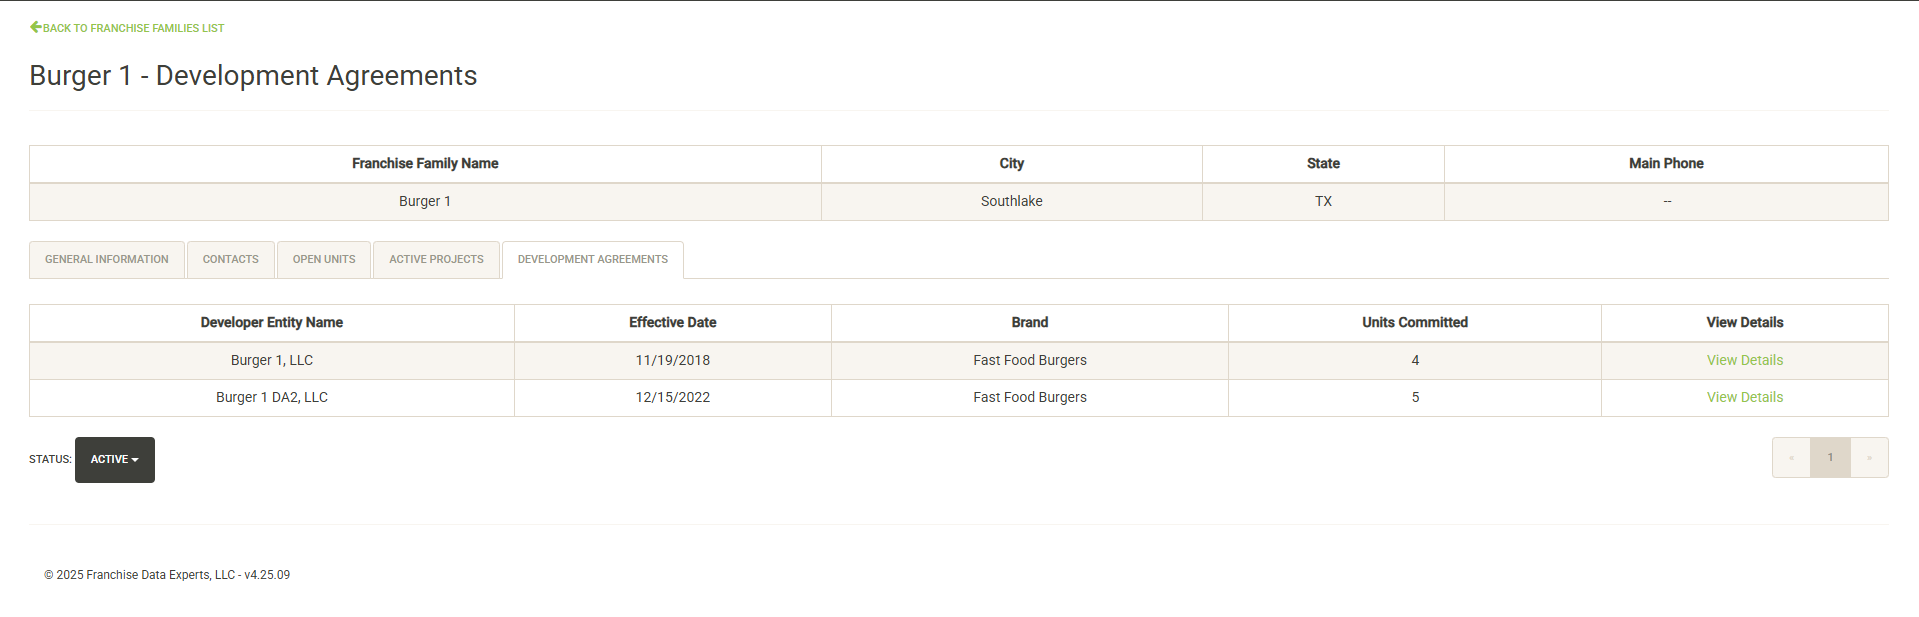
Displays the active Development Agreements for the Franchise Family. Each active agreement includes the effective date and the number of units committed. Click on View Details to see more information or make changes to the agreement. See the Development Agreements section below for more information about viewing or changing an agreement.
Franchise Family Contacts List
You can quickly locate a Franchise Family contact using this window. The attribute columns can be sorted or filtered, or you can enter a search term to locate the contact.
Click on View Details to view or edit the contact information. This will take you to the Franchise Family contacts page:
You click on the pencil icon to the left of the contact name to edit the contact information or set it inactive. Click on Add New to add a new contact. Click on the Status dropdown to view active vs. inactive contacts for the Franchise Family.
Development Agreements
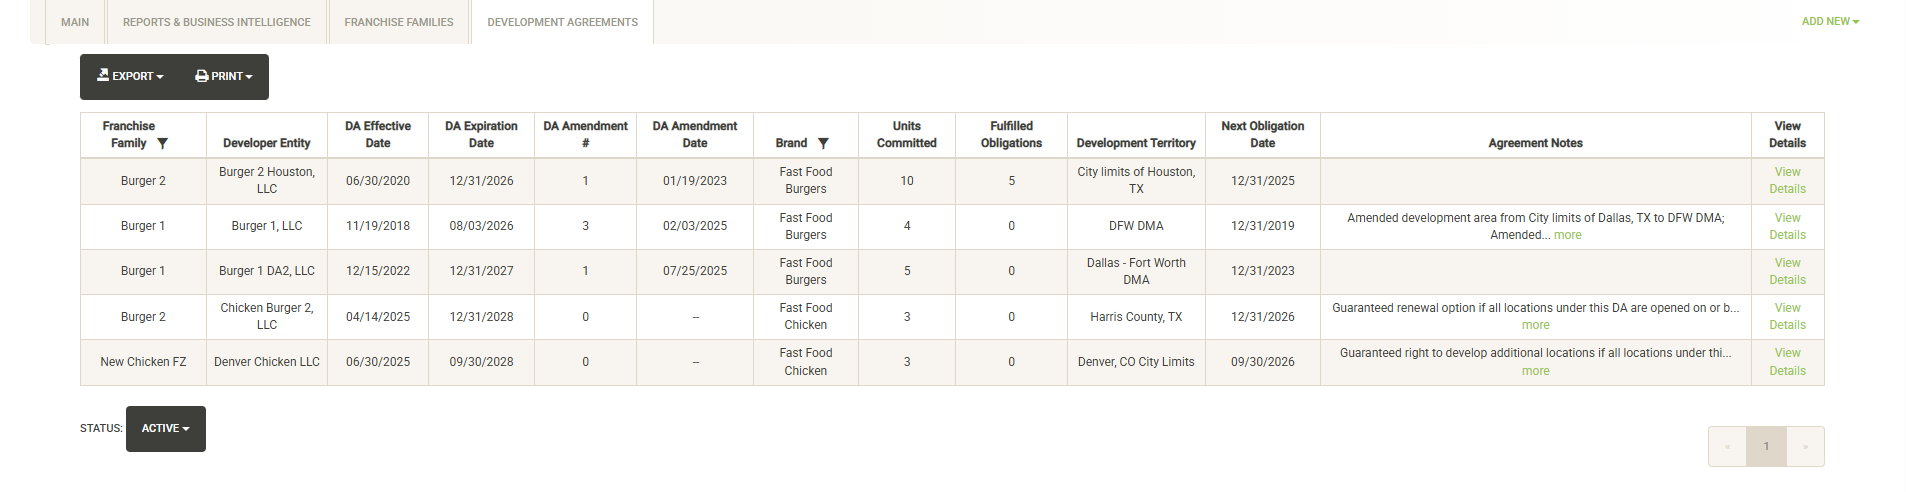
Displays a list of active Development Agreements across all of your Franchise Families. You can sort, filter, export and print this list. Also noted are the units committed and obligations fulfilled and the next obligation date coming up. You can also toggle the Status dropdown to view inactive or fulfilled agreements.
Click on View Details to view/edit the information associated with the agreement, including making amendments and fulfilling obligations.
Displays the active Development Agreements for the Franchise Family. Each active agreement includes the effective date and the number of units committed. Click on View Details to see more information or make changes to the agreement. See the Development Agreements section below for more information about viewing or changing an agreement.
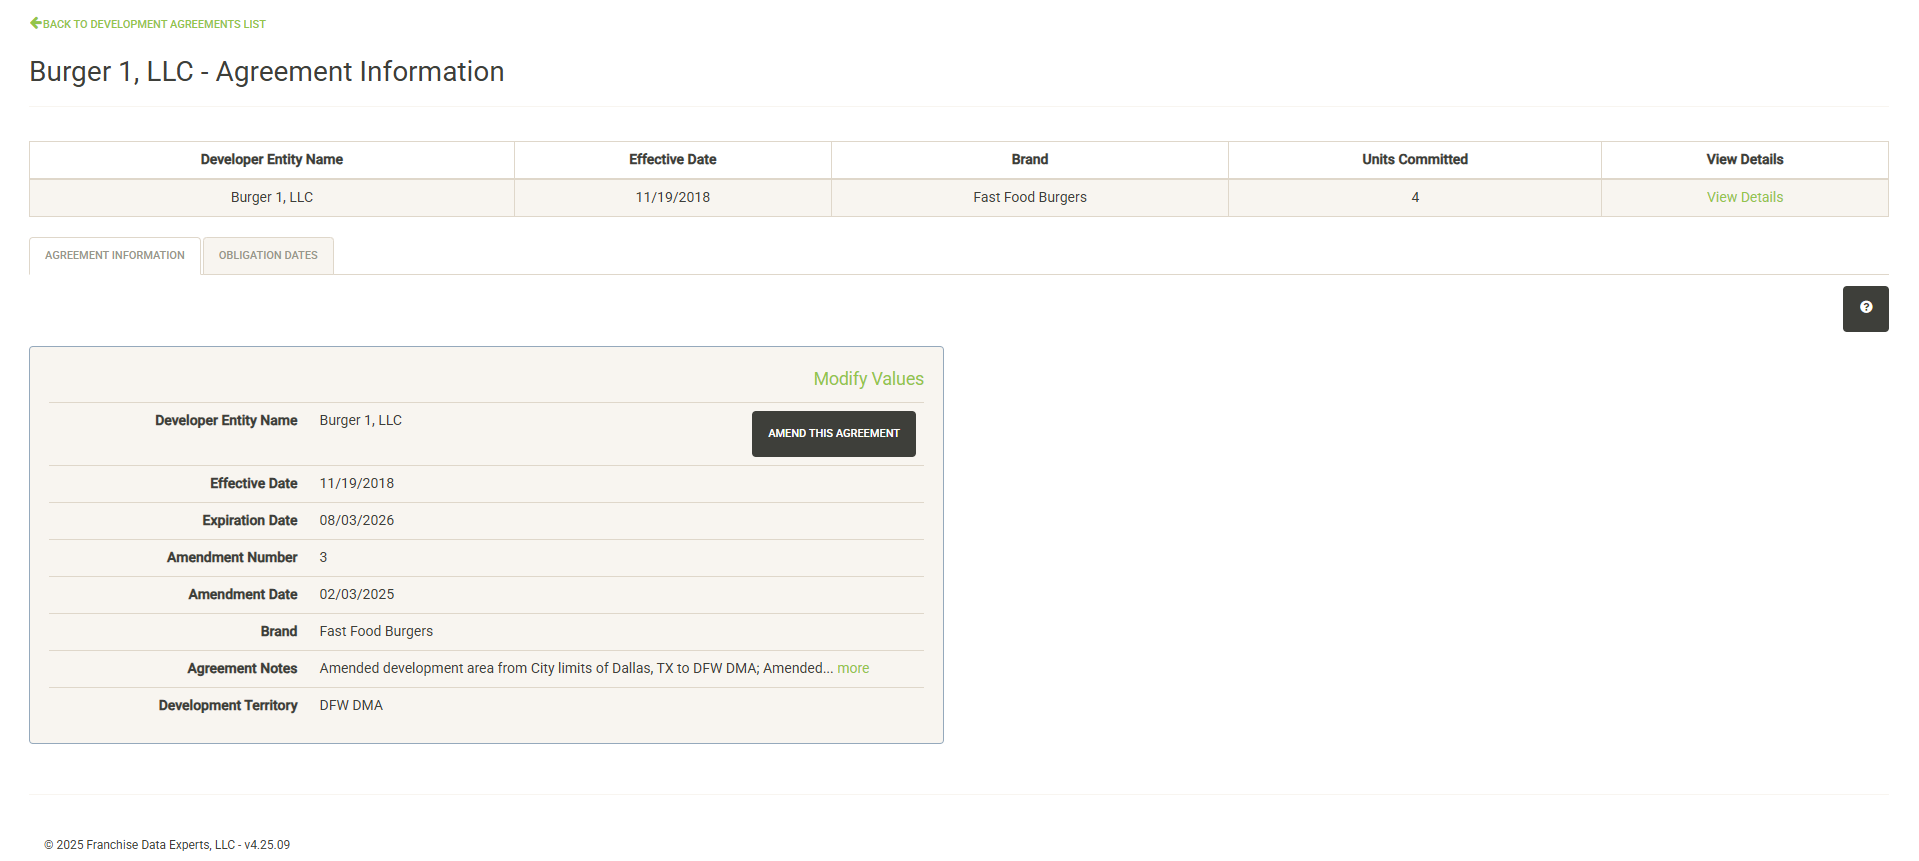
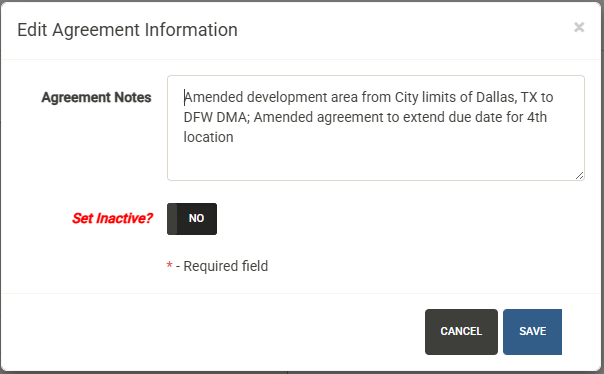
The Agreement Information tab shows the general information about the agreement including the Entity Name, Agreement Effective and Expiration Dates and more. Once an agreement has been signed, most elements can only be changed through an Amendment. Click on Modify Values to update notes about the agreement or to set the agreement as Inactive.
Click on Amend Agreement to modify the agreement details. You will first be presented with a note about unit assignments:

After closing the note, the Amend Development Agreement form is displayed
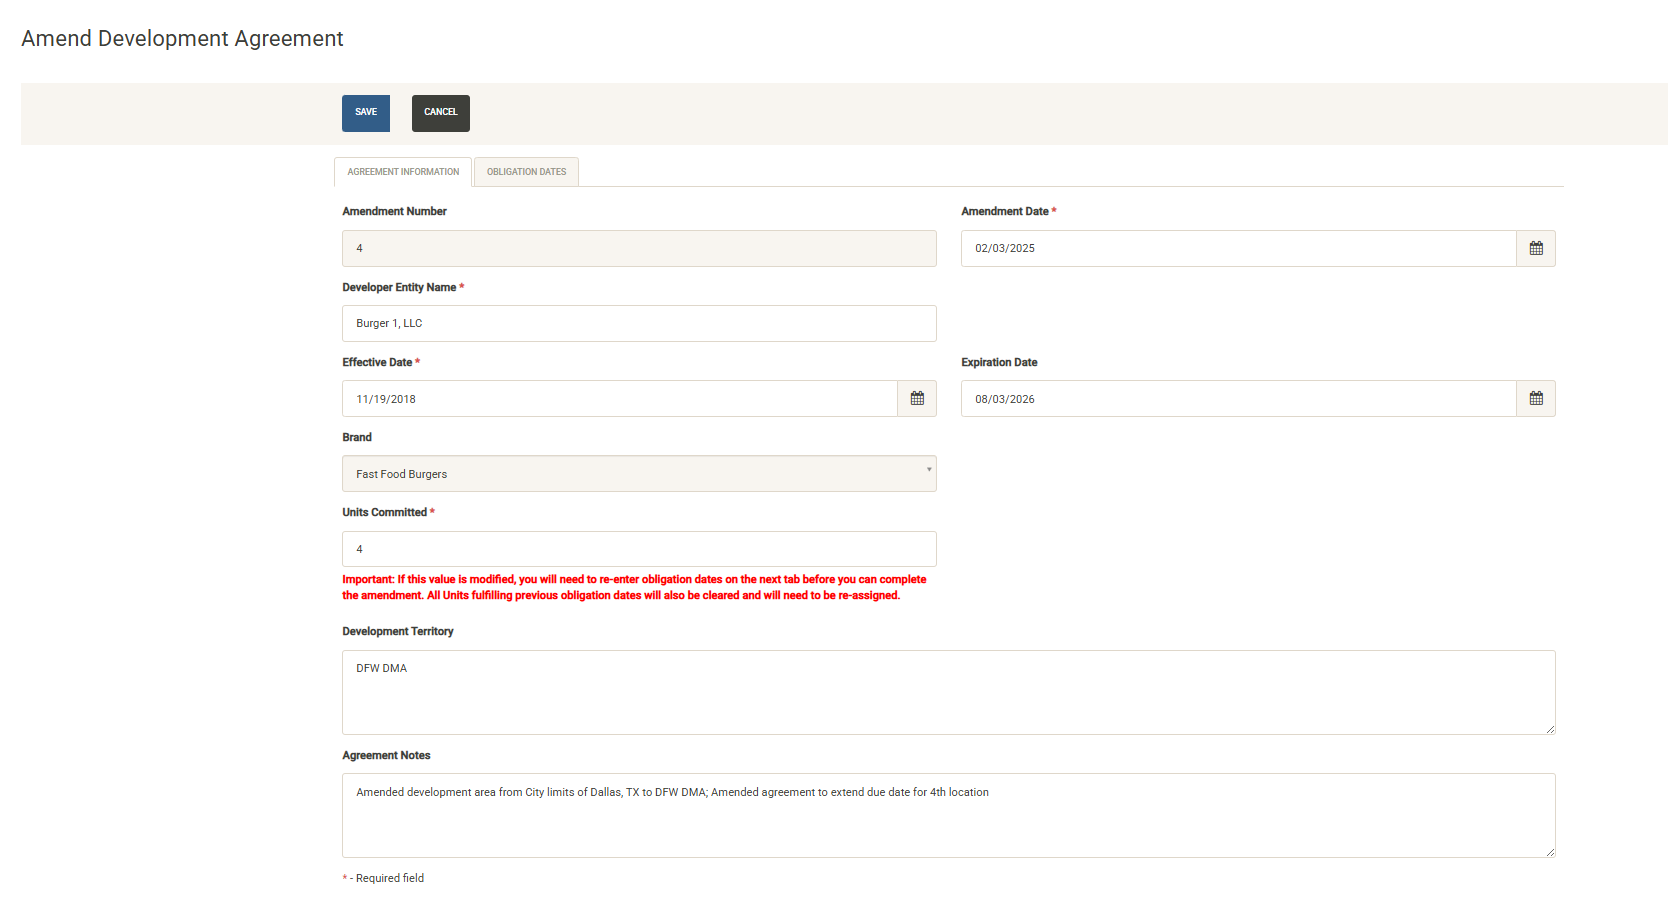
Update the available fields with your new information. Note that if you change the number of units committed, you will have to re-enter all of the obligation dates. If necessary, click over to the Obligation Dates tab before changing this value to record your current obligation dates. If no change is made to the Units Committed field, the obligation dates will not change.
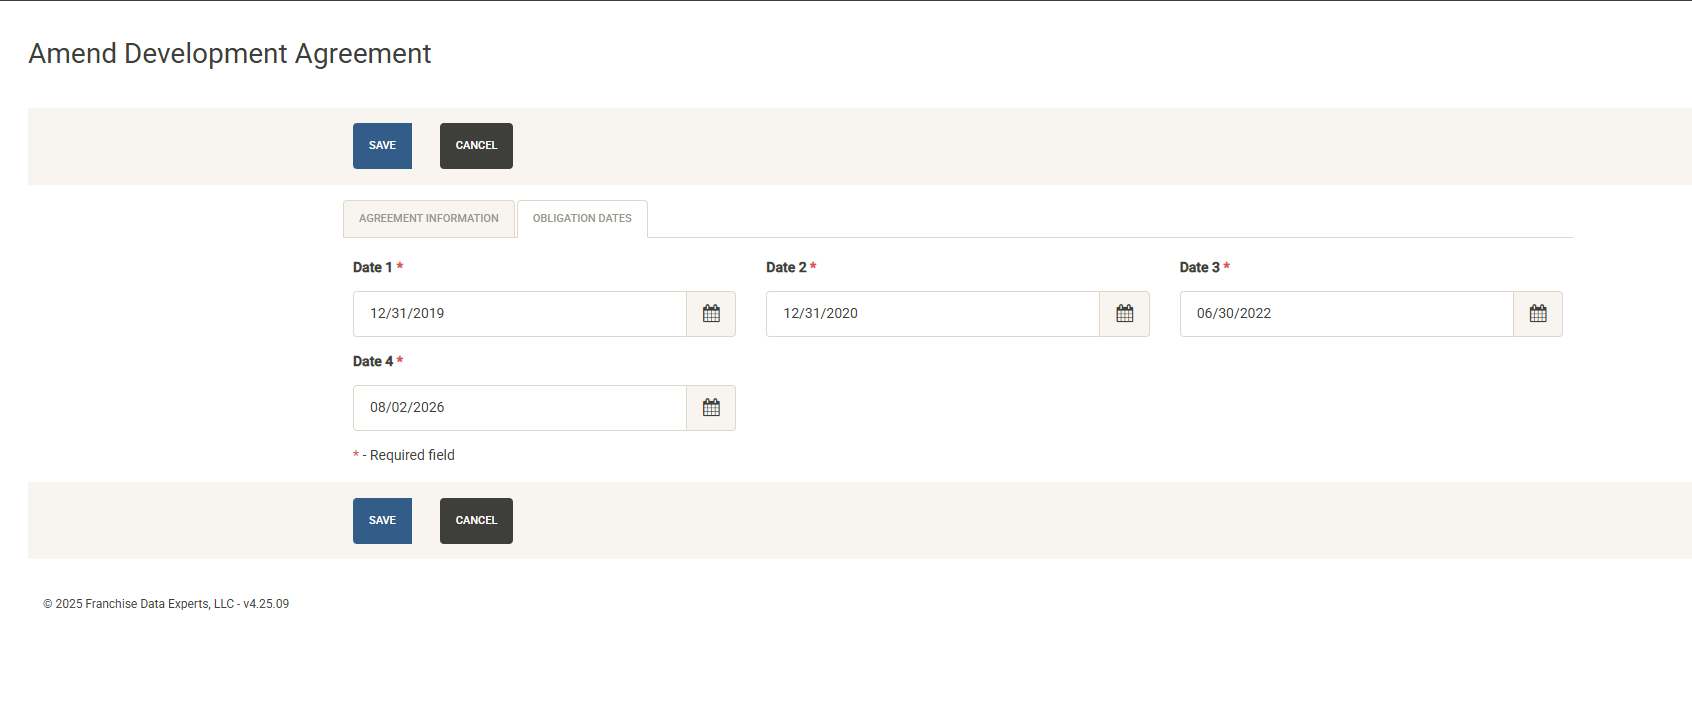
To fulfill development obligations with open units, click on Obligation Dates from the Agreement Information screen.
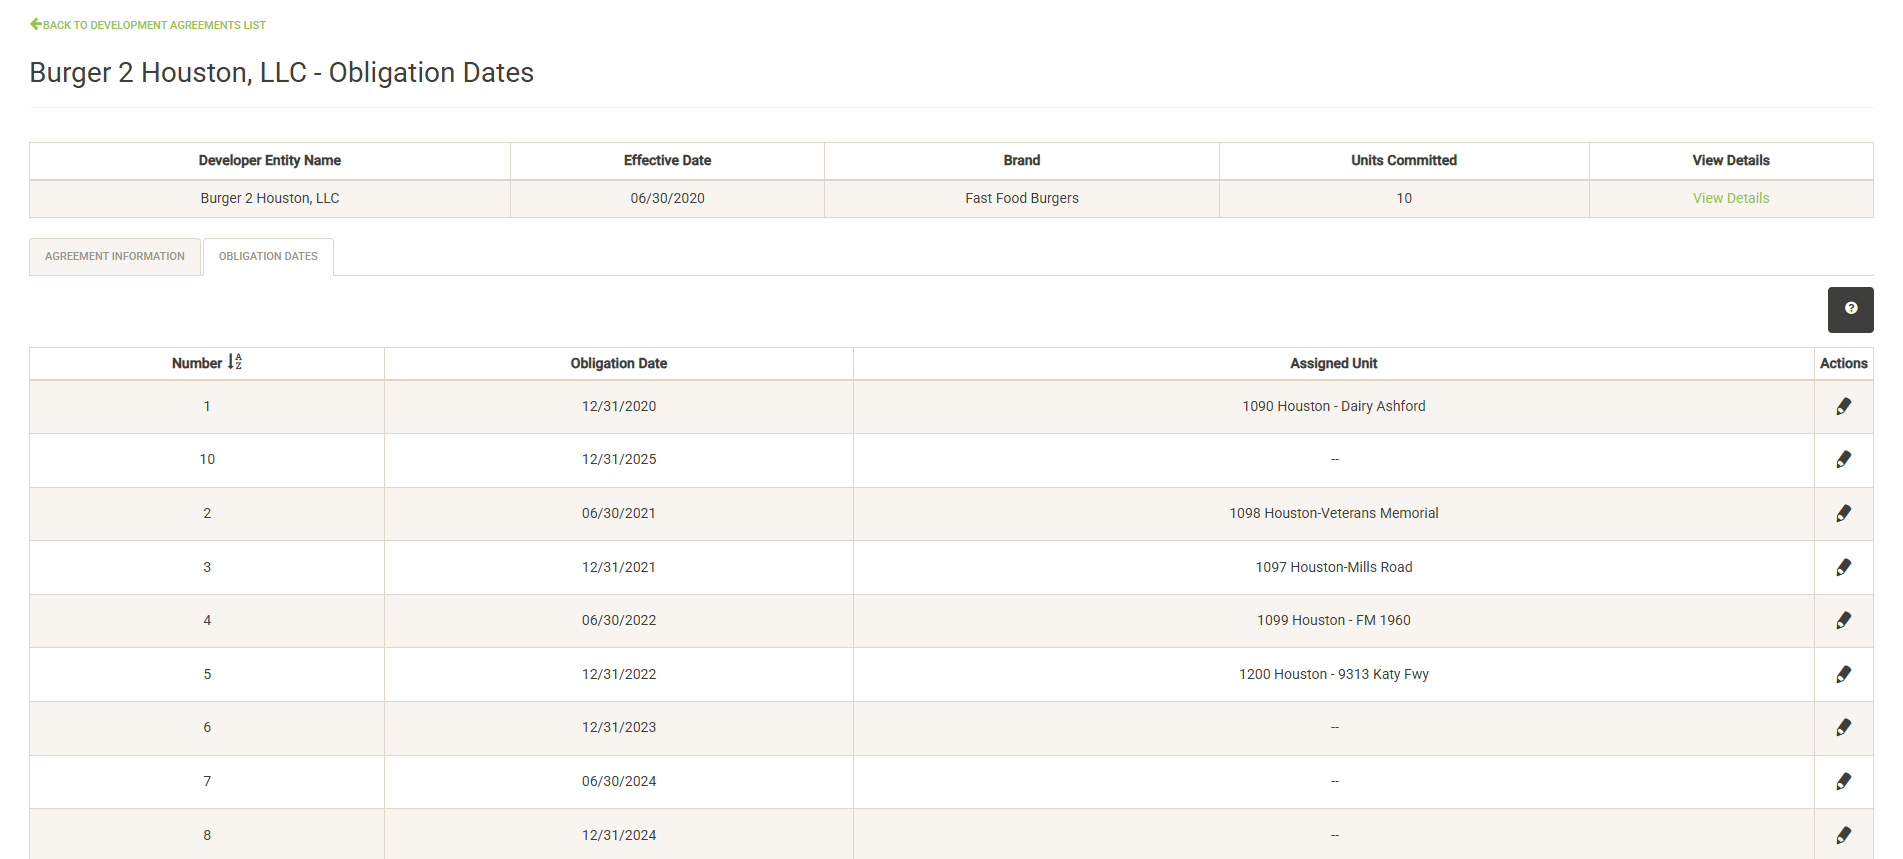
The Obligation Dates tab displays the obligation dates as defined in the agreement, along with units that have been assigned to fulfill those obligations. Click on the edit pencil icon to the right of the obligation date to fulfill the obligation with an active unit.
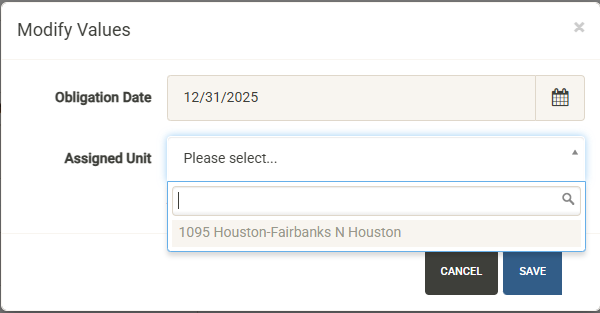
Note that you can only fulfill an obligation with an active, open unit that has been assigned to the Development Agreement. The list will only display units that meet this criteria and have not already been assigned to another obligation date.
Hit Save after selecting the unit and the agreement will be updated to show this obligation fulfilled.
Main Dashboard
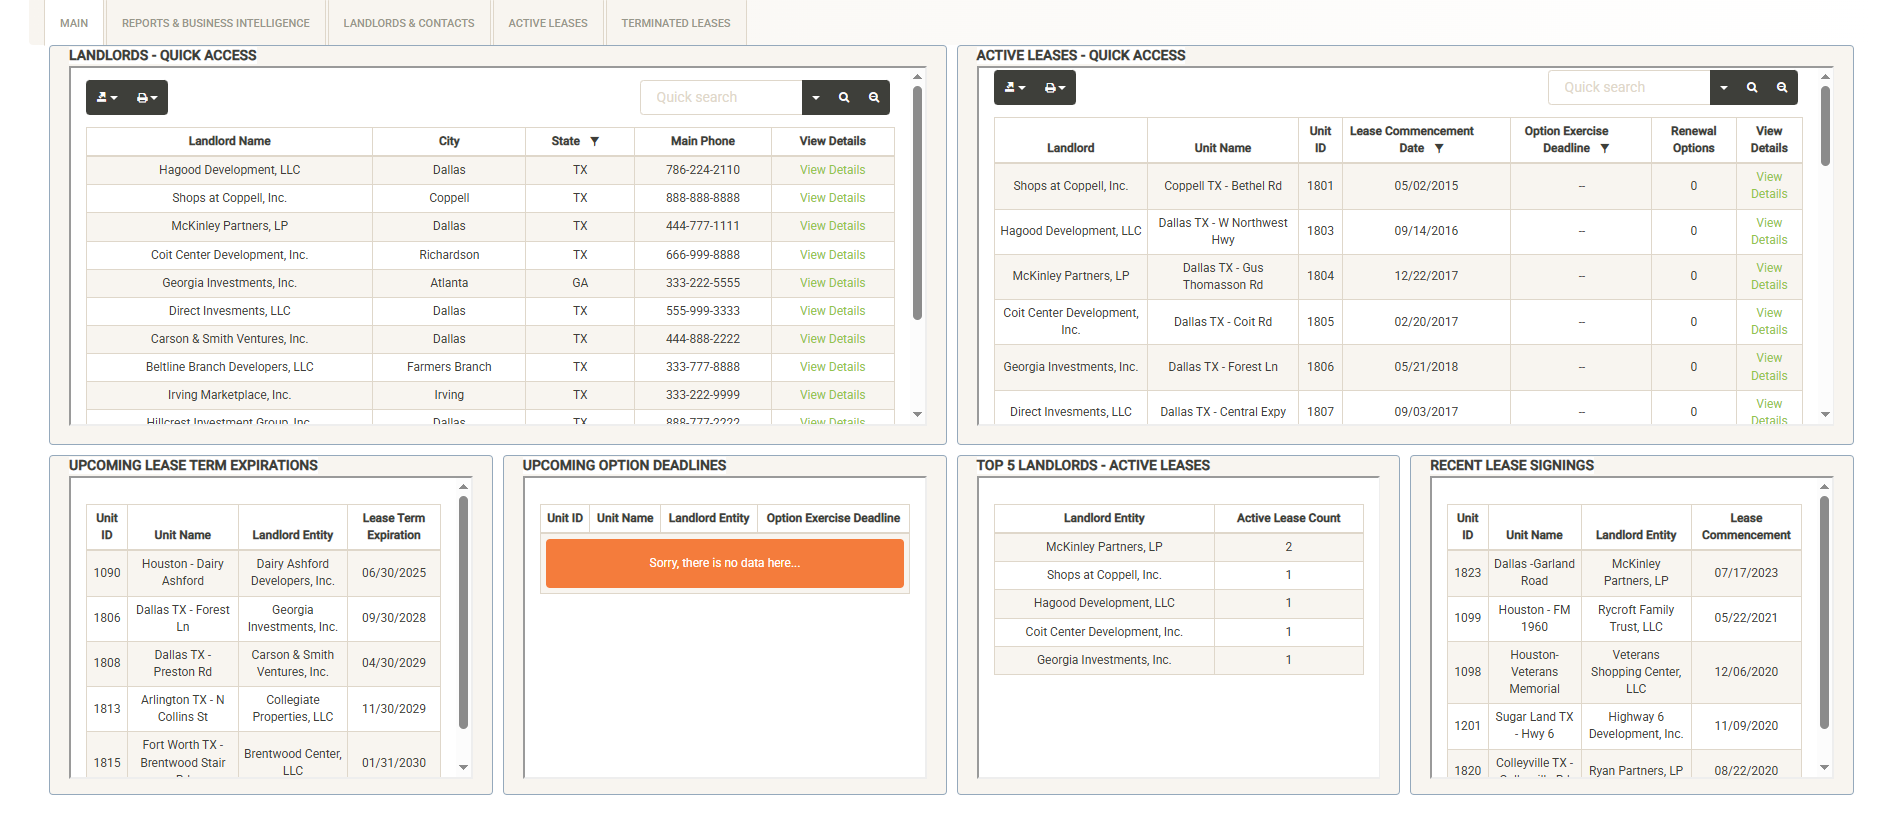
Landlords – Quick Access
You can search and filter the list of landlords to view information about them. The Quick Access window shows basic information about the Franchise Family including the main phone number. Click on View Details to view/edit the full set of information about the landlord. See the Landlords & Contacts section for more information about this.
Active Leases – Quick Access
Displays information about the active leases in your system. You can sort, filter and search the items in this list to quickly locate your lease. Click on View Details to view/edit the full set of lease information. See the Lease Details section for more information.
Lease Alert Widgets
Across the bottom of the Lease Dash page are example alert widgets to keep you up-to-date on lease expiration and renewal dates as well as providing quick summaries of key data. These alert widgets can be customized for your needs.
Upcoming DA Obligations
Displays the upcoming and overdue Development Agreement Obligations. The alert time can be modified (1 year shown). See the Developments Agreement section for more information.
Reports & Business Intelligence
The Lease module includes a dedicated reports tab to generate built-in and custom reports about your lease activities.
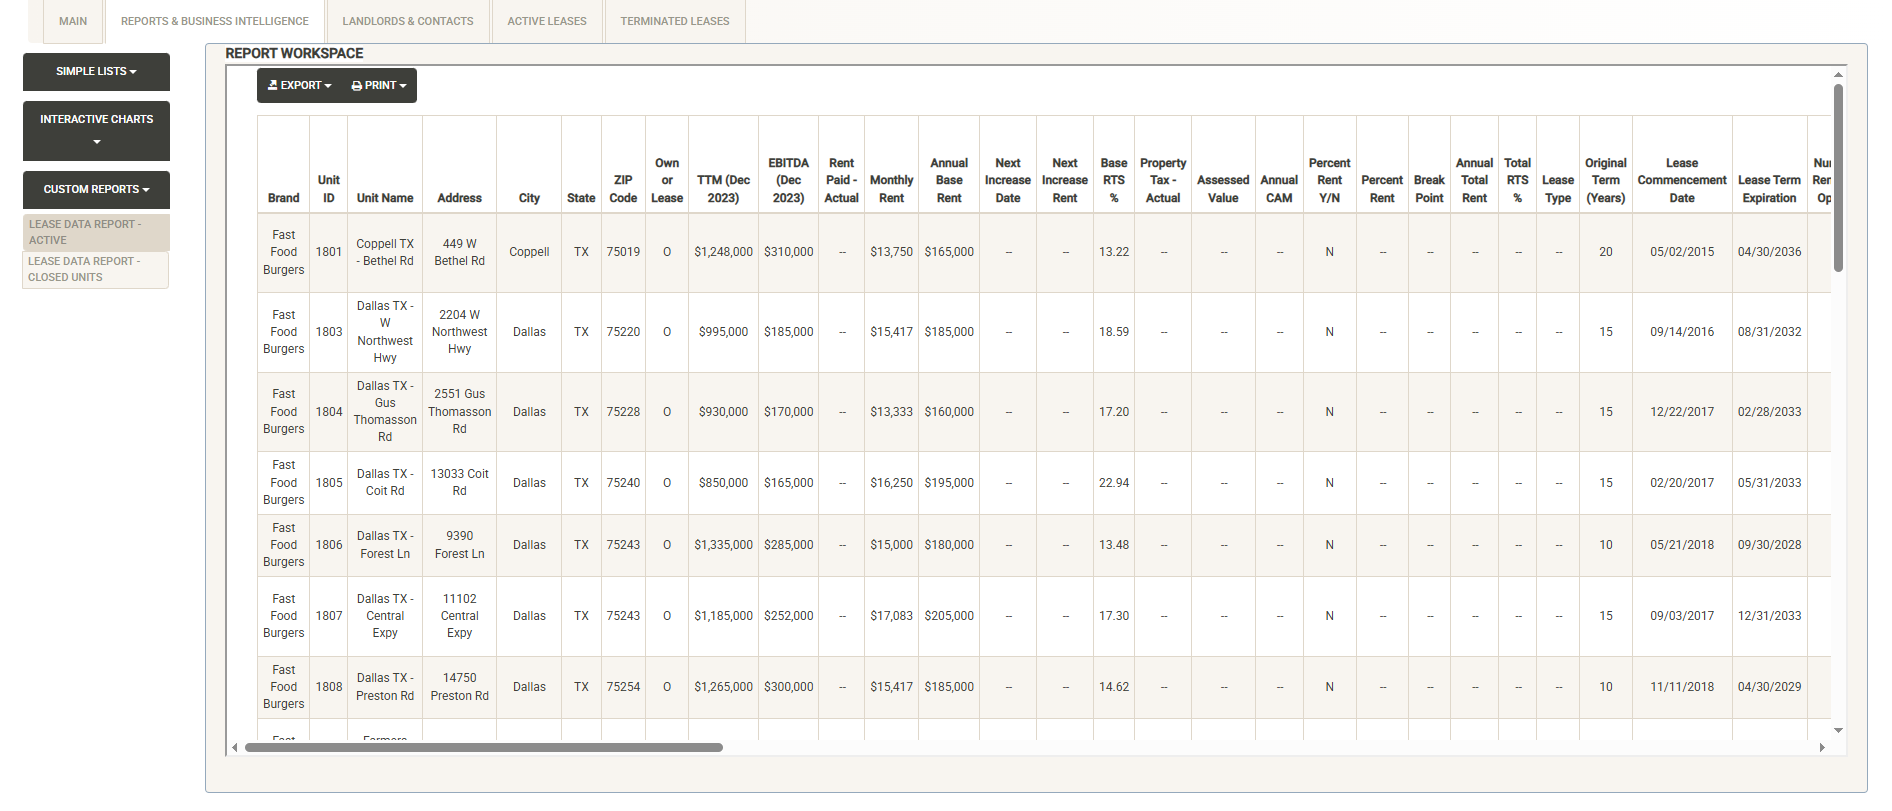
The left side of the page includes report categories including Simple Lists, Interactive Charts and Custom Reports (Note – available reports can be customized by client). Click on a category to open the report list, then select the report you wish to view. The Report Workspace window displays the selected report. Here you can again use the sorting and filtering options to customize your report output. You can export or print the report. Export options include PDF, Excel and CSV output of your report.
See the Reports section for more details about the reports included in the base system.
Landlords & Contacts
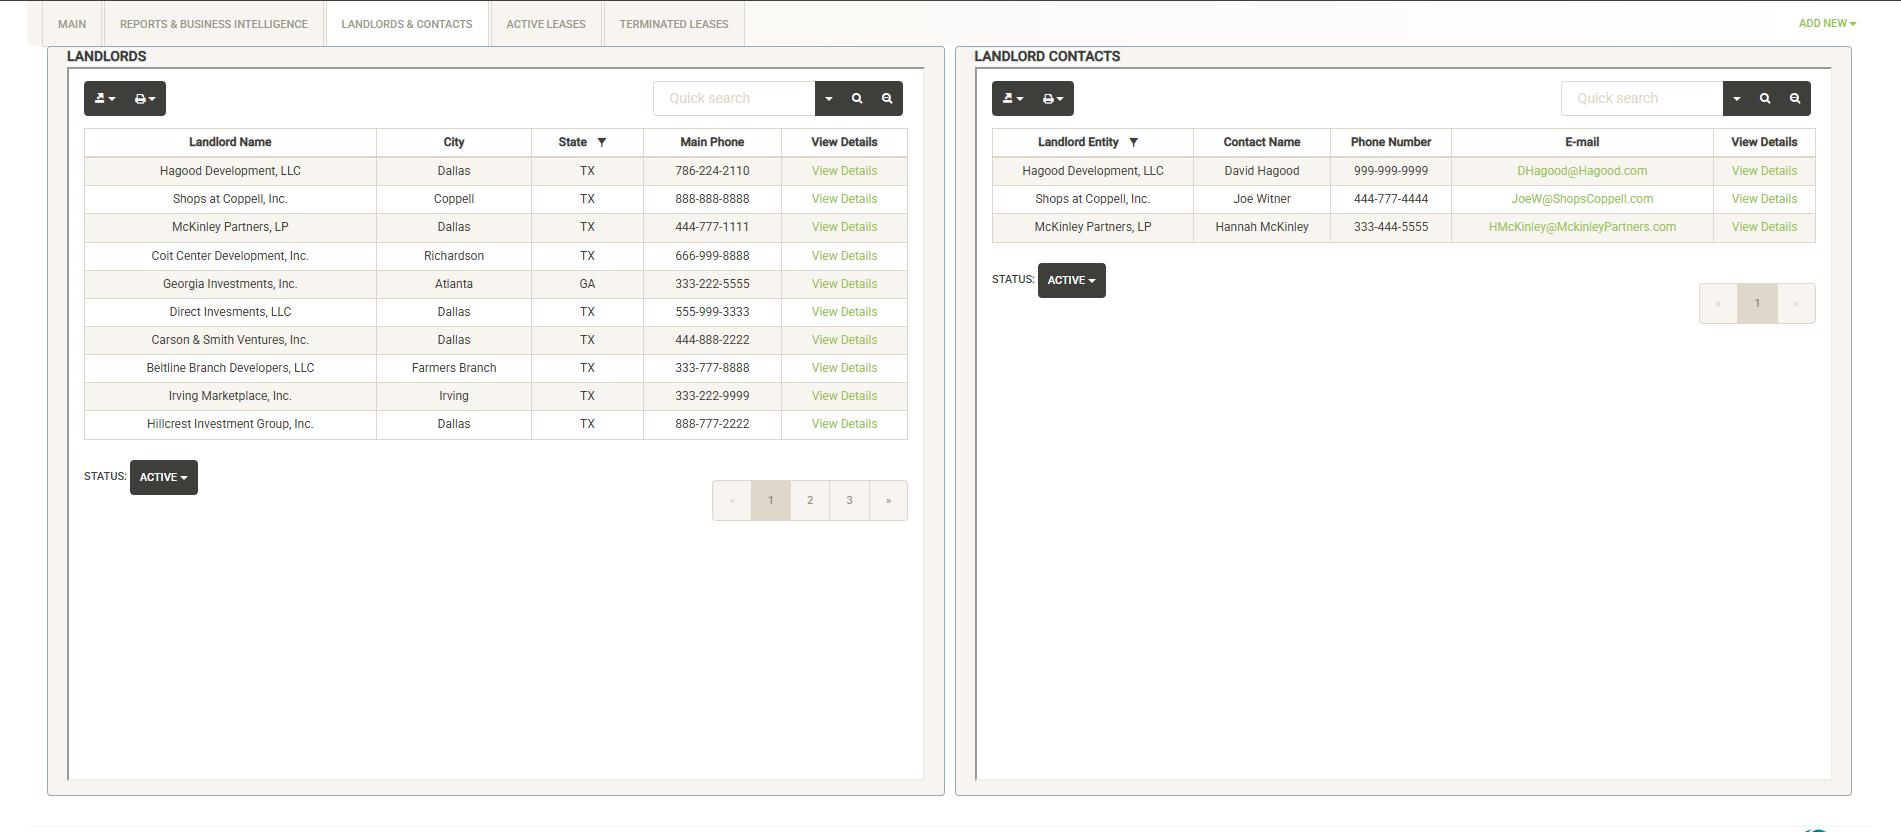
The Landlords & Contacts tab is split into two sections, the Landlords list and the Landlord Contacts list:
Landlords List
Displays the full list of Landlords in your system. You can use the sort and filter options in the column headers to customize the list. You can also print or export the landlord list from this screen.
You can toggle the Status option below the list to toggle between active and inactive landlords.
If you need to view or edit the details of the Landlord, click on the “View Details” link to the far right of the landlord information.
General Information
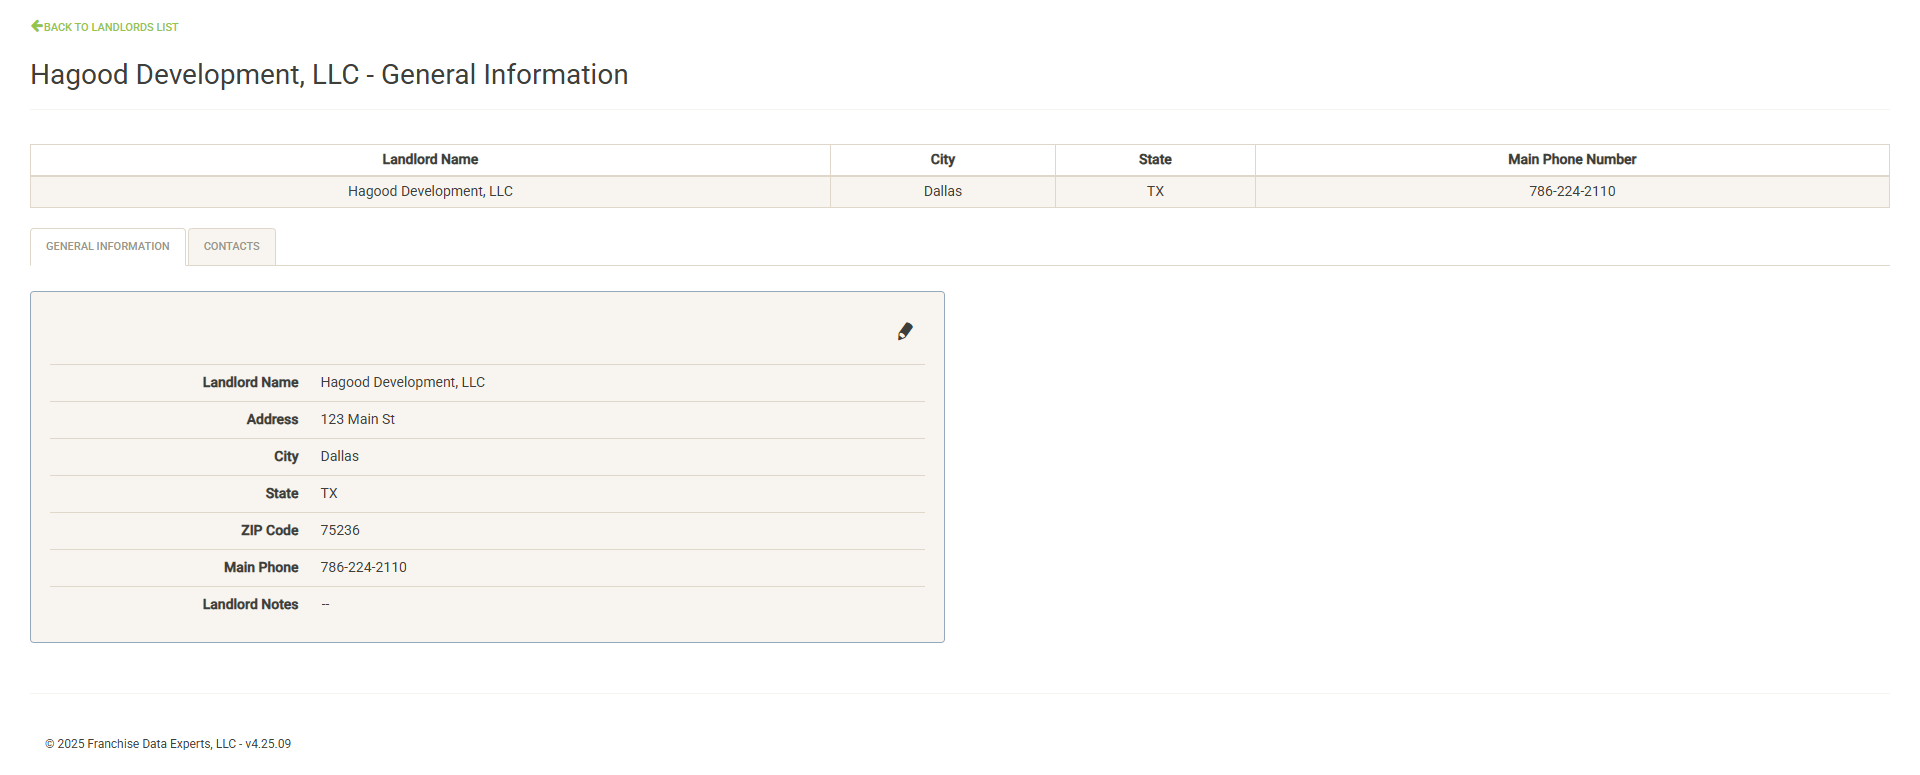
Displays basic information about the Landlord including address, phone and notes. Click on the pencil icon to edit values here (with the proper permissions).
Contacts
Displays contacts for the selected Landlord. You can click on the pencil icon to the left of the contact name to edit the contact information or set it inactive. Click on Add New to add a new contact. Click on the Status dropdown to view active vs. inactive contacts for the Franchise Family.
Landlord Contacts List
Also displayed on the Landlords & Contacts tab is the Landlord Contacts List.
You can quickly locate a Landlord contact using this window. The attribute columns can be sorted or filtered, or you can enter a search term to locate the contact.
Click on View Details to view or edit the contact information. This will take you to the Landlord contacts page (described above):
Active Leases
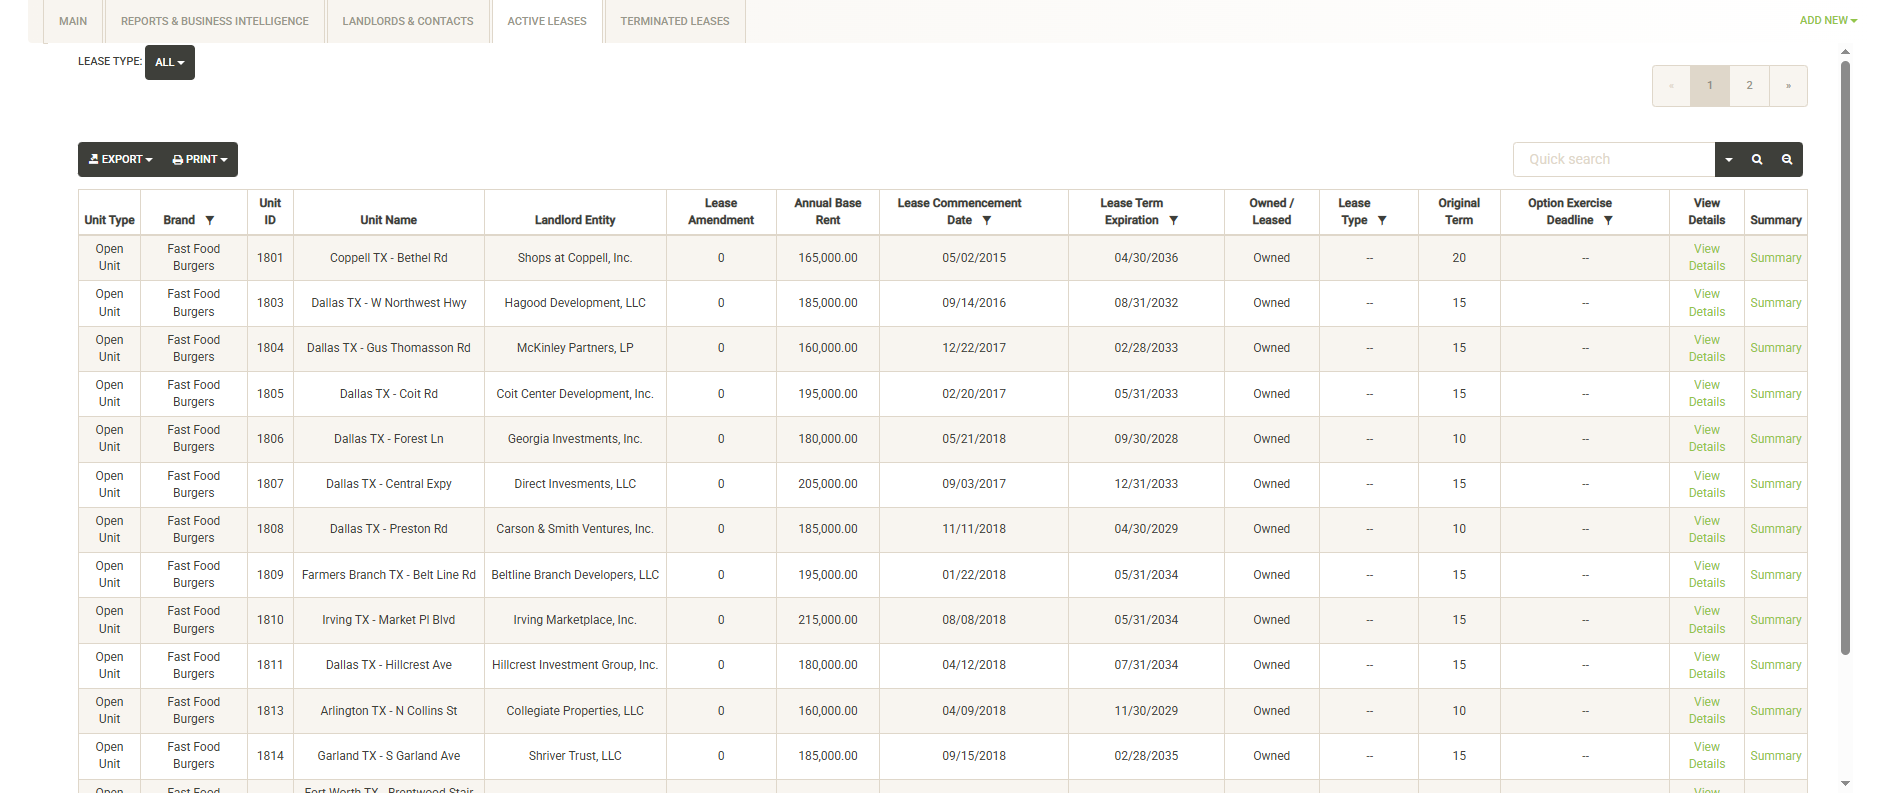
Displays the active leases currently in your system along with key attributes about each lease. You can sort and filter on these columns to customize the list, which can also be exported or printed directly from this screen.
You can also use the Lease Type dropdown to filter the list by specific lease types: Open Unit, Development Project, Closed Unit.
Click View Details to the right of the lease info to view/edit the full Lease Details. Click Summary to view the Lease Summary:
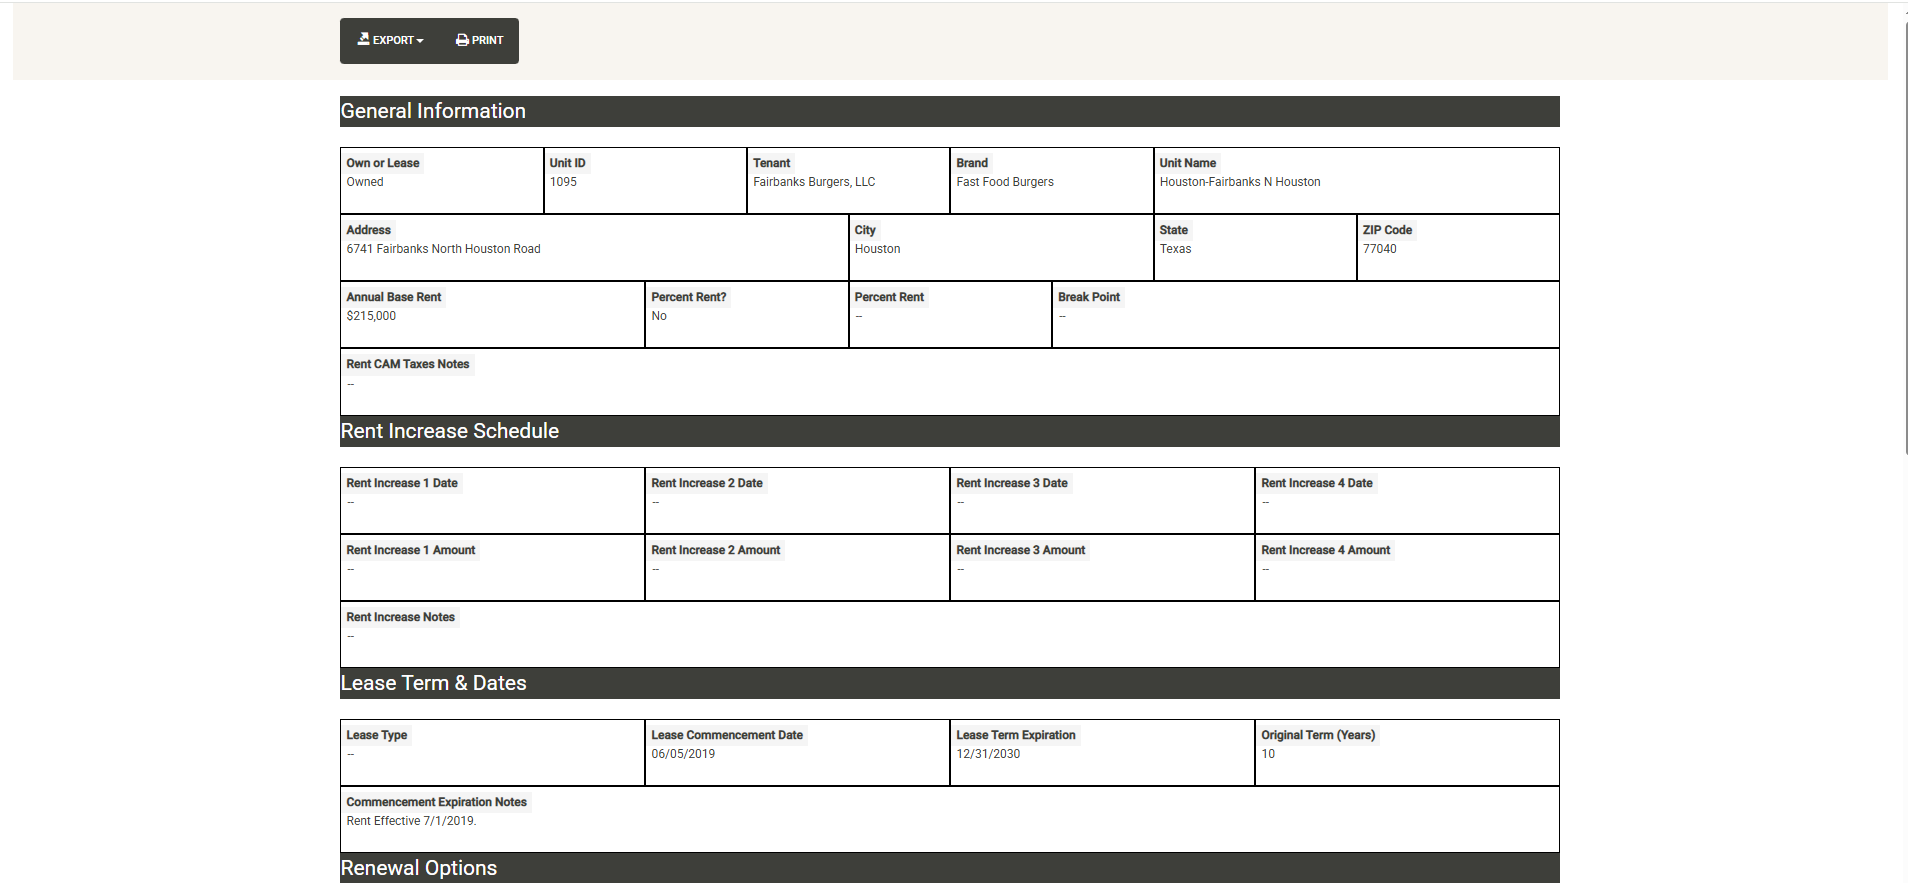
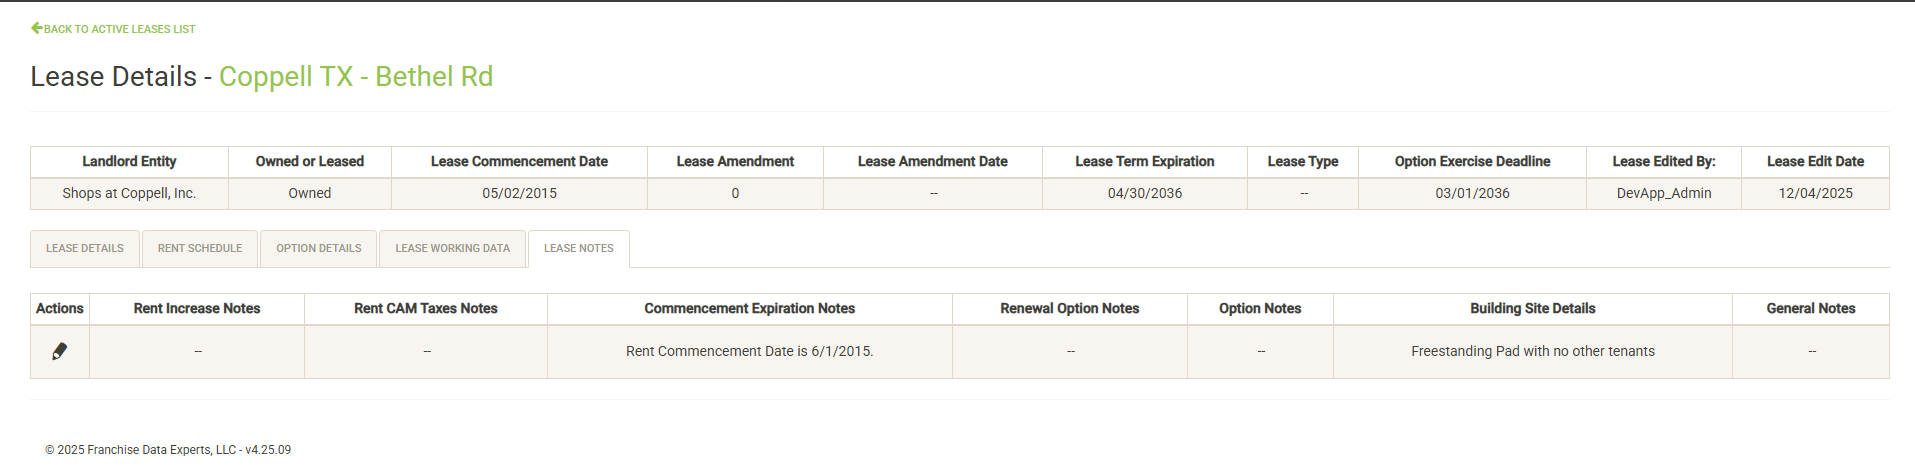
Lease Details
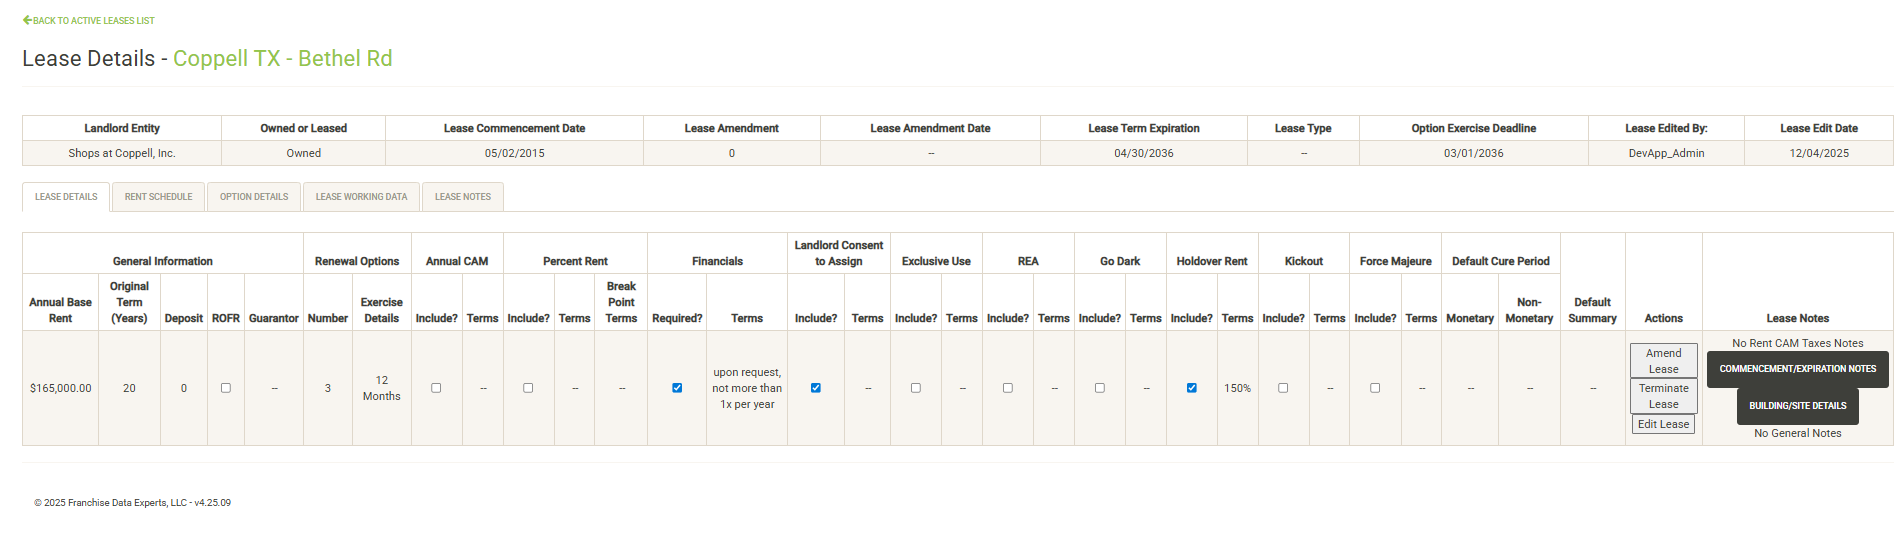
The Lease Details page includes five tabs. The first is opened by default and includes various details about the lease. If you have the proper permissions, the actions column includes various actions you can take for the current lease. See the Amend Lease or Edit Lease sections for more information. The Lease Notes column includes notes about various areas of the lease. If there are no notes in the system for the category, a message will reflect this. If there are notes, click on the button to display the notes in a pop-up window.
Rent Schedule
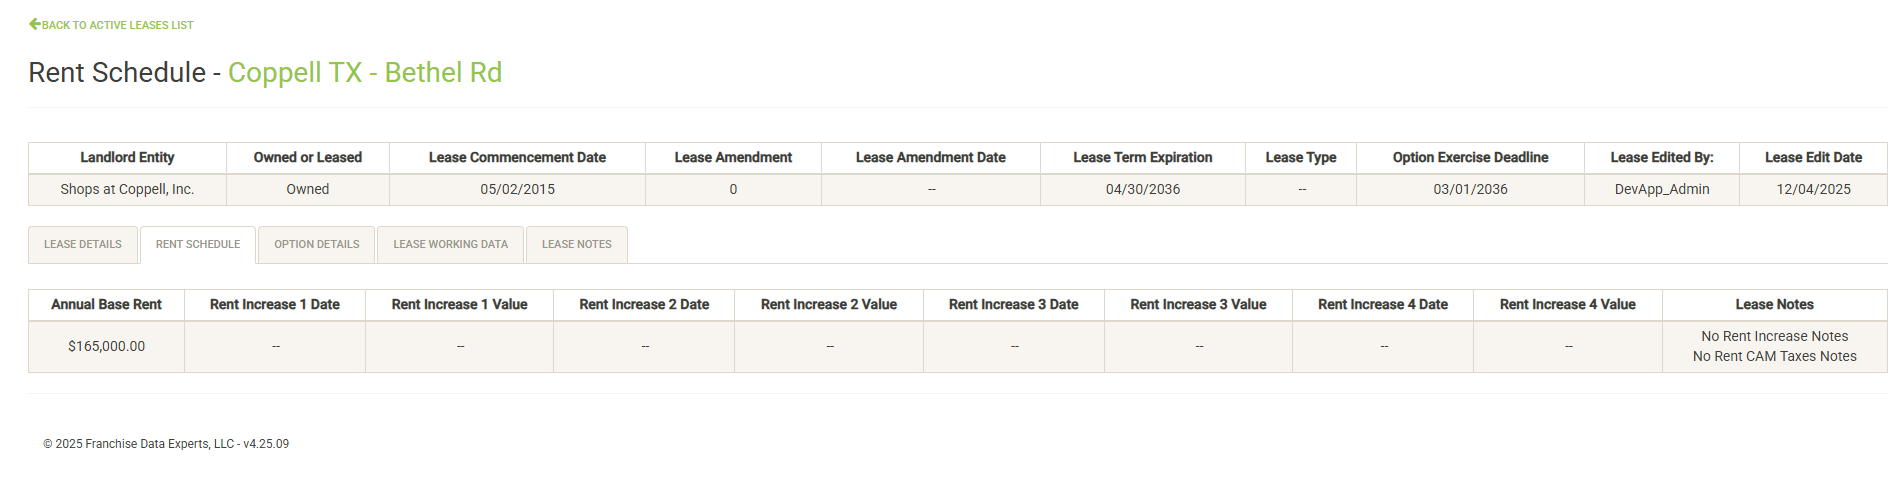
The Rent Schedule tab includes details about the rent schedule if there are scheduled rent increases. The Lease Notes column includes notes related to the rent schedule. If there are no notes in the system for the category, a message will reflect this. If there are notes, click on the button to display the notes in a pop-up window.
Option Details
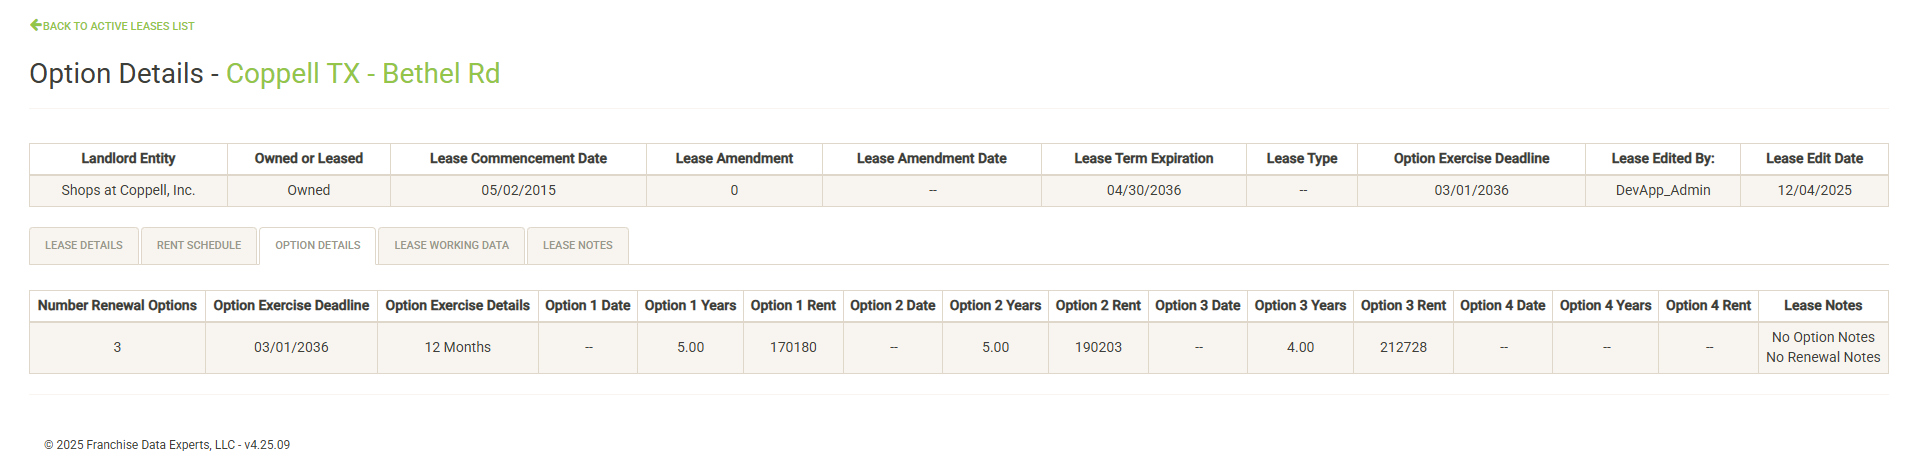
The Option Details tab includes information about the options that have been defined in the lease. The Lease Notes column includes notes related to the options. If there are no notes in the system for the category, a message will reflect this. If there are notes, click on the button to display the notes in a pop-up window.
Lease Working Data
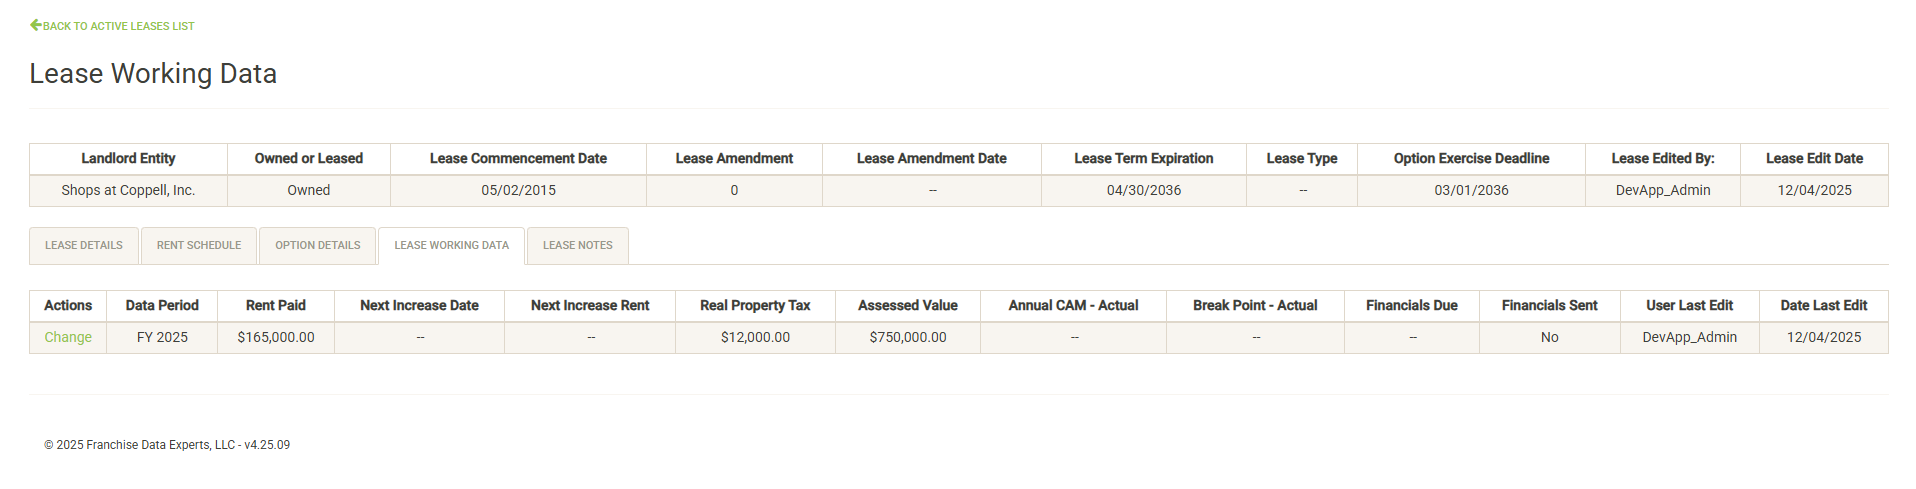
Lease Working Data contains current-year values for various elements of the lease. Items include actual rent paid, actual taxes, current assessed value and upcoming deadlines for recurring obligations. These values are used for various lease reports and are optional.
You can modify or update this data (with the proper permissions) at any time without editing or amending the lease. Click on the Change link to the left of the data to update the lease working data.
Lease Notes
Displays the various categories of lease notes that populate the notes buttons on the previous tabs. Click on the edit pencil to the edit the notes for the lease. Notes can be added or edited (with the proper permissions) at any time without editing or amending the lease.
Terminated Leases
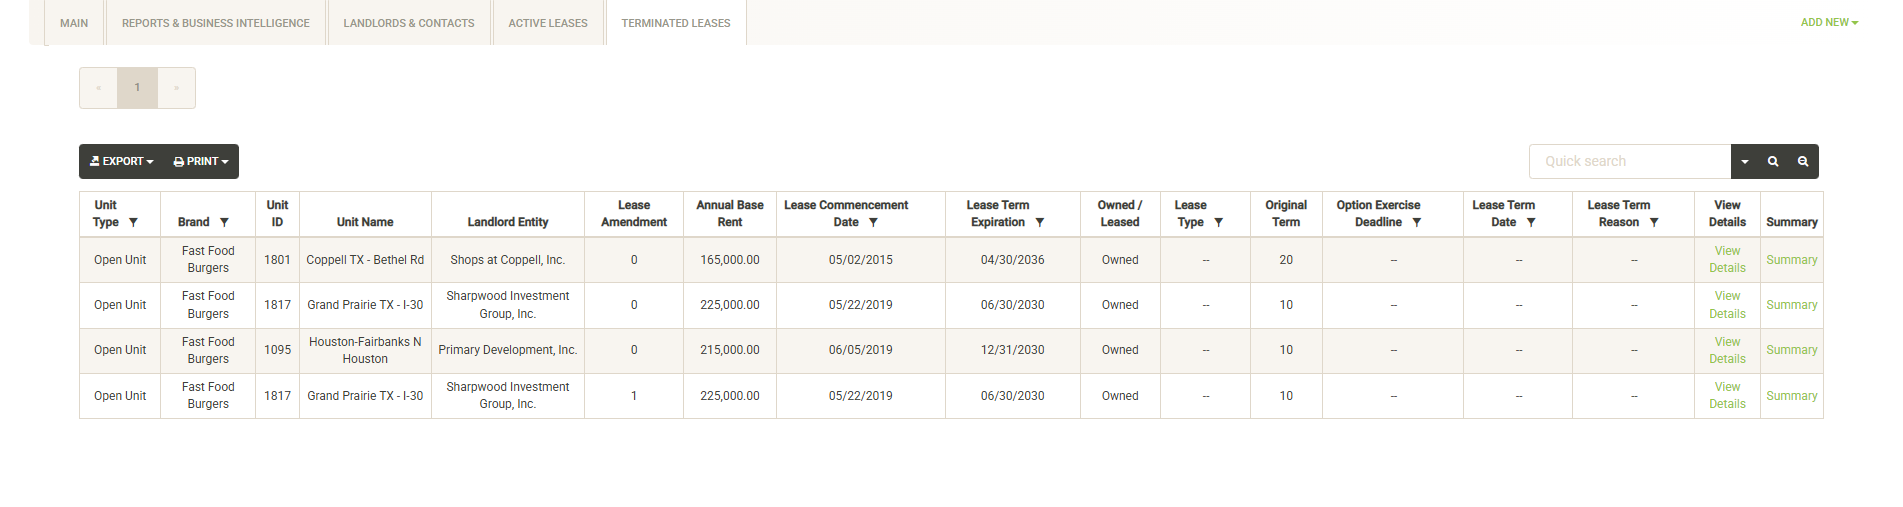
Displays the terminated leases currently in your system along with key attributes about each lease. You can sort and filter on these columns to customize the list, which can also be exported or printed directly from this screen.
Click View Details to the right of the lease info to view/edit the full Lease Details. Lease Details for terminated leases cannot be edited or amended, aside from Lease Working Data. Click Summary to view the Terminated Lease Summary.
Main Dashboard
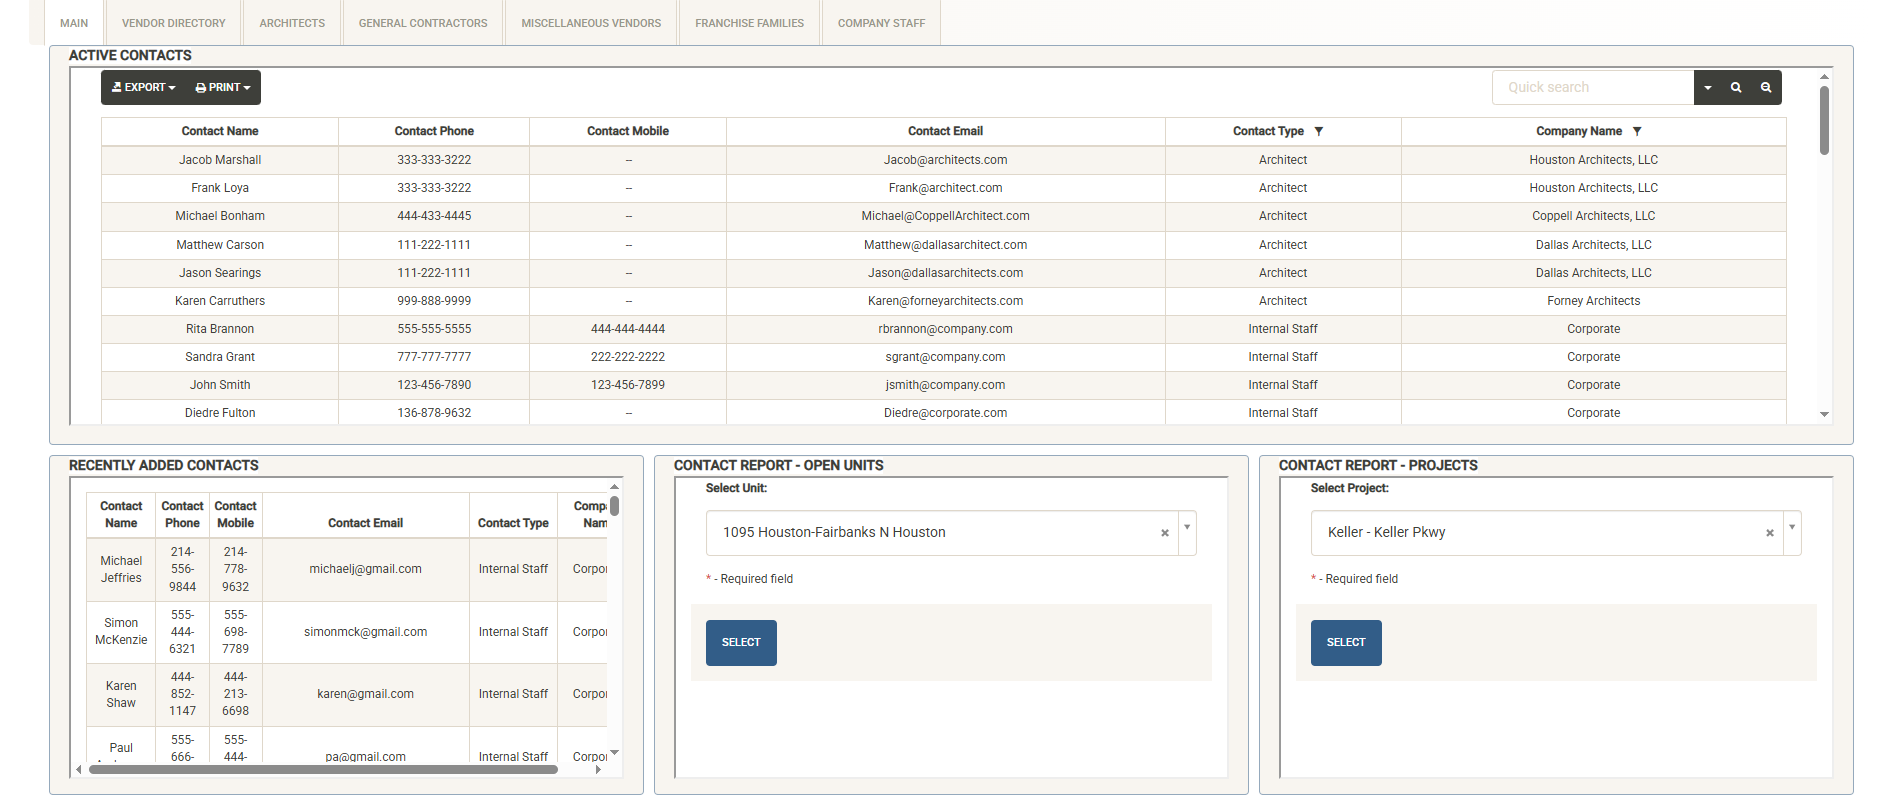
Active Contacts Widget
Provides a list of all system contacts that have been loaded into Architects, General Contractors, Miscellaneous Vendors, Franchise Families and Company Staff. The list can be quickly searched, sorted and filtered. Once you have modified the list, you can print or export. If you just need to look up a contact for quick reference, Active Contacts makes the task simple.
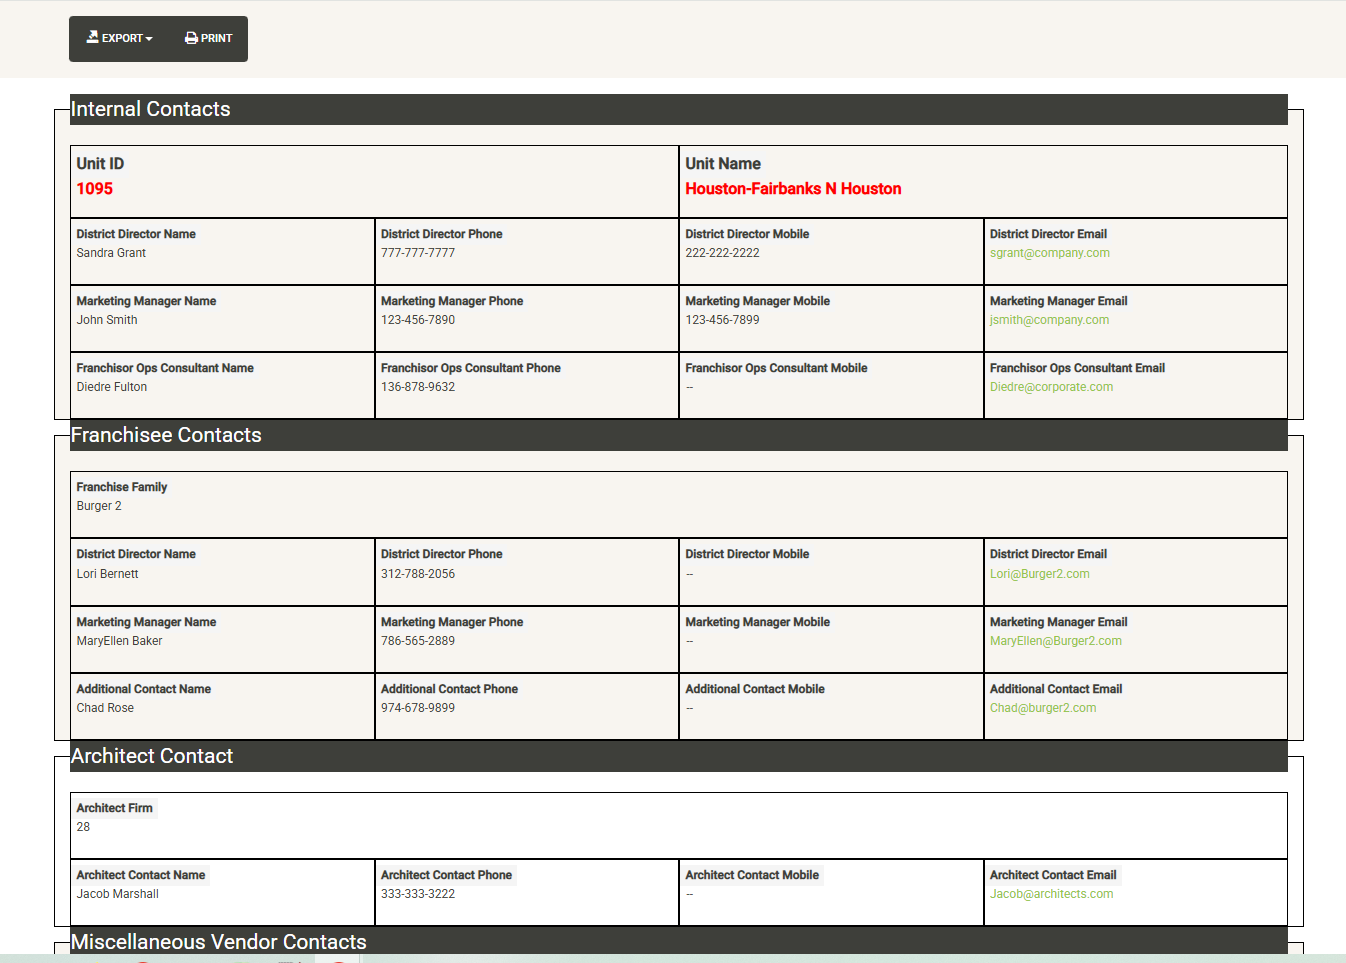
Contact Reports – Units & Projects
To generate a complete contact report for a unit or project, simply select the unit or project from the drop down and hit Select. The report can be printed or exported from this page.
Vendor Directory
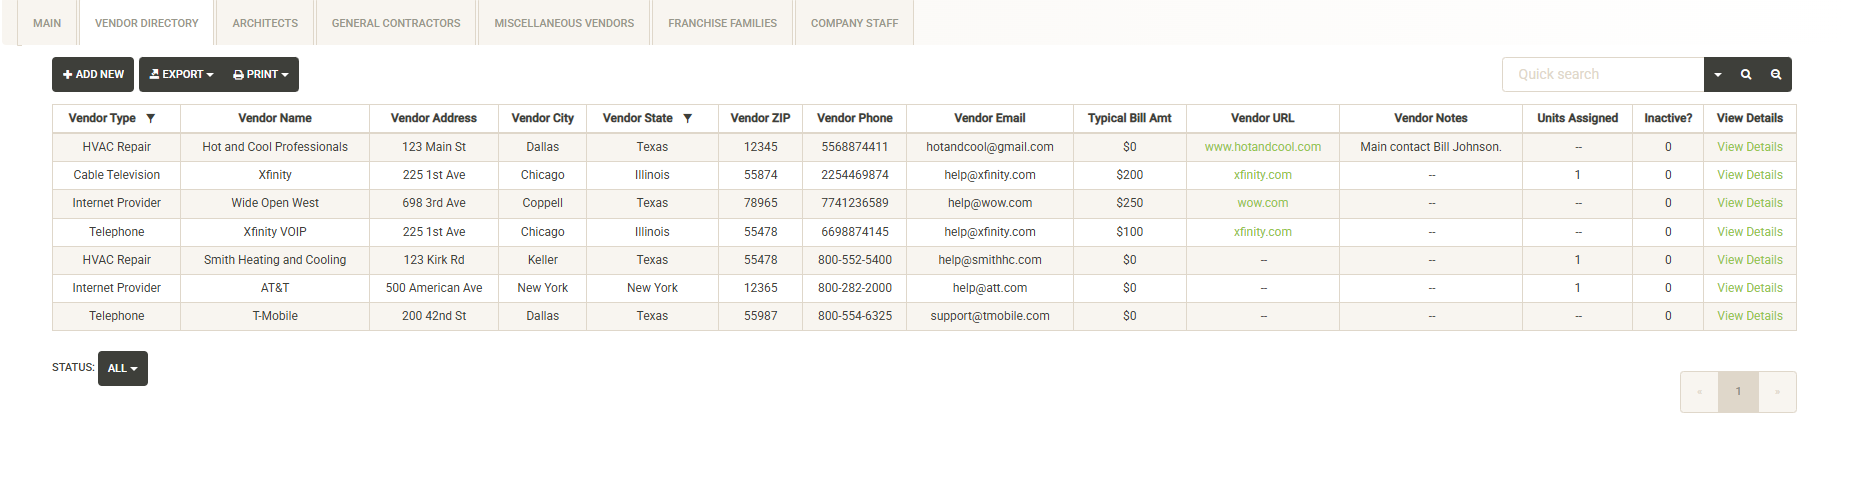
The Vendor Directory displays a list of vendors that have been registered in UnitTrak. These vendors can be assigned to units and projects through the unit details and project details pages. The Vendor Directory contains contact information for the vendor including phone number and e-mail addresses. When assigning a vendor to a unit or project, unit-specific contact information can also be added. You can view the unit-specific details on the Assigned Units or Assigned Projects tabs.
Also included is a field for optionally including a Typical Bill Amount, URL, Notes, and the number units (including projects) that the vendor has been assigned to. Click on the Status dropdown to view Active/Inactive vendors. Note that Inactive Vendors will not be available for assignment to units or projects.
The list can be sorted and filtered and the results printed and exported. New vendors can be added by clicking on the Add New Button. Click on the View Details link to the right of a vendor to view/edit the details of the selected vendor.
Vendor Information
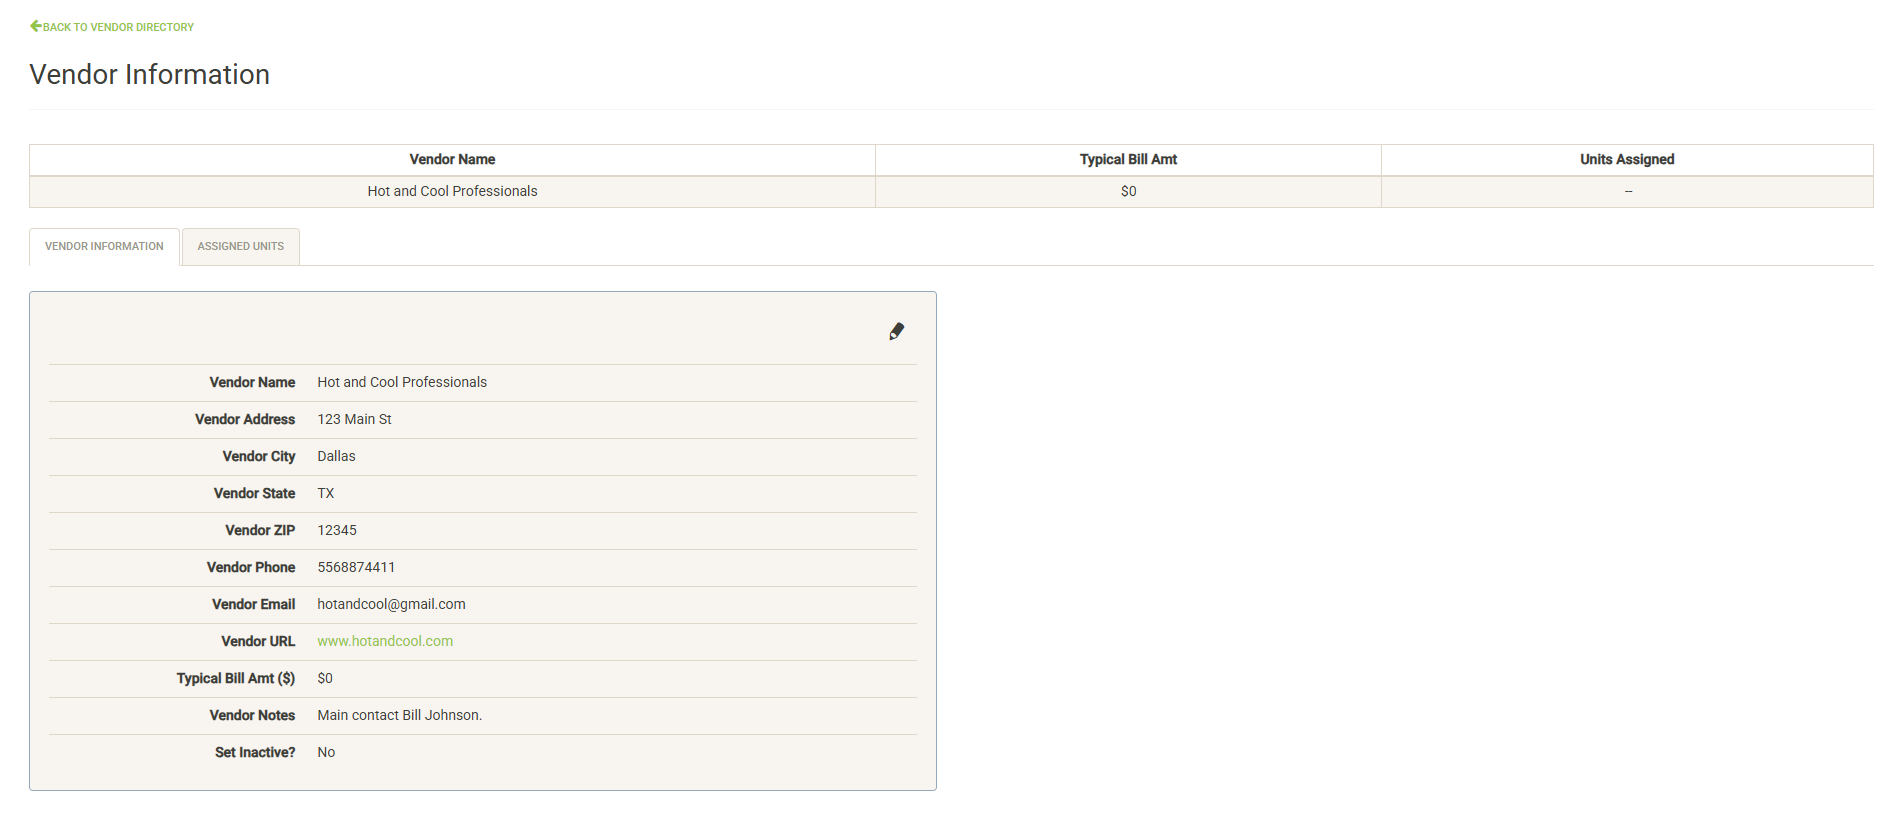
Displays general and contact information for the vendor. Note this is the main contact information, units and projects that have assigned this vendor can include unit-specific contact information. You can view this information in the Assigned Units or Assigned Projects tabs.
If you have the proper permissions, you can click on the edit pencil to edit this data or set the vendor inactive.
Assigned Units & Assigned Projects
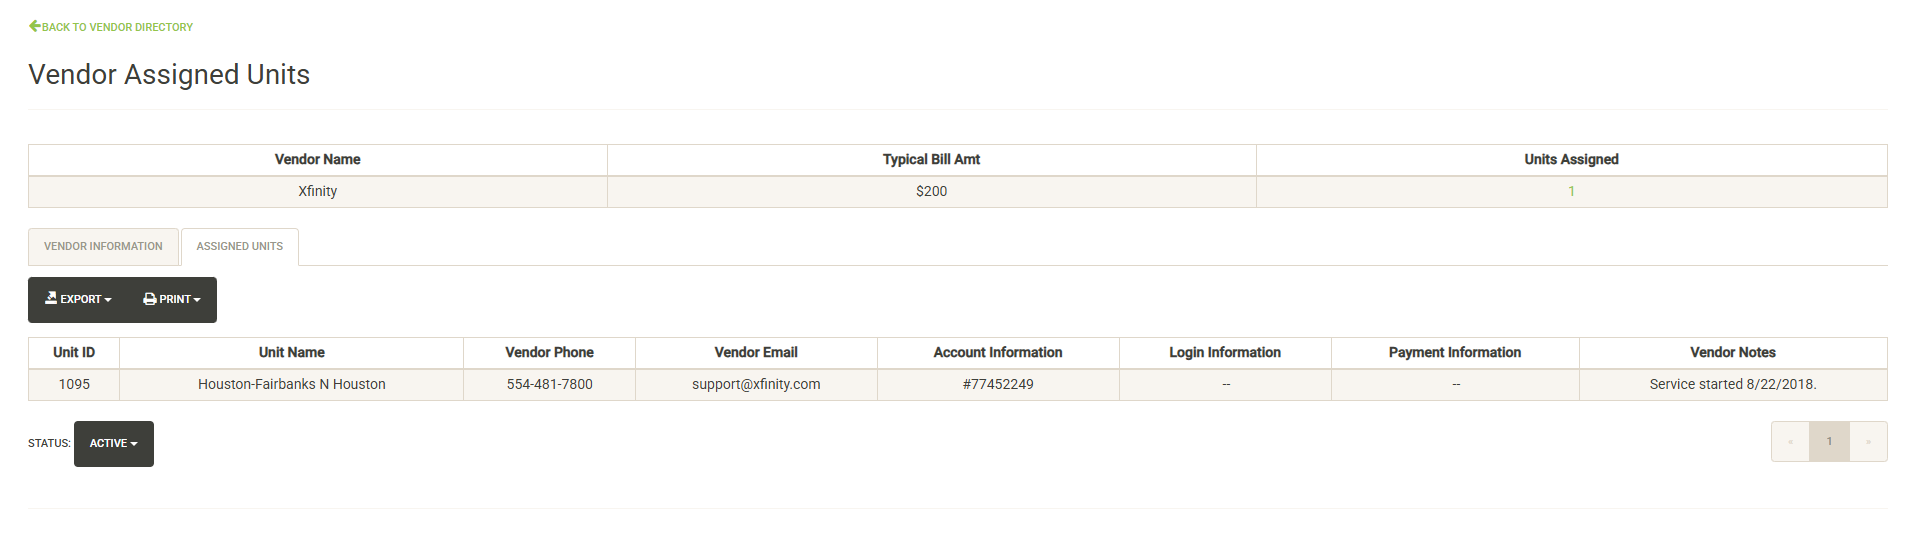
Displays a list of the units or projects to which the vendor has been assigned. If unit-specific information was added at assignment, that information is displayed here. The list can be exported and printed.
Click on the Status dropdown to view inactive assignments. If a vendor was assigned to a unit and then later the assignment was set inactive, you can view that history here.
Architects, General Contractors & Miscellaneous Vendors
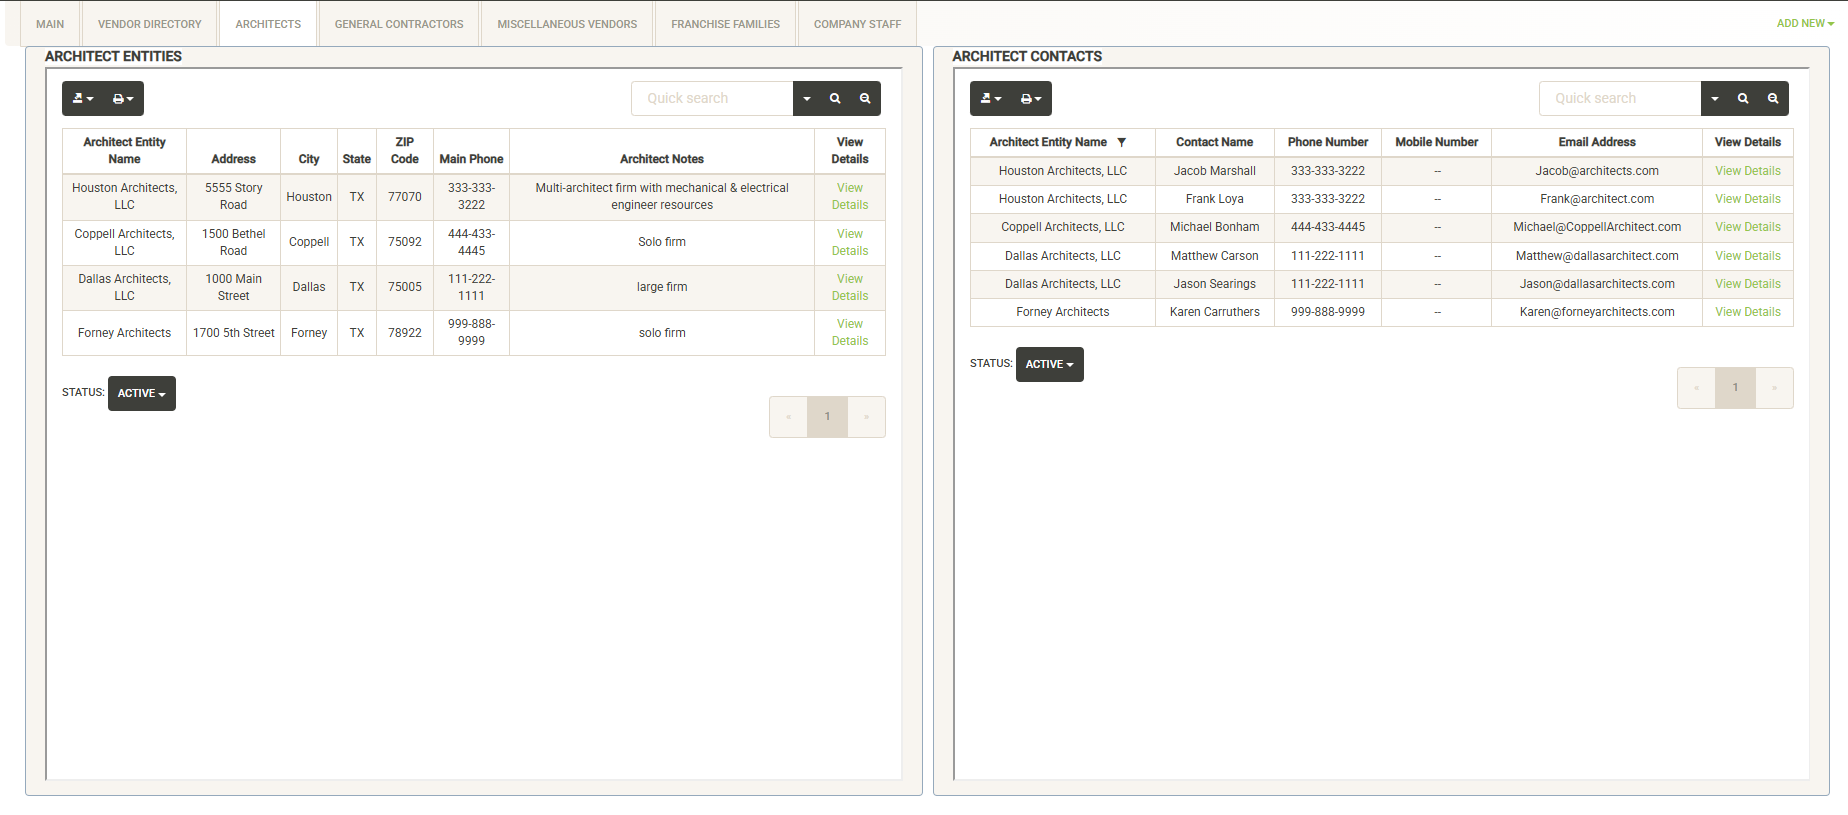
Vendors with multiple points of contact and various roles are logged in a dedicated section by type. These types can be customized by installation. In the example shown, UnitTrak is tracking Architects, General Contractors and Miscellaneous Vendors.
Each of these pages is similar, displaying a list of Entities on the left and a full contact list for the category on the right. You can search either of these sections, sort and filter, and print or export the lists. You can click on the Status drop-down to switch between active and inactive entries. Clicking on View Details for either an entity or contact takes you to the detail page.
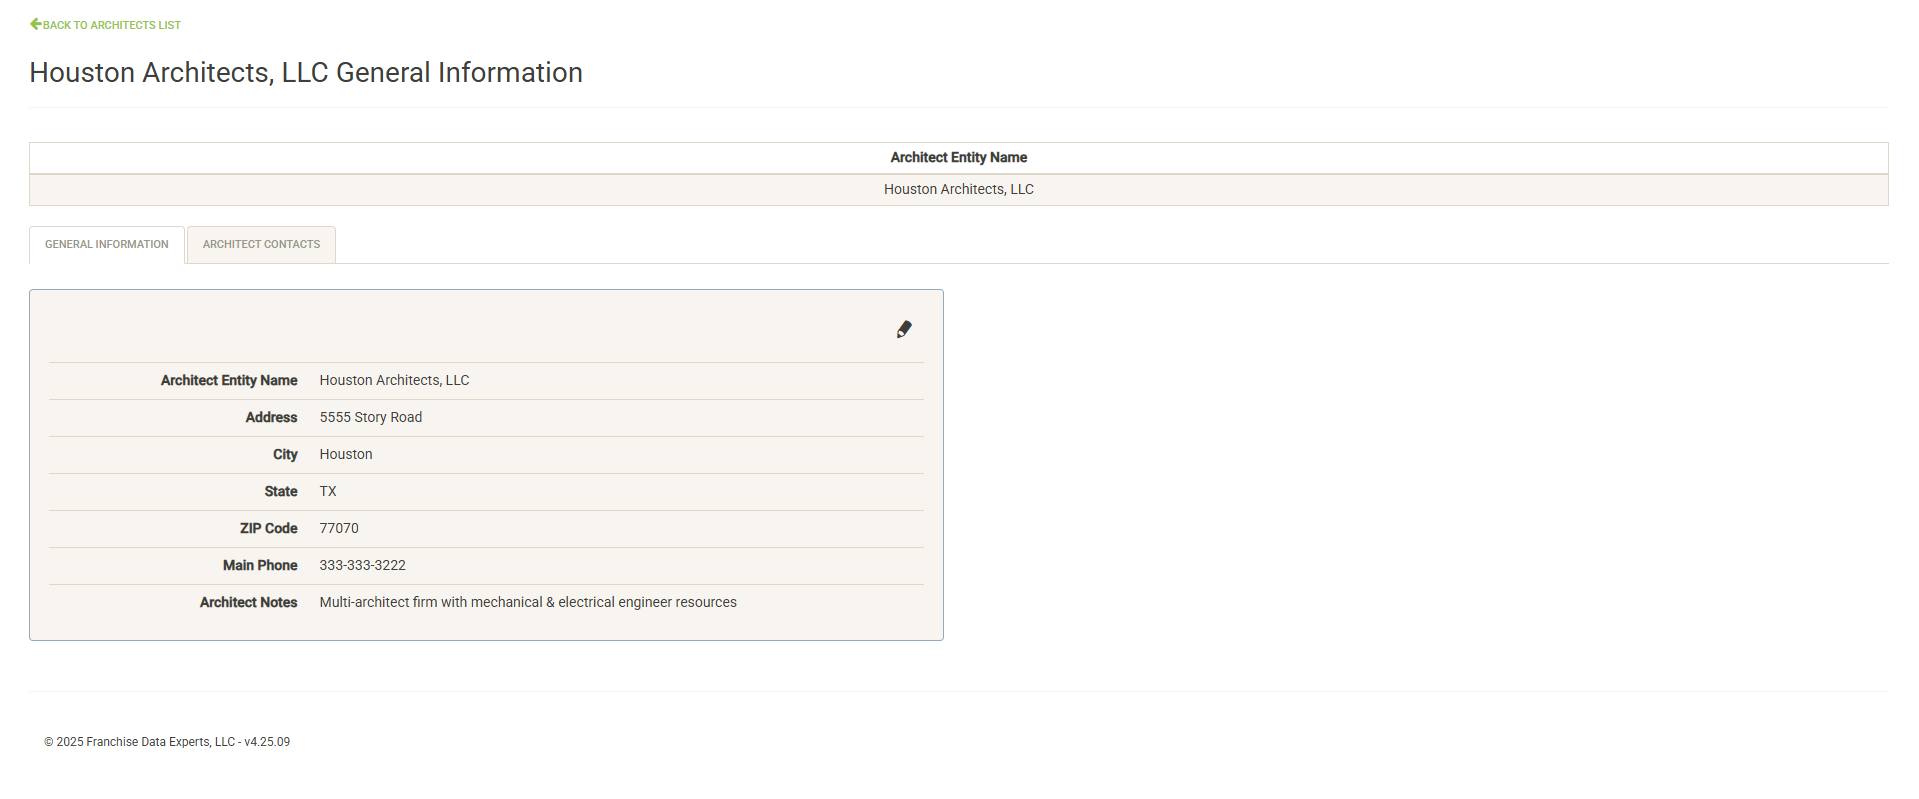
If you clicked on the entity details, you will be taken to the general information page. If you have the proper permissions, you can click the edit pencil to modify this information or set the Architect inactive.
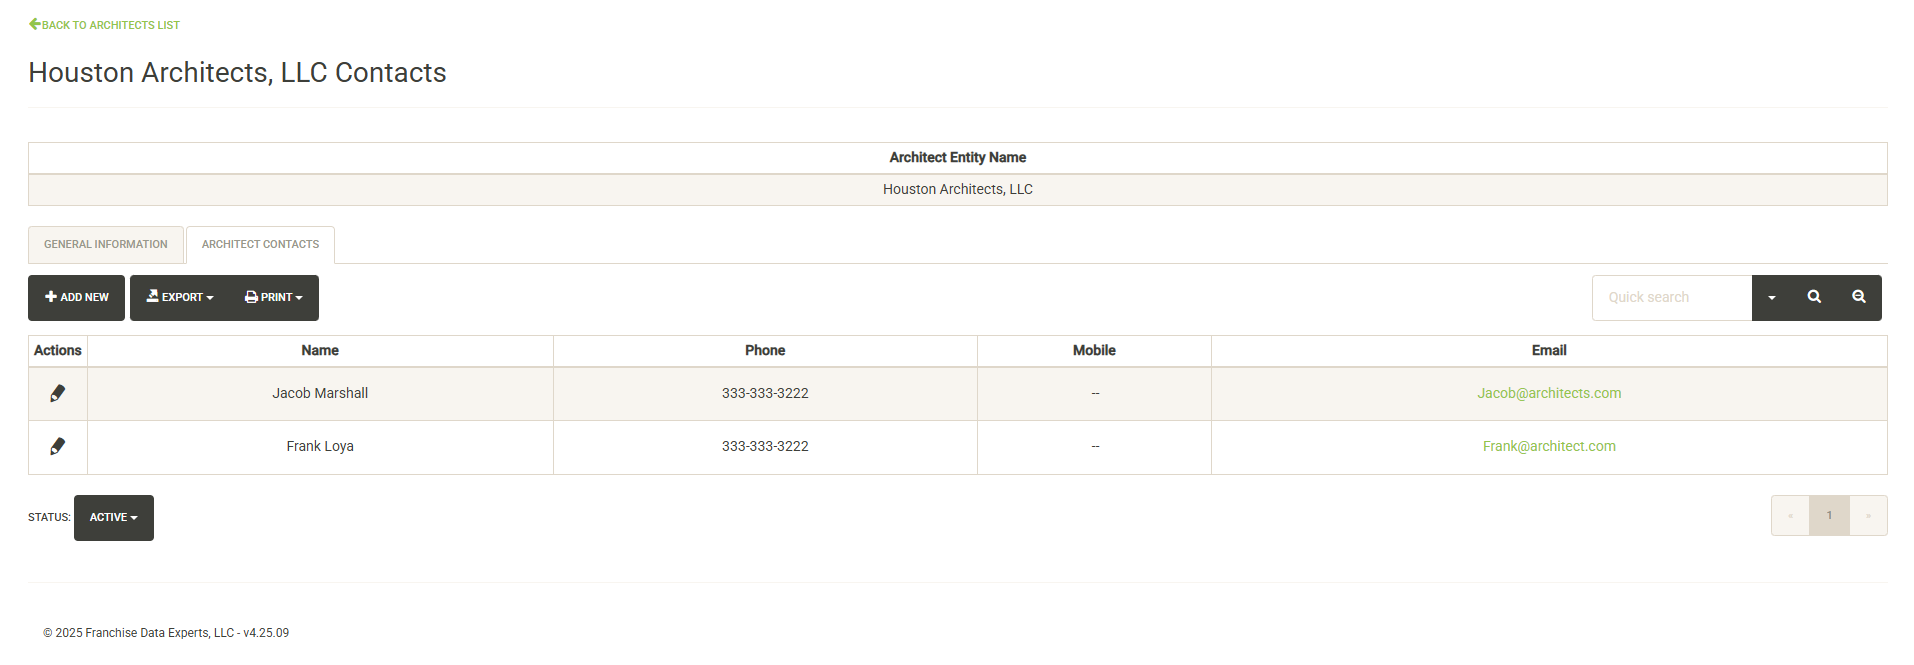
If you clicked on the contact details, you will be taken to the entity’s contact list. Here you can view, edit or add contacts to the entity. You can also print or export the contact list. Clicking on the Status dropdown allows you to switch between active and inactive contacts.
Franchise Families
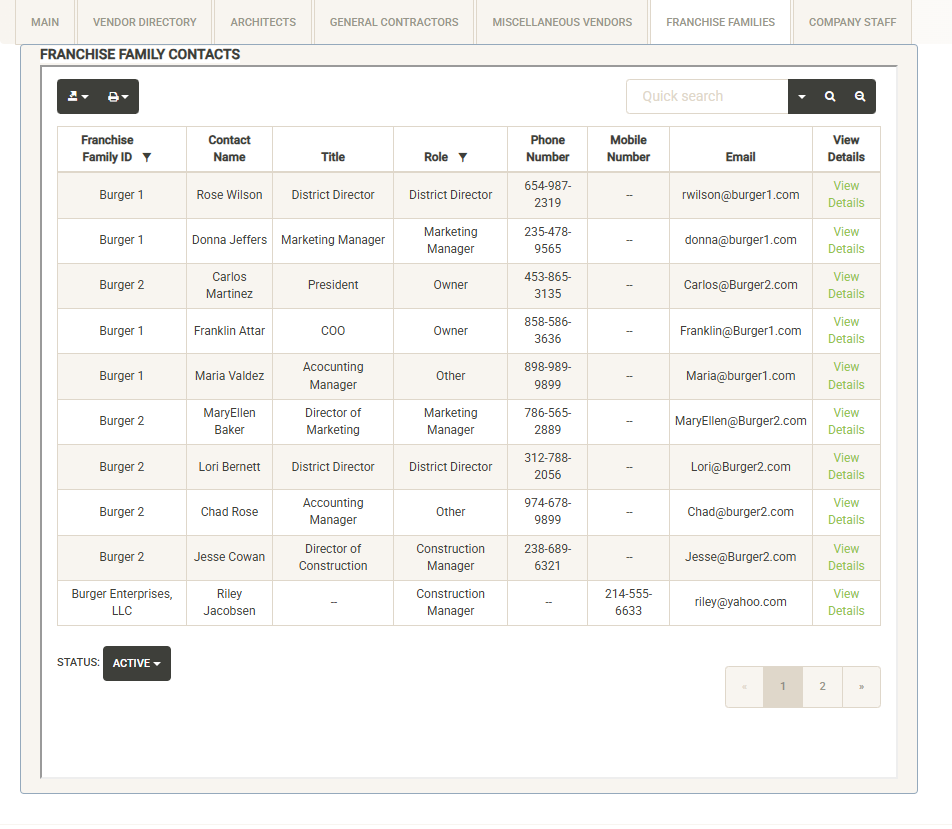
Displays a copy of the Franchise Family Contacts window from the Franchise module. You can search, sort and filter the items in this window. You can print and export the list. Click on the Status dropdown to switch between active and inactive contacts. Clicking on View Details to the right of a contact will take you into the Franchise Family Contact Details page.
Company Staff
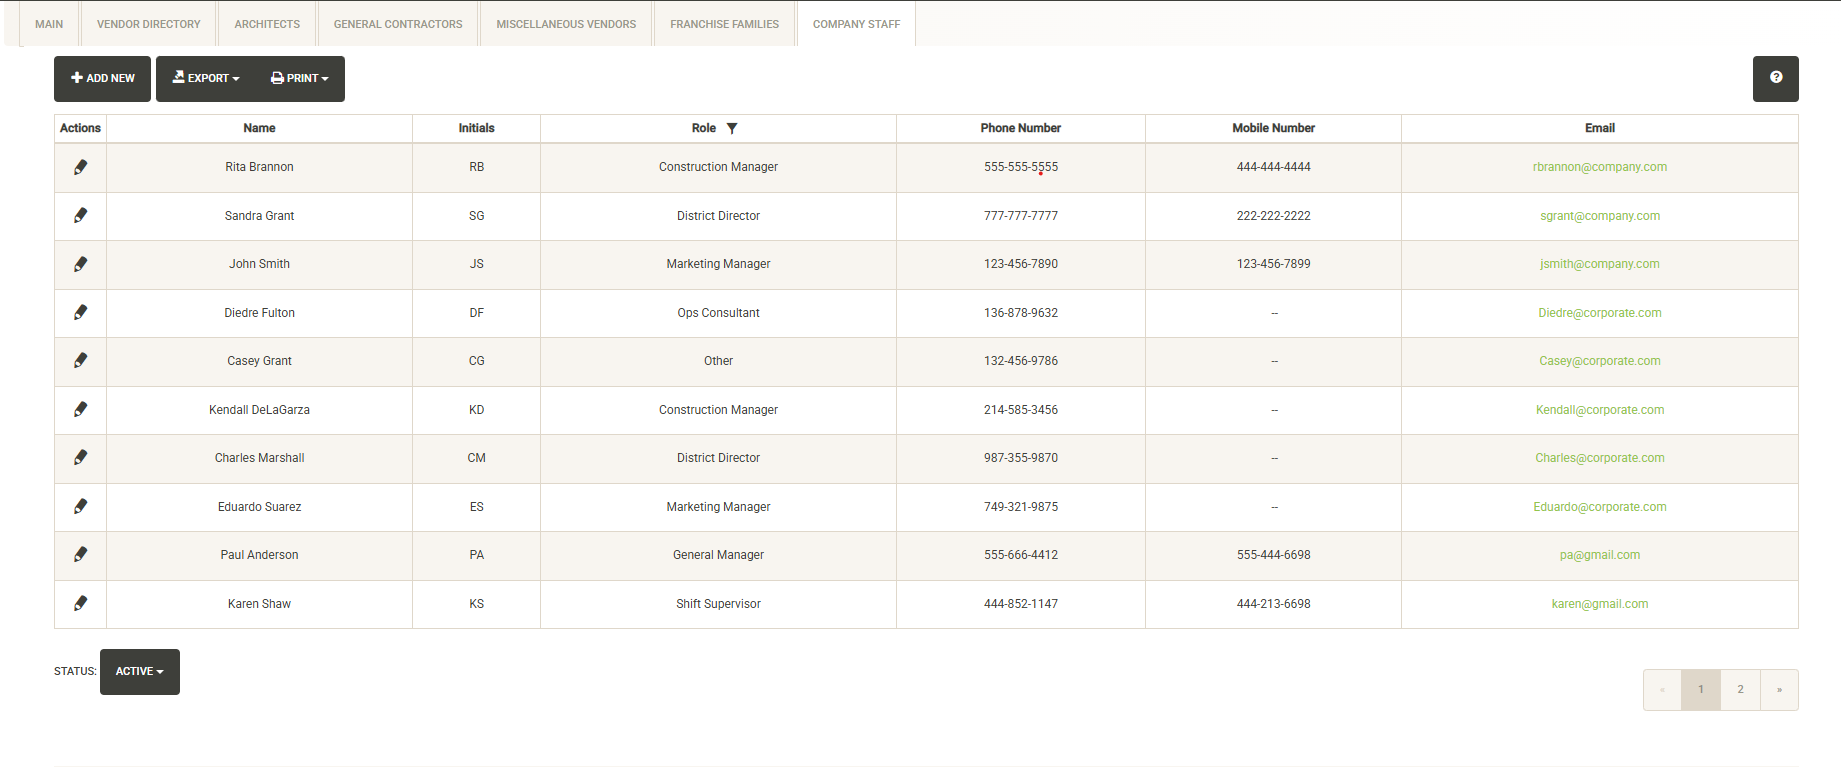
Displays all company staff that has been loaded into UnitTrak. The company staff table is the basis for assigning staff to units and projects. If you need to add a new member, click on the Add New button. Once added, the member can be assigned to your units and projects. The list can be searched, sorted and filtered. You can print or export the list.
If you have the proper permissions, you can click on the edit pencil to the left of any staff member to edit their information or set them inactive. Inactive staff will not be available for assignment to units and projects.